SAR Scenario Gladstone-Terowie Passenger V2
From TrainzOnline
(Difference between revisions)
(Created page with "<!-- V2.0 (seperate V1.0 file) --> <!-- SAR Scenario 4 --> <table width=1000> <!-- BEGIN Title table --> <tr valign="top"> <td width=50 align="left">[[image:ArrowLeftBtn...") |
m |
||
| Line 42: | Line 42: | ||
<tr valign="top"> | <tr valign="top"> | ||
<td colspan=4> | <td colspan=4> | ||
| − | *'''[[ | + | *'''[[SAR_Scenario_Rolling_Stock_V2#SAR_T_Class|SAR T 200]]''' attached to a passenger consist, also:-</td> |
</tr> | </tr> | ||
<tr valign="top"> | <tr valign="top"> | ||
<td> | <td> | ||
| − | *'''[[ | + | *'''[[SAR_Scenario_Rolling_Stock_V2#SAR_T_Class|SAR T 201]]'''</td> |
<td> | <td> | ||
| − | *'''[[ | + | *'''[[SAR_Scenario_Rolling_Stock_V2#SAR_T_Class|SAR T 210]]'''</td> |
<td> | <td> | ||
| − | *'''[[ | + | *'''[[SAR_Scenario_Rolling_Stock_V2#SAR_830_Class|SAR 865]]'''</td> |
<td> | <td> | ||
| − | *'''[[ | + | *'''[[SAR_Scenario_Rolling_Stock_V2#SAR_830_Class|SAR 866]]'''</td> |
</tr> | </tr> | ||
<tr valign="top"> | <tr valign="top"> | ||
| Line 63: | Line 63: | ||
<tr valign="top"> | <tr valign="top"> | ||
<td> | <td> | ||
| − | *'''[[ | + | *'''[[SAR_Scenario_Rolling_Stock_V2#SAR_T_Class|SAR T 23]]'''</td> |
<td> | <td> | ||
| − | *'''[[ | + | *'''[[SAR_Scenario_Rolling_Stock_V2#SAR_T_Class|SAR T 180]]'''</td> |
<td> | <td> | ||
| − | *'''[[ | + | *'''[[SAR_Scenario_Rolling_Stock_V2#SAR_T_Class|SAR T 233]]'''</td> |
<td> | <td> | ||
| − | *'''[[ | + | *'''[[SAR_Scenario_Rolling_Stock_V2#SAR_400_Class|SAR 407]]'''</td> |
<td> | <td> | ||
| − | *'''[[ | + | *'''[[SAR_Scenario_Rolling_Stock_V2#SAR_830_Class|SAR 858]]'''</td> |
</tr> | </tr> | ||
<tr valign="top"> | <tr valign="top"> | ||
<td colspan=5> | <td colspan=5> | ||
| − | *'''[[ | + | *'''[[SAR_Scenario_Rolling_Stock_V2#SAR_830_Class|SAR 867]]'''</td> |
</tr> | </tr> | ||
<tr valign="top"> | <tr valign="top"> | ||
| Line 86: | Line 86: | ||
<tr valign="top"> | <tr valign="top"> | ||
<td colspan=3> | <td colspan=3> | ||
| − | *'''[[ | + | *'''[[SAR_Scenario_Rolling_Stock_V2#SAR_T_Class|SAR T 197]]''' attached to a passenger consist, also:-</td> |
</tr> | </tr> | ||
<tr valign="top"> | <tr valign="top"> | ||
<td> | <td> | ||
| − | *'''[[ | + | *'''[[SAR_Scenario_Rolling_Stock_V2#SAR_T_Class|SAR T 182]]'''</td> |
<td> | <td> | ||
| − | *'''[[ | + | *'''[[SAR_Scenario_Rolling_Stock_V2#SAR_T_Class|SAR T 198]]'''</td> |
<td> | <td> | ||
| − | *'''[[ | + | *'''[[SAR_Scenario_Rolling_Stock_V2#SAR_T_Class|SAR T 231]]'''</td> |
</tr> | </tr> | ||
<tr valign="top"> | <tr valign="top"> | ||
| Line 114: | Line 114: | ||
<tr> | <tr> | ||
<td> | <td> | ||
| − | [[Image:Location Index.png|link=SAR | + | [[Image:Location Index.png|link=SAR Index_V2|alt=Location Index|Location Index]] |
</td> | </td> | ||
<td>'''Each location in the layout has a detailed set of track diagrams that provide a variety of useful information'''<br> | <td>'''Each location in the layout has a detailed set of track diagrams that provide a variety of useful information'''<br> | ||
The <span style="font-weight: 700; color: white; background-color: black;"> Getting Started </span> guide below gives a summary of what is available.<br> | The <span style="font-weight: 700; color: white; background-color: black;"> Getting Started </span> guide below gives a summary of what is available.<br> | ||
| − | To display this information click any [[image:Line_Index_Label.png|link= | + | To display this information click any [[image:Line_Index_Label.png|link=SAR_Index_V2|Location Index]] graphic, or go to the bottom of the page for all the session links (all links will open in this window).</td> |
</tr> | </tr> | ||
</table> <!-- END Location Data table --> | </table> <!-- END Location Data table --> | ||
| Line 136: | Line 136: | ||
#:*the '''driver''' icon (e.g. named '''Driver 200''') - this is a non-animated icon | #:*the '''driver''' icon (e.g. named '''Driver 200''') - this is a non-animated icon | ||
#::then click the drivers '''Eye''' icon [[image:Driver_Eye.png|link=]] to take control of the loco | #::then click the drivers '''Eye''' icon [[image:Driver_Eye.png|link=]] to take control of the loco | ||
| − | # Take a few moments to get your bearings. Click [[image:Line_Index_Gladstone.png|link= | + | # Take a few moments to get your bearings. Click [[image:Line_Index_Gladstone.png|link=SAR_Gladstone_V2|Gladstone Data]] (this link will open in this window) to show the location details and track plans for '''Gladstone'''. In each location details page:- |
#*the [[image:Tab_HM_White.png|link=|75px]] tab gives an overall summary of each location with a "potted" history (where available). | #*the [[image:Tab_HM_White.png|link=|75px]] tab gives an overall summary of each location with a "potted" history (where available). | ||
#*the [[image:Tab_TM_Grey.png|link=|75px]] tab reveals the invisible [[image:Trackmark_Right.png|link=|alt=TM|8px]] '''Track Marks''' for '''Drive To''' commands. | #*the [[image:Tab_TM_Grey.png|link=|75px]] tab reveals the invisible [[image:Trackmark_Right.png|link=|alt=TM|8px]] '''Track Marks''' for '''Drive To''' commands. | ||
| Line 157: | Line 157: | ||
<table bgcolor="lightcyan" width=996> <!-- BEGIN Tutorial link table --> | <table bgcolor="lightcyan" width=996> <!-- BEGIN Tutorial link table --> | ||
<tr valign="center"> | <tr valign="center"> | ||
| − | <td width=70 align="right">[[image:SAR Tutorial.png|link=SAR Scenarios | + | <td width=70 align="right">[[image:SAR Tutorial.png|link=SAR Scenarios Tutorial_V2|alt=Tutorial]]</td> |
<td width=750>'''A tutorial on using these scenarios is provided in the link on the left. The link will open in this window'''</td> | <td width=750>'''A tutorial on using these scenarios is provided in the link on the left. The link will open in this window'''</td> | ||
</tr> | </tr> | ||
| Line 1,155: | Line 1,155: | ||
<td>'''<sup>1</sup>''' Cross '''train 200'''</td> | <td>'''<sup>1</sup>''' Cross '''train 200'''</td> | ||
<td>'''<sup>2</sup>''' Cross '''train 110'''</td> | <td>'''<sup>2</sup>''' Cross '''train 110'''</td> | ||
| − | <td>'''<sup>3</sup>''' Cross '''train [[SAR Scenario East-West | + | <td>'''<sup>3</sup>''' Cross '''train [[SAR Scenario East-West Express_V2|300]]'''</td> |
<td>'''<sup>4</sup>''' Cross '''train 304'''</td> | <td>'''<sup>4</sup>''' Cross '''train 304'''</td> | ||
<td>'''<sup>5</sup>''' Cross '''train 204'''</td> | <td>'''<sup>5</sup>''' Cross '''train 204'''</td> | ||
</tr> | </tr> | ||
<tr valign="top"> | <tr valign="top"> | ||
| − | <td>'''<sup>6</sup>''' Cross '''train [[SAR Scenario Depot Fuel | + | <td>'''<sup>6</sup>''' Cross '''train [[SAR Scenario Depot Fuel Run_V2|223]]'''</td> |
| − | <td>'''<sup>7</sup>''' Cross '''train [[SAR Scenario Gladstone Local | + | <td>'''<sup>7</sup>''' Cross '''train [[SAR Scenario Gladstone Local Livestock_V2|161/162]]'''</td> |
| − | <td>'''<sup>8</sup>''' Cross '''train [[SAR Scenario Livestock | + | <td>'''<sup>8</sup>''' Cross '''train [[SAR Scenario Livestock Shuttle_V2|361]]'''</td> |
| − | <td>'''<sup>9</sup>''' Cross '''train [[SAR Scenario East-West | + | <td>'''<sup>9</sup>''' Cross '''train [[SAR Scenario East-West Express_V2|400]]'''</td> |
| − | <td>'''<sup>10</sup>''' Cross '''train [[SAR Scenario Depot Fuel | + | <td>'''<sup>10</sup>''' Cross '''train [[SAR Scenario Depot Fuel Run_V2|223]]'''</td> |
</tr> | </tr> | ||
<tr valign="top"> | <tr valign="top"> | ||
| − | <td>'''<sup>11</sup>''' Cross '''train [[SAR Scenario Transcontinental Express | + | <td>'''<sup>11</sup>''' Cross '''train [[SAR Scenario Transcontinental Express Freight_V2|320]]'''</td> |
<td colspan=4> </td> | <td colspan=4> </td> | ||
</tr> | </tr> | ||
| Line 1,199: | Line 1,199: | ||
<td> | <td> | ||
A summary of the facilities and product loads at all locations along the lines is provided in the links<br> | A summary of the facilities and product loads at all locations along the lines is provided in the links<br> | ||
| − | :[[Image:SAR_PortPirie-BrokenHill_Line.png|link=SAR Port Pirie-Broken | + | :[[Image:SAR_PortPirie-BrokenHill_Line.png|link=SAR Port Pirie-Broken Hill_V2|alt=Port Pirie-Broken Hill Line|Show Port Pirie-Broken Hill Line]] and [[Image:SAR_Peterborough-Terowie_Line.png|link=SAR Peterborough-Terowie_V2|alt=Peterborough-Terowie Line|Show Peterborough-Terowie Line]] |
*The approaches to all locations are protected by invisible signals to prevent the '''AI Half Speed Slowdown Problem''' when approaching a signal at stop. | *The approaches to all locations are protected by invisible signals to prevent the '''AI Half Speed Slowdown Problem''' when approaching a signal at stop. | ||
| − | *Trackmarks and industries have been provided for AI '''Drive To Trackmark''', '''Drive via Trackmark''' and '''Drive to <span style="background-color: yellow;"> Industry </span>''' commands. Click [[image:Line_Index_Label.png|link= | + | *Trackmarks and industries have been provided for AI '''Drive To Trackmark''', '''Drive via Trackmark''' and '''Drive to <span style="background-color: yellow;"> Industry </span>''' commands. Click [[image:Line_Index_Label.png|link=SAR_Index_V2|Location Index]] for details. |
*Industry active stations (where you can use the '''Drive To''' industry command) are only at '''Gladstone''', '''Jamestown''', '''Peterborough''' and '''Terowie'''. Industry active stations will have a longer than expected wait time. | *Industry active stations (where you can use the '''Drive To''' industry command) are only at '''Gladstone''', '''Jamestown''', '''Peterborough''' and '''Terowie'''. Industry active stations will have a longer than expected wait time. | ||
| − | *Manual (no AI) driving is possible. As a visual driving aid, a '''Caution''' warning sign has been placed at the location of the '''Main Approach Dn''' and '''Main Approach Up''' trackmarks. Click [[image:Line_Index_Label.png|link= | + | *Manual (no AI) driving is possible. As a visual driving aid, a '''Caution''' warning sign has been placed at the location of the '''Main Approach Dn''' and '''Main Approach Up''' trackmarks. Click [[image:Line_Index_Label.png|link=SAR_Index_V2|Location Index]] for details. |
*If driving manually in yards, you are responsible for correctly setting any '''catch points'''. | *If driving manually in yards, you are responsible for correctly setting any '''catch points'''. | ||
</td> | </td> | ||
| Line 1,217: | Line 1,217: | ||
</tr> | </tr> | ||
<tr valign="center"> | <tr valign="center"> | ||
| − | <td width=63 align="left">[[image:ArrowLeftBtn.png|link=SAR Scenario Wilmington | + | <td width=63 align="left">[[image:ArrowLeftBtn.png|link=SAR Scenario Wilmington Freight_V2|30px]]</td> |
| − | <td width=125 align="center">[[image:Session Scenario Index.png|link=SAR Peterborough Base | + | <td width=125 align="center">[[image:Session Scenario Index.png|link=SAR Peterborough Base Session_V2|alt=Scenarios|Scenario Index]]<br>'''[[SAR Peterborough Base Session|Session Scenarios]]'''</td> |
| − | <td width=125 align="center">[[Image:Location Index.png|link=SAR | + | <td width=125 align="center">[[Image:Location Index.png|link=SAR Index_V2|alt=Location Index|Location Index]]<br>'''[[SAR Index|Location List]]'''</td> |
| − | <td width=125 align="center">[[image:SAR Tutorial.png|link=SAR Scenarios | + | <td width=125 align="center">[[image:SAR Tutorial.png|link=SAR Scenarios Tutorial_V2|alt=Tutorial]]<br>'''[[SAR Scenarios Tutorial|Drive Tutorial]]'''</td> |
| − | <td width=125 align="center">[[image:Rolling Stock Index.png|link=SAR Scenario Rolling | + | <td width=125 align="center">[[image:Rolling Stock Index.png|link=SAR Scenario Rolling Stock_V2|alt=Rolling Stock]]<br>'''[[SAR Scenario Rolling Stock|Rolling Stock]]'''</td> |
| − | <td width=125 align="center">[[image:Loco Index.png|link=SAR Peterborough Division Loco | + | <td width=125 align="center">[[image:Loco Index.png|link=SAR Peterborough Division Loco Roster_V2|alt=Loco Roster]]<br>'''[[SAR Peterborough Division Loco Roster|Loco Roster]]'''</td> |
| − | <td width=125 align="center">[[image:Industry Index.png|link=SAR Scenario | + | <td width=125 align="center">[[image:Industry Index.png|link=SAR Scenario Industries_V2|alt=Industries]]<br>'''[[SAR Scenario Industries|Active Industries]]'''</td> |
<td width=125 align="center">[[image:BackToTop.png|link=#top|alt=Top|Top]]</td> | <td width=125 align="center">[[image:BackToTop.png|link=#top|alt=Top|Top]]</td> | ||
| − | <td width=62 align="left">[[image:ArrowRightBtn.png|link=SAR Scenario Gladstone Bulk | + | <td width=62 align="left">[[image:ArrowRightBtn.png|link=SAR Scenario Gladstone Bulk Ore_V2|30px]]</td> |
</tr> | </tr> | ||
</table> <!-- END End Links Table --> | </table> <!-- END End Links Table --> | ||
Revision as of 20:59, 9 May 2024
| 4 Gladstone to Terowie Local Passenger Services | ||
| A scenario in the SAR Peterborough Base Session v2.0 This scenario has been updated in Base Session v2.0. For the original v1.0 scenario, click here |
||
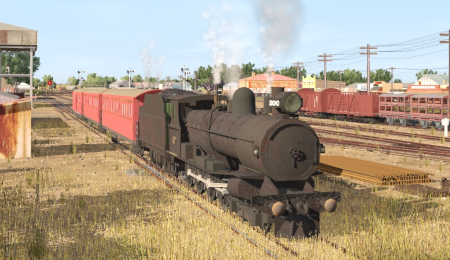
| Passenger services between Gladstone and Terowie. The SAR ran some services specifically to carry school students to and from their schools in different towns. You have a choice of services starting from Gladstone, Peterborough and Terowie. |
 |
|
|||||||||||||||||||||||||||||||||||||||||||
|
|
Each location in the layout has a detailed set of track diagrams that provide a variety of useful information The Getting Started guide below gives a summary of what is available. |
Getting Started:
|
Tutorial:
|
|
||||||||

| Gladstone-Terowie Passenger Timetable | |||||||||||||||||||||||||||||||||||||||||||||||||||||||||||||||||||||||||||||||||||||||||||||||||||||||||||||||||||||||||||||||||||||||||||||||||||||||||||||||||||||||||||||||||||||||||||||||||||||||||||||||||||||||||||||||||||||||||||||||||||||||||||||||||||||||||||||||||||||||||||||||||||||||||||||||||||||||||||||||||||||||||||||||||||||||||||||||||||||||||||||||||||||||||||||||||||||||||||||||||||||||||||||||||||||||||||||||||||||||||||||||||||||||||||||||||||||||||||||||||||||||||||||||||||||||||||||||||||||||||||||||||||||||||||||||||||||||||||||||||||||||||||||||||||||||||||||||||||||||||||||||||||||||||||||||||||||||||||||||||||||||||||||||||||||||||||||||||||||||||||||||||||||||||||||||||||||||||||||||||||||||||||||||||||||||||||||||||||||||||||||||||||||||||||||||||||||||||||||||||||||||||||||||||||||||||||||||||||||||||||||||||||||||||||||||||||||||||||
|
|||||||||||||||||||||||||||||||||||||||||||||||||||||||||||||||||||||||||||||||||||||||||||||||||||||||||||||||||||||||||||||||||||||||||||||||||||||||||||||||||||||||||||||||||||||||||||||||||||||||||||||||||||||||||||||||||||||||||||||||||||||||||||||||||||||||||||||||||||||||||||||||||||||||||||||||||||||||||||||||||||||||||||||||||||||||||||||||||||||||||||||||||||||||||||||||||||||||||||||||||||||||||||||||||||||||||||||||||||||||||||||||||||||||||||||||||||||||||||||||||||||||||||||||||||||||||||||||||||||||||||||||||||||||||||||||||||||||||||||||||||||||||||||||||||||||||||||||||||||||||||||||||||||||||||||||||||||||||||||||||||||||||||||||||||||||||||||||||||||||||||||||||||||||||||||||||||||||||||||||||||||||||||||||||||||||||||||||||||||||||||||||||||||||||||||||||||||||||||||||||||||||||||||||||||||||||||||||||||||||||||||||||||||||||||||||||||||||||||
| bold time = arrive/depart time | plain time = timing point | |||
| Service Symbols: | ||||
| L Load | U Unload | A Attach wagons | D Detach wagons | S Stable loco |
| a on request stop | c coal (if required) | w water (if required) | † to/from Quorn | |
| 1 Cross train 200 | 2 Cross train 110 | 3 Cross train 300 | 4 Cross train 304 | 5 Cross train 204 |
| 6 Cross train 223 | 7 Cross train 161/162 | 8 Cross train 361 | 9 Cross train 400 | 10 Cross train 223 |
| 11 Cross train 320 | ||||
| Location Symbols: | ||||
| Ø = Loco Turntable | C = Loco Coal Loader | E = Engine Depot | F = Fixed Signals | J = Junction |
| Δ = Turning Triangle | U = Unattended | W = Loco Water Tank | X = Crossing Loop | |
Driving Notes:
|
| Links: All links will open in this window | ||||||||
 Session Scenarios |
 Location List |
 Drive Tutorial |
 Rolling Stock |
 Loco Roster |
 Active Industries |
|||
This page was created by Trainz user pware in February 2021 and was last updated as shown below.