How to Use Track Triggers
m (→ Move the Track Trigger ) |
m (→Adding a Track Trigger) |
||
| Line 132: | Line 132: | ||
<tr valign="top" bgcolor=#ffffe0> | <tr valign="top" bgcolor=#ffffe0> | ||
<td>[[image:PencilTips.PNG|link=]]</td> | <td>[[image:PencilTips.PNG|link=]]</td> | ||
| − | <td><span style="font-weight: 700;">The direction that a | + | <td><span style="font-weight: 700;">The direction that a Track Trigger is pointing has '''NO EFFECT''' on its operation</span></td> |
</tr> | </tr> | ||
</table> | </table> | ||
| Line 617: | Line 617: | ||
</tr> | </tr> | ||
</table> <!-- END Nav Buttons Table --> | </table> <!-- END Nav Buttons Table --> | ||
| + | |||
='''Creating a Track Trigger Event'''= | ='''Creating a Track Trigger Event'''= | ||
Revision as of 07:52, 27 December 2022
The information in this Wiki Page applies to TANE, TRS19, Trainz Plus and TRS22.
|
|
|||||||||
What are Track Triggers?
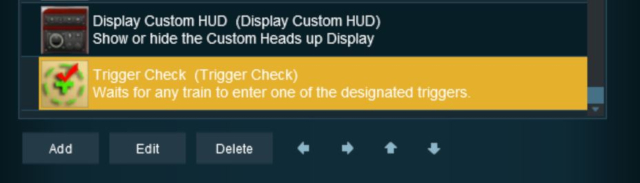
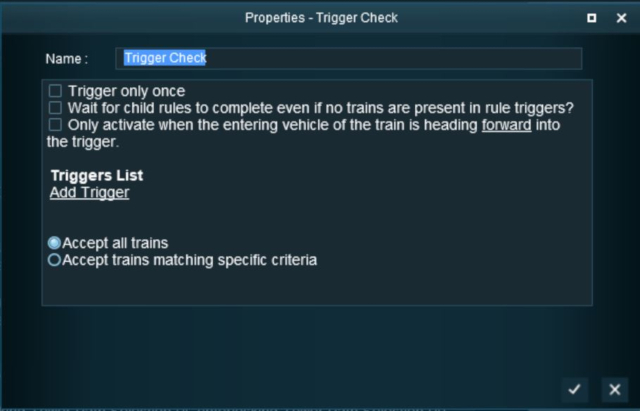
Track triggers can be programmed to respond when a train (any train or a specific train) passes over them in Driver Mode. The response comes from executing a set of Session Rules that have been attached to a ![]() Trigger Check Rule (or a similar rule) or a Driver Command that is monitoring the track trigger.
Trigger Check Rule (or a similar rule) or a Driver Command that is monitoring the track trigger.
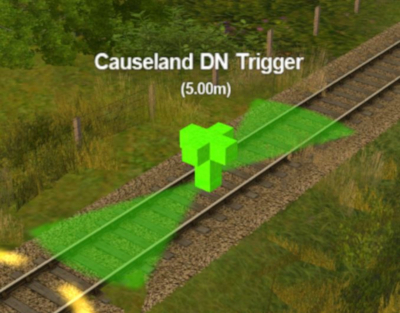 |
Shown at left is a Track Trigger placed on a track in Surveyor Mode
|
Route or Session?
| Track Triggers can be placed in a Route layer or in a Session layer |
|
 |
Information on Route and Session layers can be found at:- |
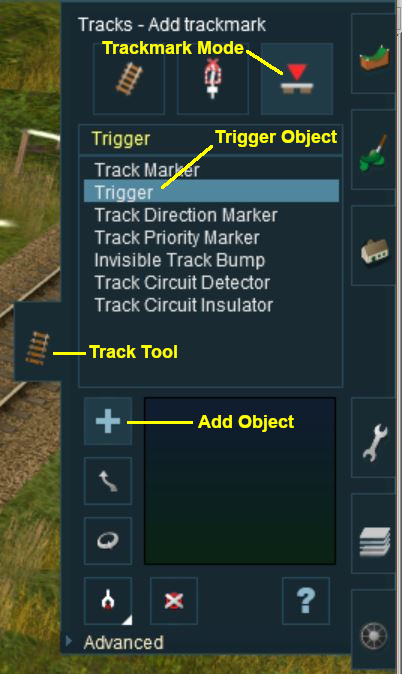
Adding a Track Trigger
|
In Surveyor Classic (S10)
 |
|
||||||
As soon as a new track trigger has been placed, its properties window will open on the screen. It will be given a default name and assigned to the currently active layer.
|
|
||||||||||
 Steps |
|
|||||||||
|
||||||||||
In Surveyor 2.0 (S20)
Adding a Track Trigger
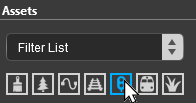
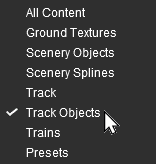
![]() In the Asset Palette either:-
In the Asset Palette either:-
|
OR |
|
|

|
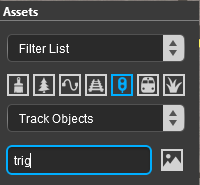
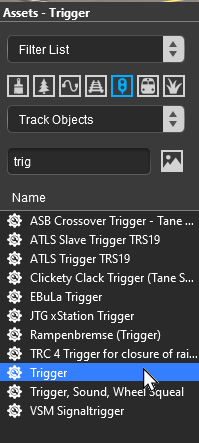
![]() To narrow down the filter list, type "trig" (UPPER/lower case does not matter) in the Search Text Box
To narrow down the filter list, type "trig" (UPPER/lower case does not matter) in the Search Text Box
 |
|
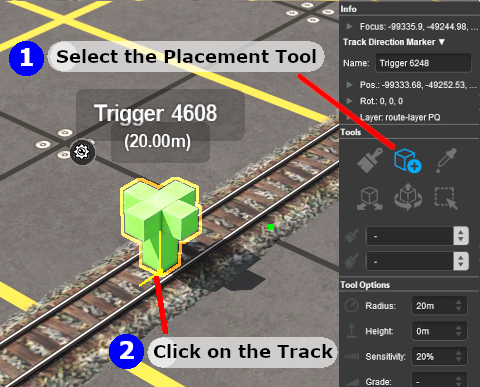
![]() Place the Track Trigger on the track.
Place the Track Trigger on the track.
|
|
||||||||||||||||
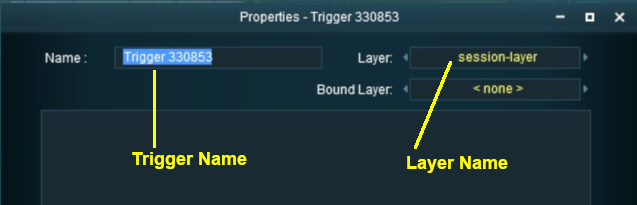
Set the Track Trigger Properties
 |
|
||||||
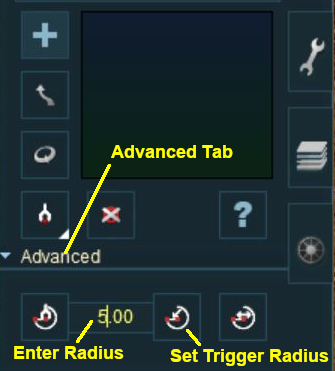
![]() Set its Trigger Radius
Set its Trigger Radius
The Trigger Radius controls how closely an AI train has to approach the trigger to activate it (smaller radius = closer to the trigger).
|
|
|
|
Steps:
|
|
|
|
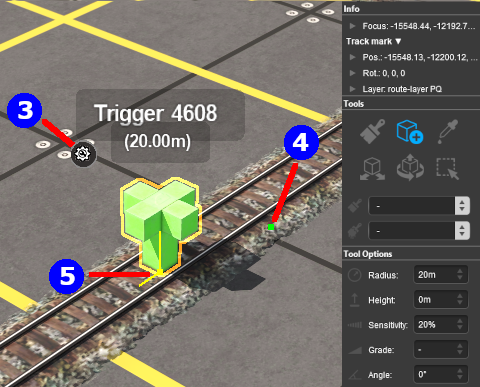
Move the Track Trigger
![]() Move it Along the Track
Move it Along the Track
|
|
|
|
Steps:
|
|
|
|
 | This feature allows a Track Trigger to be physically placed above the track so that it will not be hidden if a consist is parked on the Track Trigger.
|
||||||||||
![]() Reposition it Left/Right
Reposition it Left/Right
This feature allows a Track Trigger to be physically placed left or right alongside the track so that it will not be hidden if a consist is parked on the Track Trigger.
|
|
||||
|
Steps:
|
|||
|
||||
|
|
||||
|
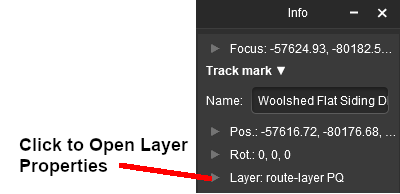
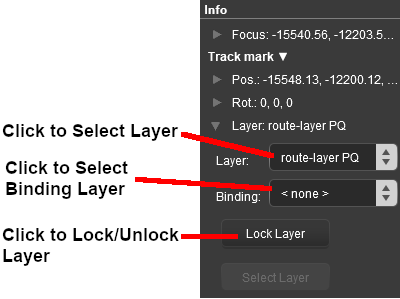
Assign a Track Trigger to a New Layer
| The Info Palette will show the layer assigned to the currently selected object. To the left of the layer name is a small arrow object. | ||||||||||||
|
|
|
|||||||||||
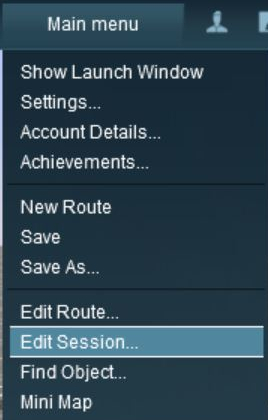
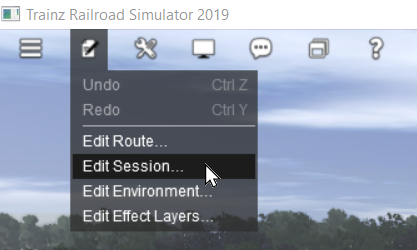
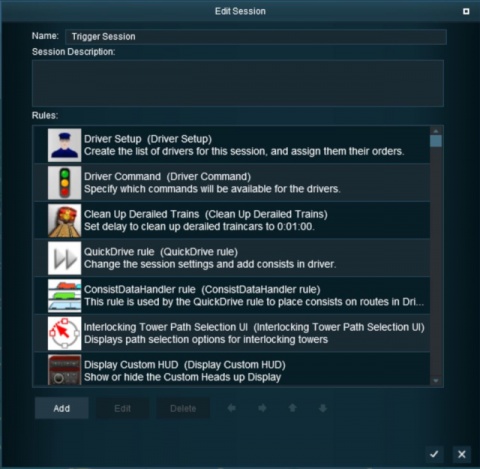
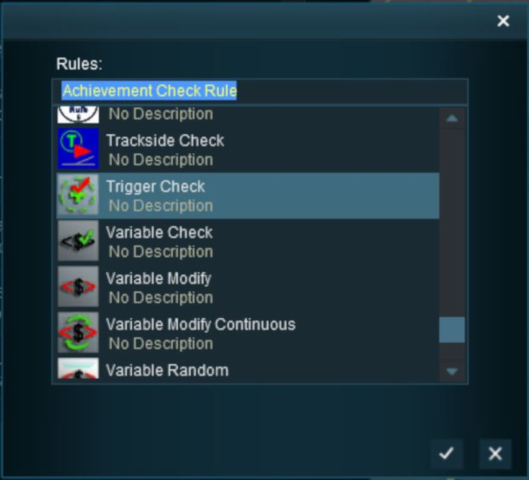
Creating a Track Trigger Event
Track trigger events are handled by the Trigger Check Rule (or a similar rule) which is added to a Session in the ![]() Session Editor.
Session Editor.
|
More information on the Trigger Check Rule can be found on the Trainz Wiki Rules Page at:- |
|
|
||||||||||
Steps |
|
|||||||||
|
||||||||||
|
||||||||||
|
||||||||||
|
||||||||||
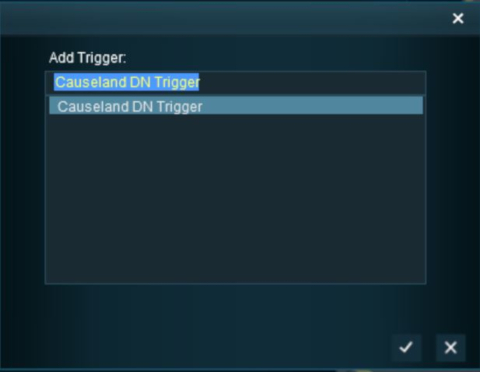
Adding an Instruction to the Trigger Event
To test your trigger event you will need to add at least one rule.
Adding a Child Rule
Steps |
|
|||||
|
||||||
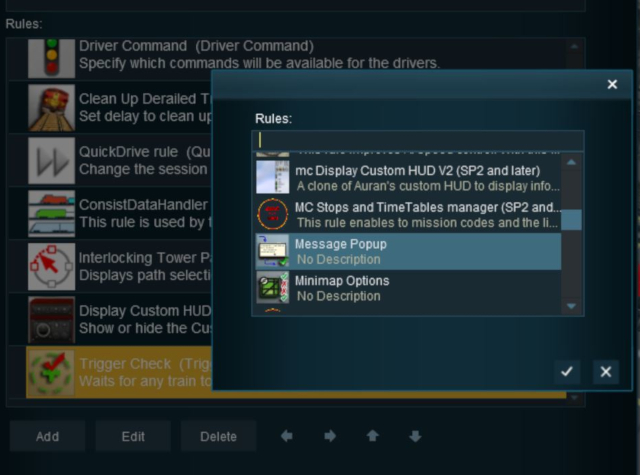
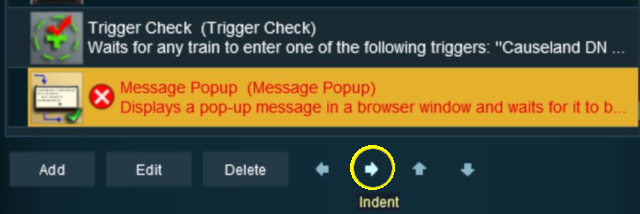
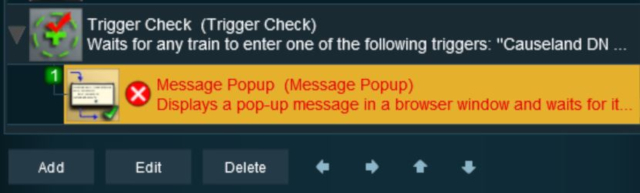
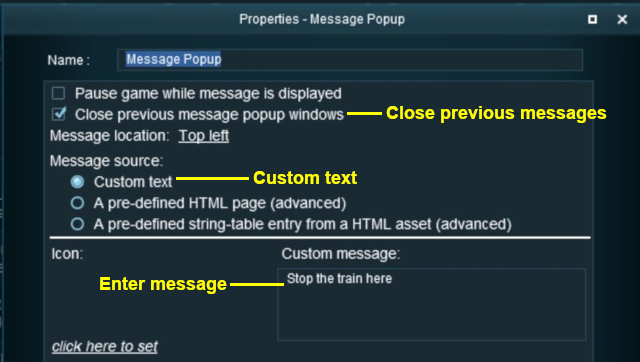
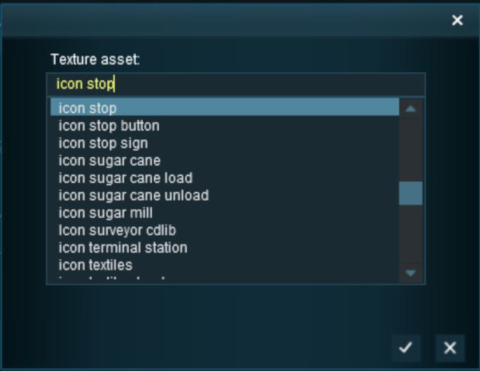
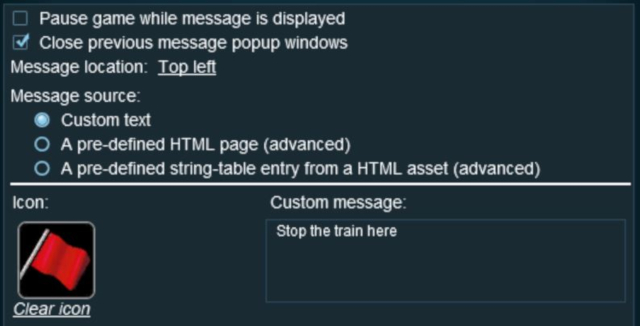
Configuring the Message and Testing
Steps |
|
|||||||
|
||||||||
|
||||||||
Another example of using the Trigger Check Rule can be found in the Trainz Wiki Page |
||||||||
Alternatives to the Trigger Check Rule
 |
There are other rules that can be used in place of the Trigger Check Rule and triggers. A few possibilities are listed below:- |
- Directional Trigger Check Rule - identical to the Trigger Check Rule but adds the ability to test the train direction. Requires the use of a special Directional Trigger. For an example of its use see the Trainz Wiki Page
 Controlling Signals in Sessions.
- Trackside Check Rule - very similar to the Trigger Check Rule but provides some different options.
- Navigation Points (see the How to Guides link below) are more complex but provide more advanced controls and options.
- Multiple Resource Check Rule - monitors and acts on changes in multiple industry or multiple wagon resource (commodity) levels.
- Resource Verify Rule - monitors and acts on changes in a single industry or wagon resource (commodity) level.
- Timecheck Rule - triggers an event at a set time.
 |
There is a driver command that can be used in place of the Trigger Check Rule. |
- Wait For Trigger - forces an AI controlled train to wait until a specified trigger has been activated by another train.
Related Links
|
Trainz Wiki
 |
More Tutorials and Guides to Using Trainz |
This page was created by Trainz user pware in May 2018 and was last updated as shown below.