How to Use S20 Palettes

From TrainzOnline
(Difference between revisions)
Jump to: navigation, search
m
m (Palette Coordinates)
(31 intermediate revisions by one user not shown)
Line 412: Line 412:
 
<tr valign="top">
 
<tr valign="top">
 
<td>[[image:DotPoint.JPG|10px|link=]]</td>
 
<td>[[image:DotPoint.JPG|10px|link=]]</td>
<td>If an '''Undocked''' and resized palette is '''Hidden''' or '''Minimised''' and then made '''Visible''' again then it will be returned to its previous '''Undocked''' position and size</td>
+
<td>If an '''Undocked''' palette is '''Hidden''' or '''Minimised''' and made '''Visible''' again it will be returned to its previous '''Undocked''' position</td>
 
</tr>
 
</tr>
 
<tr valign="top">
 
<tr valign="top">
 
<td>[[image:DotPoint.JPG|10px|link=]]</td>
 
<td>[[image:DotPoint.JPG|10px|link=]]</td>
<td>If an '''Undocked''' and resized palette is '''Closed''' and then reopened again it will be returned to its previous '''Undocked''' position but '''NOT''' to its previous size</td>
+
<td>If an '''Undocked''' palette is '''Closed''' and reopened again it will be returned to its previous '''Undocked''' position</td>
 
</tr>
 
</tr>
 
</table>
 
</table>
Line 424: Line 424:
 
</td>
 
</td>
 
</tr>
 
</tr>
 +
</table>
 +
</td>
 +
</tr>
 +
</table>
 +
<br>
 +
<table bgcolor=#000000 cellpadding=2>
 
<tr valign="top">
 
<tr valign="top">
<td colspan=2>
+
<td>
 
<table bgcolor=#ffffe0 cellpadding=2>
 
<table bgcolor=#ffffe0 cellpadding=2>
 
<tr valign="top">
 
<tr valign="top">
<td>[[image:PencilTips.PNG|link=]]</td>
+
<td width=25>[[image:PencilTips.PNG|link=]]</td>
<td>To hide an '''Undocked''' palette and later return it to the same '''Undocked''' state, <span style="font-weight: 700; font-size: 15px; background-color: lightcyan;">Left Click</span> on its '''Minimise''' <span style="font-weight: 700; font-size: 15px; color: white; background-color: black;">&#160;-&#160;</span> icon on its top menu bar. To restore it to the screen see [[image:PageLink.PNG|link=]]&#160;'''[[#Minimise Maximise Close|Minimise Maximise Close]]''' below.</td>
+
<td>All palettes that are docked to the two sidebars on the screen can be hidden by pressing the <span style="font-weight: 700; font-size: 15px;"><span style="color: white; background-color: black;">&#160;Ctrl&#160;</span>&#160;+&#160;<span style="color: white; background-color: black;">&#160;Space&#160;</span></span>&#160;keys. Another press of the same keys will reveal them again.<br>
</tr>
+
The palettes that are '''Undocked''' and "free floating" will not be hidden and can still be used. This is a good way to clear out some of the screen real estate to provide more working space</td>
</table>
+
</td>
+
 
</tr>
 
</tr>
 
</table>
 
</table>
Line 572: Line 576:
 
<td>Release the mouse button when the palette or window has reached the required size</td>
 
<td>Release the mouse button when the palette or window has reached the required size</td>
 
</tr>
 
</tr>
</table>
 
</td>
 
</tr>
 
</table>
 
<br>
 
<table width=700 bgcolor=#000000 cellpadding=2>
 
 
<tr valign="top">
 
<tr valign="top">
<td>
+
<td colspan=2>
<table width=696 bgcolor=#ffffb0 cellpadding=2>
+
<table bgcolor=#ffffb0 cellpadding=2>
 
<tr valign="top">
 
<tr valign="top">
 
<td width=25>[[image:NotePad.PNG|link=]]</td>
 
<td width=25>[[image:NotePad.PNG|link=]]</td>
<td>If a resized palette is returned to a docking area on either side of the screen or is closed and then reopened, its dimensions will return to its default (original) values</td>
+
<td><span style="font-size: 17px; font-weight: 700;">Notes:'''</span></td>
 +
</tr>
 +
<tr valign="top">
 +
<td>[[image:DotPoint.JPG|10px|link=]]</td>
 +
<td>If a resized palette is '''Hidden''' or '''Minimised''' and made '''Visible''' again it will be returned to its previous size</td>
 +
</tr>
 +
<tr valign="top">
 +
<td>[[image:DotPoint.JPG|10px|link=]]</td>
 +
<td>If a resized palette is '''Closed''' and reopened again it will be returned to its previous size</td>
 
</tr>
 
</tr>
 
</table>
 
</table>
Line 593: Line 599:
 
</table>
 
</table>
 
<br>
 
<br>
<table bgcolor=#000000 width=1000 cellpadding=2>
+
<table width=700 bgcolor=#000000 cellpadding=2>
 
<tr valign="top">
 
<tr valign="top">
 
<td>
 
<td>
<table bgcolor=#ffffe0 width=996 cellpadding=2>
+
<table width=696 bgcolor=#ffffb0 cellpadding=2>
 
<tr valign="top">
 
<tr valign="top">
<td colspan=2>[[image:PencilTips.PNG|link=]] To hide an '''Resized''' palette or window and later return it to the same state, <span style="font-weight: 700; font-size: 15px; background-color: lightcyan;">Left Click</span> on its '''Minimise''' <span style="font-weight: 700; font-size: 15px; color: white; background-color: black;">&#160;-&#160;</span> icon on its top menu bar. To restore it to the screen see the next section [[image:PageLink.PNG|link=]]&#160;'''[[#Minimise Maximise Close|Minimise Maximise Close]]'''.</td>
+
<td width=25>[[image:NotePad.PNG|link=]]</td>
 +
<td>If a resized palette is returned to a docking area on either side of the screen then its dimensions will return to its default (original) values</td>
 +
</tr>
 +
</table>
 +
</td>
 
</tr>
 
</tr>
 
</table>
 
</table>
Line 713: Line 723:
 
<tr valign="top">
 
<tr valign="top">
 
<td width=25>[[image:NotePad.PNG|link=]]</td>
 
<td width=25>[[image:NotePad.PNG|link=]]</td>
<td>'''Minimising''' will "remember" the size and position of a palette or window while '''Closing''' will not</td>
+
<td>'''Minimising''' will "remember" the size and position of a palette or window so that it can later be restored to the same size and position</td>
 
</tr>
 
</tr>
 
</table>
 
</table>
Line 766: Line 776:
 
</table>
 
</table>
 
</td>
 
</td>
 +
</tr>
 +
</table>
 +
</td>
 +
</tr>
 +
</table>
 +
<br>
 +
<table bgcolor=#000000 cellpadding=2>
 +
<tr valign="top">
 +
<td>
 +
<table bgcolor=#ffffe0 cellpadding=2>
 +
<tr valign="top">
 +
<td width=25>[[image:PencilTips.PNG|link=]]</td>
 +
<td>You can '''Hide''' all the palettes in Surveyor that are docked in the two side panels and leave those that are undocked or "free floating" visible. Press the <span style="font-weight: 700; font-size: 15px;"><span style="color: white; background-color: black;">&#160;Ctrl&#160;</span>&#160;+&#160;<span style="color: white; background-color: black;">&#160;Space&#160;</span></span> keys to hide and show the side panels and their palettes. The side panels will also be hidden freeing up screen space to display more of your '''Trainz World'''</td>
 
</tr>
 
</tr>
 
</table>
 
</table>
Line 780: Line 803:
 
='''The Info Palette'''=
 
='''The Info Palette'''=
 
</td>
 
</td>
<td width=50>[[image:SkipDown.png|link=#skip Info Settings Menu|Skip Down]]</td>
+
<td width=50>[[image:SkipDown.png|link=#skip XYZCoordinates|Skip Down]]</td>
 
<td width=50>[[image:SkipUp.png|link=#skipMinMax|Skip Up]]</td>
 
<td width=50>[[image:SkipUp.png|link=#skipMinMax|Skip Up]]</td>
 
<td width=46>[[image:BackToTop.png|link=#top|alt=Top|Top]]</td>
 
<td width=46>[[image:BackToTop.png|link=#top|alt=Top|Top]]</td>
Line 877: Line 900:
 
</table>
 
</table>
 
<br>
 
<br>
 +
<table width=1000> <!-- BEGIN Section Nav Buttons -->
 +
<tr valign="top">
 +
<td width=629><span id="skip XYZCoordinates"></span>
 
=='''Palette Coordinates'''==
 
=='''Palette Coordinates'''==
 +
</td>
 +
<td width=50>[[image:SkipDown.png|link=#skip Info Settings Menu|Skip Down]]</td>
 +
<td width=50>[[image:SkipUp.png|link=#stepInfo|Skip Up]]</td>
 +
<td width=46>&#160;</td> <!-- for Top -->
 +
<td width=75>[[image:HeadingUp.png|link=#stepInfo|alt=Heading|To Heading]]</td>
 +
<td width=75>&#160;</td> <!-- for Next Down -->
 +
<td width=75>&#160;</td> <!-- for Bottom -->
 +
</tr>
 +
</table> <!-- END Section Nav Buttons -->
  
<table bgcolor=#000000 width=1000 cellpadding=2>
+
<table width=1000>
 +
<tr valign="top">
 +
<td width=700>
 +
<table bgcolor=#000000 cellpadding=2>
 
<tr valign="top">
 
<tr valign="top">
 
<td>
 
<td>
<table bgcolor=#ffffb0 width=996 cellpadding=2>
+
<table bgcolor=#ffffff cellpadding=2>
 
<tr valign="top">
 
<tr valign="top">
<td width=25>[[image:NotePad.PNG|link=]]</td>
+
<td colspan=2>
<td><span style="font-size: 17px; font-weight: 700;">Notes:</span><br>
+
----
+
All the positional data and controls in the '''Info Palette''' are defined in the following ways:-<br>
+
 
<table>
 
<table>
 +
<tr valign="middle">
 +
<td width=35>[[image:Information.png|35px|link=]]</td>
 +
<td>All the positional data and controls in the <span style="font-weight: 700; font-size: 15px; color: white; background-color: #797979;">&#160;Info&#160;Palette&#160;</span> are defined in the following ways:-</td>
 +
</tr>
 +
</table>
 +
</td>
 +
</tr>
 
<tr valign="top">
 
<tr valign="top">
<td><span style="font-weight: 700; font-size: 17px; color: white; background-color: black;">&#160;x&#160;</span></td>
+
<td><span style="font-weight: 700; font-size: 17px; color: white; background-color: black;">&#160;x:&#160;</span></td>
 
<td>is '''ALWAYS''' the <span style="font-weight: 700; font-size: 17px; color: white; background-color: black;">&#160;North-South&#160;</span> compass direction regardless of the direction that an object is facing</td>
 
<td>is '''ALWAYS''' the <span style="font-weight: 700; font-size: 17px; color: white; background-color: black;">&#160;North-South&#160;</span> compass direction regardless of the direction that an object is facing</td>
 
</tr>
 
</tr>
 
<tr valign="top">
 
<tr valign="top">
<td><span style="font-weight: 700; font-size: 17px; color: white; background-color: black;">&#160;y&#160;</span></td>
+
<td><span style="font-weight: 700; font-size: 17px; color: white; background-color: black;">&#160;y:&#160;</span></td>
 
<td>is '''ALWAYS''' the <span style="font-weight: 700; font-size: 17px; color: white; background-color: black;">&#160;East-West&#160;</span> compass direction regardless of the direction that an object is facing</td>
 
<td>is '''ALWAYS''' the <span style="font-weight: 700; font-size: 17px; color: white; background-color: black;">&#160;East-West&#160;</span> compass direction regardless of the direction that an object is facing</td>
 
</tr>
 
</tr>
 
<tr valign="top">
 
<tr valign="top">
<td><span style="font-weight: 700; font-size: 17px; color: white; background-color: black;">&#160;z&#160;</span></td>
+
<td><span style="font-weight: 700; font-size: 17px; color: white; background-color: black;">&#160;z:&#160;</span></td>
 
<td>is '''ALWAYS''' the <span style="font-weight: 700; font-size: 17px; color: white; background-color: black;">&#160;Vertical&#160;</span> direction (perpendicular to the compass directions) regardless of how an object has been rolled or tilted</td>
 
<td>is '''ALWAYS''' the <span style="font-weight: 700; font-size: 17px; color: white; background-color: black;">&#160;Vertical&#160;</span> direction (perpendicular to the compass directions) regardless of how an object has been rolled or tilted</td>
 
</tr>
 
</tr>
 
<tr valign="top">
 
<tr valign="top">
 
<td colspan=2>
 
<td colspan=2>
 +
<table bgcolor=#ffffb0 cellpadding=2>
 +
<tr valign="top">
 +
<td width=25>[[image:NotePad.PNG|link=]]</td>
 +
<td><span style="font-size: 17px;">'''Notes:'''</span><br>
 
----
 
----
 
</td>
 
</td>
 
</tr>
 
</tr>
 
<tr valign="top">
 
<tr valign="top">
<td>[[image:DotPoint.JPG|10px|link=]]</td>
+
<td width=10>[[image:DotPoint.JPG|10px|link=]]</td>
 
<td>distances are measured in '''metres''' from the '''North-West''' corner of the first baseboard. If that baseboard is later deleted then distances will '''still''' be measured from its original and now "virtual" North-West corner.</td>
 
<td>distances are measured in '''metres''' from the '''North-West''' corner of the first baseboard. If that baseboard is later deleted then distances will '''still''' be measured from its original and now "virtual" North-West corner.</td>
 
</tr>
 
</tr>
 
<tr valign="top">
 
<tr valign="top">
 
<td>[[image:DotPoint.JPG|10px|link=]]</td>
 
<td>[[image:DotPoint.JPG|10px|link=]]</td>
<td><span style="font-weight: 700; font-size: 15px;">&#160;+&#160;</span> positive distances are in the <span style="font-weight: 700; font-size: 15px; color: white; background-color: black;">&#160;South&#160;</span> and <span style="font-weight: 700; font-size: 15px; color: white; background-color: black;">&#160;East&#160;</span> directions</td>
+
<td><span style="font-weight: 700; font-size: 17px;">&#160;+&#160;</span> positive distances are in the <span style="font-weight: 700; font-size: 15px; color: white; background-color: black;">&#160;South&#160;</span>, <span style="font-weight: 700; font-size: 15px; color: white; background-color: black;">&#160;East&#160;</span> and <span style="font-weight: 700; font-size: 15px; color: white; background-color: black;">&#160;Up&#160;</span> directions</td>
 
</tr>
 
</tr>
 
<tr valign="top">
 
<tr valign="top">
 
<td>[[image:DotPoint.JPG|10px|link=]]</td>
 
<td>[[image:DotPoint.JPG|10px|link=]]</td>
<td><span style="font-weight: 700; font-size: 15px;">&#160;-&#160;</span> negative distances are in the <span style="font-weight: 700; font-size: 15px; color: white; background-color: black;">&#160;North&#160;</span> and <span style="font-weight: 700; font-size: 15px; color: white; background-color: black;">&#160;West&#160;</span> directions</td>
+
<td><span style="font-weight: 700; font-size: 17px;">&#160;-&#160;</span> negative distances are in the <span style="font-weight: 700; font-size: 15px; color: white; background-color: black;">&#160;North&#160;</span>, <span style="font-weight: 700; font-size: 15px; color: white; background-color: black;">&#160;West&#160;</span> and <span style="font-weight: 700; font-size: 15px; color: white; background-color: black;">&#160;Down&#160;</span> directions</td>
 
</tr>
 
</tr>
 
<tr valign="top">
 
<tr valign="top">
Line 927: Line 973:
 
</table>
 
</table>
 
</td>
 
</td>
 +
</tr>
 +
</table>
 +
</td>
 +
<td width=300>[[image:PositionXYZ_S20.png|300px|link=]]</td>
 
</tr>
 
</tr>
 
</table>
 
</table>
Line 933: Line 983:
 
<tr valign="top">
 
<tr valign="top">
 
<td width=629><span id="skip Info Settings Menu"></span>
 
<td width=629><span id="skip Info Settings Menu"></span>
 +
 
=='''Info Settings Menu'''==
 
=='''Info Settings Menu'''==
 
</td>
 
</td>
 
<td width=50>[[image:SkipDown.png|link=#skip Focus Info and Controls|Skip Down]]</td>
 
<td width=50>[[image:SkipDown.png|link=#skip Focus Info and Controls|Skip Down]]</td>
<td width=50>[[image:SkipUp.png|link=#stepInfo|Skip Up]]</td>
+
<td width=50>[[image:SkipUp.png|link=#skip XYZCoordinates|Skip Up]]</td>
 
<td width=46>&#160;</td> <!-- for Top -->
 
<td width=46>&#160;</td> <!-- for Top -->
 
<td width=75>[[image:HeadingUp.png|link=#stepInfo|alt=Heading|To Heading]]</td>
 
<td width=75>[[image:HeadingUp.png|link=#stepInfo|alt=Heading|To Heading]]</td>
Line 1,169: Line 1,220:
 
<tr valign="top">
 
<tr valign="top">
 
<td><span style="font-weight: 700; font-size: 15px; color: white; background-color: black;">&#160;Copy&#160;</span></td>
 
<td><span style="font-weight: 700; font-size: 15px; color: white; background-color: black;">&#160;Copy&#160;</span></td>
<td><span style="font-weight: 700; font-size: 15px; color: white; background-color: red;">&#160;NOT WORKING&#160;</span><span style="font-weight: 700; font-size: 15px; background-color: #fcbcbc;"> (a known bug) </span></td>
+
<td>copies the asset '''name''' and '''&lt;kuid&gt;''' into your operating systems clipboard. If more than two assets have been selected then only the first two will be copied</td>
 
</tr>
 
</tr>
 
</table>
 
</table>
Line 1,209: Line 1,260:
 
<tr valign="top">
 
<tr valign="top">
 
<td width=180><span style="font-weight: 700; font-size: 15px; color: white; background-color: black;">&#160;Remove&#160;from&#160;Picklist&#160;</span></td>
 
<td width=180><span style="font-weight: 700; font-size: 15px; color: white; background-color: black;">&#160;Remove&#160;from&#160;Picklist&#160;</span></td>
<td>removes selected objects from a '''Picklist''' (objects must already be in a '''Picklist''')</td>
+
<td><span style="font-weight: 700; font-size: 15px; color: white; background-color: red;">&#160;NOT WORKING&#160;</span><span style="font-weight: 700; font-size: 15px; background-color: #fcbcbc;"> (a known bug)</span><br>
 +
use this same option found in the '''Filter Palette''' or '''Content Manager''' instead</td>
 
</tr>
 
</tr>
 
</table>
 
</table>
Line 1,308: Line 1,360:
 
In the image shown on the left there are 4 objects all named '''Old Orroroo Rd'''.<br>
 
In the image shown on the left there are 4 objects all named '''Old Orroroo Rd'''.<br>
 
<br>
 
<br>
This will not cause any problems for scenery objects apart from finding the ''exact'' one you want with the '''Finder Tool''' (<span style="font-weight: 700; font-size: 15px;"><span style="color: white; background-color: black;">&#160;Ctrl&#160;</span>&#160;+&#160;<span style="color: white; background-color: black;">&#160;F&#160;</span></span> keys).<br>
+
This will not cause any problems for scenery objects apart from finding the ''exact'' one you want with the '''Finder Tool''' (<span style="font-weight: 700; font-size: 15px;"><span style="color: white; background-color: black;">&#160;Ctrl&#160;</span>&#160;+&#160;<span style="color: white; background-color: black;">&#160;F&#160;</span></span> keys) as shown in the image on the left - Which of the 4 "Old Orroroo Rd" objects is the one that I need?<br>
 
<br>
 
<br>
<table bgcolor=#000000 cellpadding=2>
+
<table bgcolor=#ff0000 cellpadding=2>
 
<tr valign="top">
 
<tr valign="top">
 
<td>
 
<td>
<table bgcolor=#ffffb0 cellpadding=2>
+
<table bgcolor=#fcbcbc cellpadding=2>
 
<tr valign="top">
 
<tr valign="top">
<td width=25>[[image:NotePad.PNG|link=]]</td>
+
<td>[[image:Stop.PNG|link=]]</td>
<td><span style="font-size: 17px; font-weight: 700;">Notes:'''</span><br>
+
<td><span style="font-size: 15px; font-weight: 700;">WARNING:</span><br>
----
+
'''Duplicate names''' will cause problems for '''Industries''' (including passenger enabled stations), '''Locomotives''', '''Track Marks''', '''Triggers''', '''Switches''', '''Signals''', etc that have to be identified to control the operation of a session.</td>
However, '''duplicated names''' will cause problems for '''Industries''' (including passenger enabled stations), '''Locomotives''', '''Track Marks''', '''Triggers''', '''Switches''', '''Signals''', etc that have to be identified to control the operation of a session.</td>
+
 
</tr>
 
</tr>
 
<tr valign="top">
 
<tr valign="top">
Line 1,395: Line 1,446:
 
</table> <!-- END Section Nav Buttons -->
 
</table> <!-- END Section Nav Buttons -->
  
You must have an object (or objects) selected for the rotation data to be shown and edited. Open up the rotation data by a <span style="font-weight: 700; font-size: 15px; background-color: lightcyan;">Left Click</span> on its '''Rot:''' arrowhead icon.<br>
+
You must have an object (or objects) selected for the rotation data to be shown and edited. Open up the rotation data by a <span style="font-weight: 700; font-size: 15px; background-color: lightcyan;">&#160;Left Click&#160;</span> on its '''Rot:''' arrowhead icon.<br>
  
 
<table width=1000>
 
<table width=1000>
 
<tr valign="top">
 
<tr valign="top">
 
<td width=310>[[image:InfoPaletteRot_S20.png|link=]]</td>
 
<td width=310>[[image:InfoPaletteRot_S20.png|link=]]</td>
<td width=790>The rotational orientation of the selected object (or the last object if more than one is selected) is shown in the '''r''', '''p''' and '''y''' text boxes (the letters stand for '''R'''oll, '''P'''itch and '''Y'''aw). These values can be edited to rotate the object or objects in 3D space '''BUT''' not all objects can be rotated in certain directions.
+
<td width=690>The rotational orientation of the selected object (or the last object if more than one is selected) is shown in the '''r:''', '''p:''' and '''y:''' text boxes (the letters stand for '''R'''oll, '''P'''itch and '''Y'''aw). These values can be edited to rotate the object or objects in 3D space '''BUT''' not all objects can be rotated in certain directions.
 
<table bgcolor=#000000 cellpadding=2>
 
<table bgcolor=#000000 cellpadding=2>
 
<tr valign="top">
 
<tr valign="top">
Line 1,422: Line 1,473:
 
<tr valign="top">
 
<tr valign="top">
 
<td width=10>[[image:DotPoint.JPG|10px|link=]]</td>
 
<td width=10>[[image:DotPoint.JPG|10px|link=]]</td>
<td>Not all objects will allow rotations. For example, '''SpeedTree''' objects can only be rotated using the <span style="font-weight: 700; font-size: 15px; color: white; background-color: black;">&#160;y&#160;</span> value (<span style="font-weight: 700; font-size: 15px; color: white; background-color: black;">&#160;r&#160;</span> and <span style="font-weight: 700; font-size: 15px; color: white; background-color: black;">&#160;p&#160;</span> entries will be ignored) while '''Spline''' objects cannot be rotated at all</td>
+
<td>Not all objects will allow rotations. For example, '''SpeedTree''' objects can only be rotated using the <span style="font-weight: 700; font-size: 15px; color: white; background-color: black;">&#160;y:&#160;</span> value (<span style="font-weight: 700; font-size: 15px; color: white; background-color: black;">&#160;r&#160;</span> and <span style="font-weight: 700; font-size: 15px; color: white; background-color: black;">&#160;p&#160;</span> entries will be ignored) while '''Spline''' objects cannot be rotated at all</td>
 
</tr>
 
</tr>
 
</table>
 
</table>
Line 1,432: Line 1,483:
 
</table>
 
</table>
 
<br>
 
<br>
<table bgcolor=#000000 width=790 cellpadding=2>
+
<table bgcolor=#000000 width=690 cellpadding=2>
 
<tr valign="top">
 
<tr valign="top">
 
<td>
 
<td>
<table bgcolor=#ffffe0 width=786 cellpadding=2>
+
<table bgcolor=#ffffe0 width=686 cellpadding=2>
 
<tr valign="top">
 
<tr valign="top">
 
<td width=25>[[image:PencilTips.PNG|link=]]</td><td>On the right of each box is a pair of '''Up/Down'''  arrow controls. <span style="font-weight: 700; font-size: 15px; background-color: lightcyan;">Left Click and Drag</span> up or down on these to adjust the rotation angle in increments of 1&#176;.</td>
 
<td width=25>[[image:PencilTips.PNG|link=]]</td><td>On the right of each box is a pair of '''Up/Down'''  arrow controls. <span style="font-weight: 700; font-size: 15px; background-color: lightcyan;">Left Click and Drag</span> up or down on these to adjust the rotation angle in increments of 1&#176;.</td>
Line 1,458: Line 1,509:
 
<table width=970>
 
<table width=970>
 
<tr valign="top">
 
<tr valign="top">
<td width=20><span style="font-weight: 700; font-size: 17px; color: white; background-color: black;">&#160;r&#160;</span></td>
+
<td width=820>
 +
<table>
 +
<tr valign="top">
 +
<td width=20><span style="font-weight: 700; font-size: 17px; color: white; background-color: black;">&#160;r:&#160;</span></td>
 
<td>'''ALWAYS''' rotates in the '''vertical plane''' around the <span style="font-weight: 700; text-decoration: underline;">selected objects</span> '''Y''' axis (which was defined when it was created).<br>
 
<td>'''ALWAYS''' rotates in the '''vertical plane''' around the <span style="font-weight: 700; text-decoration: underline;">selected objects</span> '''Y''' axis (which was defined when it was created).<br>
 
This is the same as the <span style="font-weight: 700; font-size: 15px; color: white; background-color: red;">&#160;Red&#160;</span> '''Rotational Anchor''' in the '''Fine Adjustment Tool'''</td>
 
This is the same as the <span style="font-weight: 700; font-size: 15px; color: white; background-color: red;">&#160;Red&#160;</span> '''Rotational Anchor''' in the '''Fine Adjustment Tool'''</td>
 
</tr>
 
</tr>
 
<tr valign="top">
 
<tr valign="top">
<td><span style="font-weight: 700; font-size: 17px; color: white; background-color: black;">&#160;p&#160;</span></td>
+
<td><span style="font-weight: 700; font-size: 17px; color: white; background-color: black;">&#160;p:&#160;</span></td>
 
<td>'''ALWAYS''' rotates in the '''vertical plane''' around the <span style="font-weight: 700; text-decoration: underline;">selected objects</span> '''Y''' axis '''PLUS''' '''90&#176;'''.<br>
 
<td>'''ALWAYS''' rotates in the '''vertical plane''' around the <span style="font-weight: 700; text-decoration: underline;">selected objects</span> '''Y''' axis '''PLUS''' '''90&#176;'''.<br>
 
This is the same as the <span style="font-weight: 700; font-size: 15px; color: white; background-color: green;">&#160;Green&#160;</span> '''Rotational Anchor''' in the '''Fine Adjustment Tool'''</td>
 
This is the same as the <span style="font-weight: 700; font-size: 15px; color: white; background-color: green;">&#160;Green&#160;</span> '''Rotational Anchor''' in the '''Fine Adjustment Tool'''</td>
 
</tr>
 
</tr>
 
<tr valign="top">
 
<tr valign="top">
<td><span style="font-weight: 700; font-size: 17px; color: white; background-color: black;">&#160;y&#160;</span></td>
+
<td><span style="font-weight: 700; font-size: 17px; color: white; background-color: black;">&#160;y:&#160;</span></td>
 
<td>'''ALWAYS''' rotates in the '''horizontal plane''' around the <span style="font-weight: 700; text-decoration: underline;">compass</span> '''Z''' or <span style="font-weight: 700; font-size: 15px;">Vertical</span> axis regardless of how the object has been rolled or pitched.<br>
 
<td>'''ALWAYS''' rotates in the '''horizontal plane''' around the <span style="font-weight: 700; text-decoration: underline;">compass</span> '''Z''' or <span style="font-weight: 700; font-size: 15px;">Vertical</span> axis regardless of how the object has been rolled or pitched.<br>
This is similar to but <span style="font-weight: 700; text-decoration: underline;">NOT exactly the same</span> as the <span style="font-weight: 700; font-size: 15px; color: white; background-color: blue;">&#160;Blue&#160;</span>  '''Rotational Anchor''' in the '''Fine Adjustment Tool'''
+
This is similar to but <span style="font-weight: 700; text-decoration: underline;">NOT exactly the same</span> as the <span style="font-weight: 700; font-size: 15px; color: white; background-color: blue;">&#160;Blue&#160;</span>  '''Rotational Anchor''' in the '''Fine Adjustment Tool'''. The difference will become obvious if the object has had a '''roll''' or '''pitch''' rotation applied before the '''yaw''' rotation</td>
 +
</tr>
 +
</table>
 +
</td>
 +
<td width=150>[[image:FineAdjust3DFrameSmall_S20.png|link=]]</td>
 +
</tr>
 +
<tr valign="top">
 +
<td>
 
<table>
 
<table>
 
<tr>
 
<tr>
<td width=170 align="right"><span style="font-weight: 700; font-size: 15px;"><span style="color: white; background-color: black;">&#160;Rot:&#160;</span> <span style="color: white; background-color: black;">&#160;y&#160;</span> = </span></td>
+
<td width=170 align="right"><span style="font-weight: 700; font-size: 15px;"><span style="color: white; background-color: black;">&#160;Rot:&#160;</span> <span style="color: white; background-color: black;">&#160;y:&#160;</span> = </span></td>
 
<td width=200><span style="font-weight: 700; font-size: 15px;">0&#176;</span> '''East'''</td>
 
<td width=200><span style="font-weight: 700; font-size: 15px;">0&#176;</span> '''East'''</td>
 
<td width=200><span style="font-weight: 700; font-size: 15px;">90&#176;</span> '''North'''</td>
 
<td width=200><span style="font-weight: 700; font-size: 15px;">90&#176;</span> '''North'''</td>
Line 1,490: Line 1,551:
 
<tr valign="top">
 
<tr valign="top">
 
<td align="center"><span style="font-weight: 700; font-size: 15px;">Original</span><br>[[image:RotationAxis_S20.png|link=]]</td>
 
<td align="center"><span style="font-weight: 700; font-size: 15px;">Original</span><br>[[image:RotationAxis_S20.png|link=]]</td>
<td align="center"><span style="font-weight: 700; font-size: 15px;">Roll: <span style="color: white; background-color: black;">&#160;r = 45&#160;</span></span><br>[[image:RotationAxisRoll_S20.png|link=]]</td>
+
<td align="center"><span style="font-weight: 700; font-size: 15px;">Roll: <span style="color: white; background-color: black;">&#160;r: = 45&#160;</span></span><br>[[image:RotationAxisRoll_S20.png|link=]]</td>
<td align="center"><span style="font-weight: 700; font-size: 15px;">Pitch: <span style="color: white; background-color: black;">&#160;p = 45&#160;</span></span><br>[[image:RotationAxisPitch_S20.png|link=]]</td>
+
<td align="center"><span style="font-weight: 700; font-size: 15px;">Pitch: <span style="color: white; background-color: black;">&#160;p: = 45&#160;</span></span><br>[[image:RotationAxisPitch_S20.png|link=]]</td>
<td align="center"><span style="font-weight: 700; font-size: 15px;">Yaw: <span style="color: white; background-color: black;">&#160;y = 45&#160;</span></span><br>[[image:RotationAxisYaw_S20.png|link=]]</td>
+
<td align="center"><span style="font-weight: 700; font-size: 15px;">Yaw: <span style="color: white; background-color: black;">&#160;y: = 45&#160;</span></span><br>[[image:RotationAxisYaw_S20.png|link=]]</td>
 
</tr>
 
</tr>
 
<tr valign="top">
 
<tr valign="top">
Line 1,545: Line 1,606:
 
<tr valign="top">
 
<tr valign="top">
 
<td width=629><span id="skip Layer Info and Controls"></span>
 
<td width=629><span id="skip Layer Info and Controls"></span>
 
 
=='''Layer Info and Controls'''==
 
=='''Layer Info and Controls'''==
 
</td>
 
</td>
Line 1,557: Line 1,617:
 
</table> <!-- END Section Nav Buttons -->
 
</table> <!-- END Section Nav Buttons -->
  
You must have an object (or objects) selected for the layer data to be shown and edited. Open up the layer data by a <span style="font-weight: 700; font-size: 15px; background-color: lightcyan;">Left Click</span> on its '''Layer:''' arrowhead icon.<br>
+
<table width=1000>
 
+
<tr valign="top">
 +
<td>You must have an object (or objects) selected for the layer data to be shown and edited. Open up the layer data by a <span style="font-weight: 700; font-size: 15px; background-color: lightcyan;">Left Click</span> on its '''Layer:''' arrowhead icon.</td>
 +
</tr>
 +
</table>
 +
<br>
 
<table bgcolor=#000000 cellpadding=2>
 
<table bgcolor=#000000 cellpadding=2>
 
<tr valign="top">
 
<tr valign="top">
Line 1,587: Line 1,651:
 
<br>
 
<br>
 
<table width=1000>
 
<table width=1000>
 +
<tr valign="top">
 +
<td colspan=2><span style="font-weight: 700; font-size: 15px;">For a single selected object</span></td>
 +
</tr>
 
<tr valign="top">
 
<tr valign="top">
 
<td width=215>[[image:InfoPaletteLayer_S20.png|link=]]</td>
 
<td width=215>[[image:InfoPaletteLayer_S20.png|link=]]</td>
Line 1,653: Line 1,720:
 
<br>
 
<br>
 
<table width=1000>
 
<table width=1000>
 +
<tr valign="top">
 +
<td colspan=2><span style="font-weight: 700; font-size: 15px;">For multiple selected objects</span></td>
 +
</tr>
 
<tr valign="top">
 
<tr valign="top">
 
<td width=235>[[image:InfoPaletteLayersMulti_S20.png|link=]]</td>
 
<td width=235>[[image:InfoPaletteLayersMulti_S20.png|link=]]</td>
<td width=765>If multiple objects from different layers have been selected then no layer name will be shown in the '''Layer''' and '''Binding''' boxes. Instead they will be left "blank" as shown in the image on the left.<br><br>
 
 
Both boxes can still be opened to assign layers to objects.
 
<br>
 
<table width=765 bgcolor=#ff0000 cellpadding=2>
 
<tr valign="top">
 
 
<td>
 
<td>
<table bgcolor=#fcbcbc width=786 cellpadding=2>
 
<tr valign="top">
 
<td>[[image:Stop.PNG|link=]]</td>
 
<td><span style="font-size: 15px; font-weight: 700;">WARNING:</span>
 
 
<table>
 
<table>
 
<tr valign="top">
 
<tr valign="top">
 
<td width=10>[[image:DotPoint.JPG|10px|link=]]</td>
 
<td width=10>[[image:DotPoint.JPG|10px|link=]]</td>
<td>Setting a layer for multiple objects that are in different layers will move ALL those objects to that layer</td>
+
<td width=755>If multiple objects '''all from the same layer''' have been selected then that layer name will be shown in the '''Layer''' box</td>
 
</tr>
 
</tr>
 
<tr valign="top">
 
<tr valign="top">
<td width=10>[[image:DotPoint.JPG|10px|link=]]</td>
+
<td>[[image:DotPoint.JPG|10px|link=]]</td>
<td>If objects are moved from one Layer Group to another (such as from the '''Route Layers Group''' to the '''Session Layers Group''') then it will change where those objects are saved (in the '''Route''' or in the '''Session''')</td>
+
<td width=755>If multiple objects that are '''not all''' from the '''same layer''' have been selected then no layer name will be shown in the '''Layer''' box. Instead both the '''Layer''' and the '''Binding''' box will be left "blank" as shown in the image on the left</td>
</tr>
+
</table>
+
</td>
+
</tr>
+
</table>
+
</td>
+
 
</tr>
 
</tr>
 
</table>
 
</table>
Line 1,689: Line 1,743:
 
<tr valign="top">
 
<tr valign="top">
 
<td width=629><span id="skip Assigning Objects to a Different Layer"></span>
 
<td width=629><span id="skip Assigning Objects to a Different Layer"></span>
 +
 
=='''Assigning Objects to a Different Layer'''==
 
=='''Assigning Objects to a Different Layer'''==
 
</td>
 
</td>
Line 1,718: Line 1,773:
 
<table bgcolor=#ffffff width=731 cellpadding=2>
 
<table bgcolor=#ffffff width=731 cellpadding=2>
 
<tr valign="top">
 
<tr valign="top">
<td colspan=2><span style="font-weight: 700; font-size: 15px;;">Steps:</span> To change the assigned layer of an object or group of objects:-</td>
+
<td colspan=2><span style="font-weight: 700; font-size: 15px;">Steps:</span> To change the assigned layer of an object or group of objects:-</td>
 
</tr>
 
</tr>
 
<tr valign="top">
 
<tr valign="top">
 
<td width=20>[[image:DotPoint1.JPG|link=]]</td>
 
<td width=20>[[image:DotPoint1.JPG|link=]]</td>
<td><span style="font-weight: 700; font-size: 15px; background-color: lightcyan;">Left Click</span> on the '''Layer''' drop down box. The layer containing the object (for a '''single selected object only''') will be shown with a [[image:BulletTick.png|link=]] in front of its name</td>
+
<td><span style="font-weight: 700; font-size: 15px; background-color: lightcyan;">&#160;Left Click&#160;</span> on the '''Layer''' drop down box. The layer containing the object (for a '''single selected object only''') will be shown with a [[image:BulletTick.png|link=]] in front of its name</td>
 
</tr>
 
</tr>
 
<tr valign="top">
 
<tr valign="top">
 
<td>[[image:DotPoint2.JPG|link=]]</td>
 
<td>[[image:DotPoint2.JPG|link=]]</td>
<td>Select the destination layer name from the drop down list. '''See Warning''' above</td>
+
<td>Select the destination layer name from the Drop Down Menu. '''See Warning''' below</td>
 
</tr>
 
</tr>
 
<tr valign="top">
 
<tr valign="top">
Line 1,746: Line 1,801:
 
<tr valign="top">
 
<tr valign="top">
 
<td width=25>[[image:NotePad.PNG|link=]]</td>
 
<td width=25>[[image:NotePad.PNG|link=]]</td>
<td>Once a target layer has been selected then the <span style="font-weight: 700; font-size: 15px; color: white; background-color: black;">&#160;Select Layer&#160;</span> button, which sets the '''Active Layer''', will become active '''IF''' the target layer is not the '''Active Layer'''. A <span style="font-weight: 700; font-size: 15px; background-color: lightcyan;">Left Click</span> on this button will set it as the '''Active Layer'''.</td>
+
<td>Once a target layer has been selected then the <span style="font-weight: 700; font-size: 15px; color: white; background-color: black;">&#160;Select Layer&#160;</span> button, which sets the '''Active Layer''', will become active '''IF''' the target layer is not the '''Active Layer'''. A <span style="font-weight: 700; font-size: 15px; background-color: lightcyan;">&#160;Left Click&#160;</span> on this button will set it as the '''Active Layer'''.</td>
 
</tr>
 
</tr>
 
</table>
 
</table>
Line 1,761: Line 1,816:
 
<table bgcolor=#ffffe0 cellpadding=2>
 
<table bgcolor=#ffffe0 cellpadding=2>
 
<tr valign="top">
 
<tr valign="top">
<td width=25>[[image:PencilTips.PNG|link=]]</td><td>You can also set the '''Active Layer''' by selecting its name from the list in the '''Layers Palette'''.</td>
+
<td width=25>[[image:PencilTips.PNG|link=]]</td><td>You can also set the '''Active Layer''' by selecting its name from the list in the <span style="font-weight: 700; font-size: 15px; color: white; background-color: #797979;">&#160;Layers Palette&#160;</span>.</td>
 +
</tr>
 +
</table>
 +
</td>
 +
</tr>
 +
</table>
 +
<br>
 +
<table width=1000 bgcolor=#ff0000 cellpadding=2>
 +
<tr valign="top">
 +
<td>
 +
<table width=996 bgcolor=#fcbcbc cellpadding=2>
 +
<tr valign="top">
 +
<td>[[image:Stop.PNG|link=]]</td>
 +
<td><span style="font-size: 15px; font-weight: 700;">WARNING:</span>
 +
<table>
 +
<tr valign="top">
 +
<td width=10>[[image:DotPoint.JPG|10px|link=]]</td>
 +
<td>Setting a layer for an object will move that object to that layer</td>
 +
</tr>
 +
<tr valign="top">
 +
<td width=10>[[image:DotPoint.JPG|10px|link=]]</td>
 +
<td>Setting a layer for multiple objects that are in different layers will move '''ALL''' those objects to that layer</td>
 +
</tr>
 +
<tr valign="top">
 +
<td>[[image:DotPoint.JPG|10px|link=]]</td>
 +
<td>If objects are moved from one layer group to another (such as from the '''Route Layers''' to the '''Session Layers''') then it will change where those objects are saved (in the '''Route''' or in the '''Session''')</td>
 +
</tr>
 +
</table>
 +
</td>
 
</tr>
 
</tr>
 
</table>
 
</table>
Line 1,787: Line 1,870:
 
<tr valign="top">
 
<tr valign="top">
 
<td>[[image:InfoPaletteLayerSelectBtnOn_S20.png|link=]]</td>
 
<td>[[image:InfoPaletteLayerSelectBtnOn_S20.png|link=]]</td>
<td>then the selected object is now assigned to a layer that is '''not''' the current '''Active Layer'''. <span style="font-weight: 700; font-size: 15px; background-color: lightcyan;">Left Click</span> on the <span style="font-weight: 700; font-size: 15px; color: white; background-color: black;">&#160;Select Layer&#160;</span> button to switch the '''Active Layer''' to the same layer as the object
+
<td>then the selected object is now assigned to a layer that is '''not''' the current '''Active Layer'''. <span style="font-weight: 700; font-size: 15px; background-color: lightcyan;">&#160;Left Click&#160;</span> on the <span style="font-weight: 700; font-size: 15px; color: white; background-color: black;">&#160;Select Layer&#160;</span> button to switch the '''Active Layer''' to the same layer as the object
 
</td>
 
</td>
 
</tr>
 
</tr>
Line 1,794: Line 1,877:
 
</tr>
 
</tr>
 
</table>
 
</table>
 +
<br>
 
<br>
 
<br>
 
<table width=1000> <!-- BEGIN Section Nav Buttons -->
 
<table width=1000> <!-- BEGIN Section Nav Buttons -->
Line 3,494: Line 3,578:
 
</tr>
 
</tr>
 
</table>
 
</table>
<br>
+
 
Only those assets in the '''&lt;kuid&gt; codes''' list that match the current '''Filter Selection''' will be shown in the asset list.</td>
+
Only those assets in the '''&lt;kuid&gt; codes''' list that match the current '''Filter Palette''' settings will be shown in the asset list.</td>
 
</tr>
 
</tr>
 
</table>
 
</table>
Line 3,582: Line 3,666:
 
<table>
 
<table>
 
<tr valign="top">
 
<tr valign="top">
<td colspan=2>More than one asset can be selected</td>
+
<td colspan=2>More than one asset can be selected (see '''Note''' below)</td>
 
</tr>
 
</tr>
 
<tr valign="top">
 
<tr valign="top">
Line 3,601: Line 3,685:
 
<td width=25>[[image:NotePad.PNG|link=]]</td>
 
<td width=25>[[image:NotePad.PNG|link=]]</td>
 
<td>Selecting multiple assets will not allow you to place all those assets in your '''Trainz World''' with a single click. Only the first selected asset will be added.<br>
 
<td>Selecting multiple assets will not allow you to place all those assets in your '''Trainz World''' with a single click. Only the first selected asset will be added.<br>
The main reason for selecting multiple assets would be to add them to a '''Picklist'''
+
The reasons for selecting multiple assets would be to add them all to a '''Picklist''', or to your OS clipboard, or to display them in a '''Content Manager''' window</td>
</td>
+
 
</tr>
 
</tr>
 
</table>
 
</table>
Line 3,825: Line 3,908:
 
<tr valign="top">
 
<tr valign="top">
 
<td>[[image:DotPoint.JPG|10px|link=]]</td>
 
<td>[[image:DotPoint.JPG|10px|link=]]</td>
<td>To hide the palette so that its new size and position will be restored when it is made visible again, <span style="font-weight: 700; font-size: 15px; background-color: lightcyan;">Left Click</span> on its '''Minimise''' <span style="font-weight: 700; font-size: 15px; color: white; background-color: black;">&#160;-&#160;</span> icon on its top menu bar and then to restore it to full size maximise it from the [[image:SurveyorWindowIcon.png|link=]]&#160;'''Window&#160;Menu'''. See [[image:PageLink.PNG|link=]]&#160;'''[[#Minimise Maximise Close|Minimise Maximise Close]]''' at the top of this document.</td>
+
<td>You can hide, and even close, the palette and its new size and position will be restored when it is made visible again. <span style="font-weight: 700; font-size: 15px; background-color: lightcyan;">Left Click</span> on its '''Minimise''' <span style="font-weight: 700; font-size: 15px; color: white; background-color: black;">&#160;-&#160;</span> or '''Close''' <span style="font-weight: 700; font-size: 15px; color: white; background-color: black;">&#160;x&#160;</span> icon on its top menu bar, and then restore it to the screen using the [[image:SurveyorWindowIcon.png|link=]]&#160;'''Window&#160;Menu'''. See [[image:PageLink.PNG|link=]]&#160;'''[[#Minimise Maximise Close|Minimise Maximise Close]]''' at the top of this document.</td>
</tr>
+
<tr valign="top">
+
<td>[[image:DotPoint.JPG|10px|link=]]</td>
+
<td>If you close the palette then it will return to its default size when it is reopened</td>
+
 
</tr>
 
</tr>
 
</table>
 
</table>
Line 4,479: Line 4,558:
 
<tr valign="top">
 
<tr valign="top">
 
<td><span style="font-weight: 700; font-size: 15px; color: white; background-color: black;">&#160;Filter&#160;Disabled&#160;</span></td>
 
<td><span style="font-weight: 700; font-size: 15px; color: white; background-color: black;">&#160;Filter&#160;Disabled&#160;</span></td>
<td>this action disables the '''Filter Palette''' so that it has no filtering effect on the '''Assets Palette''' which will then display '''All Content''' including those assets that are on the '''DLS''' but not installed. Its main use is in the '''Bulk Replace Assets Tool''' (available in <span style="font-weight:700; background-color: yellow;">&#160;Trainz&#160;Plus&#160;only</span>) but it can also be used to temporarily switch off the filters without having to delete them</td>
+
<td>this action disables the '''Filter Palette''' so that it has no filtering effect on the '''Assets Palette''' which will then display '''All (Installed) Content''' including those assets that are '''Obsolete''' or '''Disabled'''. Its main use is in the '''Bulk Replace Assets Tool''' (available in <span style="font-weight:700; background-color: yellow;">&#160;Trainz&#160;Plus&#160;only</span>) but it can also be used to temporarily switch off the filters without having to delete them</td>
 
</tr>
 
</tr>
 
</table>
 
</table>
Line 4,617: Line 4,696:
 
<td>[[image:Bblue.png|link=]] <span style="font-weight: 700; font-size: 15px; background-color: lightcyan;">Left Click</span> the '''Content Drop-down Box'''<br>
 
<td>[[image:Bblue.png|link=]] <span style="font-weight: 700; font-size: 15px; background-color: lightcyan;">Left Click</span> the '''Content Drop-down Box'''<br>
 
[[image:FilterPaletteOpenSelections_S20.png|link=|alt=Filter List]]<br>
 
[[image:FilterPaletteOpenSelections_S20.png|link=|alt=Filter List]]<br>
 +
Then select the asset type you want
 
<table>
 
<table>
<tr valign="top">
 
<td>
 
<table>
 
<tr valign="top">
 
<td colspan=2>Then select the asset type you want</td>
 
</tr>
 
 
<tr valign="top">
 
<tr valign="top">
 
<td>[[image:FilterSelectSceneryObject_S20.png|link=]]</td>
 
<td>[[image:FilterSelectSceneryObject_S20.png|link=]]</td>
</tr>
 
</table>
 
</td>
 
<td>
 
<table bgcolor=#000000 cellpadding=2>
 
<tr valign="top">
 
 
<td>
 
<td>
 
<table bgcolor=#ffffb0 cellpadding=2>
 
<table bgcolor=#ffffb0 cellpadding=2>
Line 4,649: Line 4,717:
 
<tr valign="top">
 
<tr valign="top">
 
<td>[[image:DotPoint.JPG|10px|link=]]</td>
 
<td>[[image:DotPoint.JPG|10px|link=]]</td>
<td>'''ALL''' the assets available for download from the '''DLS''' (in grey) including those that are '''Obsolete'''</td>
+
<td>'''ALL''' the installed '''Obsolete''' or '''Disabled''' assets (in grey)</td>
 
</tr>
 
</tr>
 
<tr valign="top">
 
<tr valign="top">
 
<td colspan=2>If you are going to be using this option then it is recommended that you undock and enlarge the '''Assets Palette''' to show the '''Status''' column.<br>
 
<td colspan=2>If you are going to be using this option then it is recommended that you undock and enlarge the '''Assets Palette''' to show the '''Status''' column.<br>
 
See [[image:PageLink.PNG|link=]]&#160;'''[[#skip Expanding the Assets List View|Expanding the Assets List View]]''' for the details</td>
 
See [[image:PageLink.PNG|link=]]&#160;'''[[#skip Expanding the Assets List View|Expanding the Assets List View]]''' for the details</td>
</tr>
 
</table>
 
</td>
 
 
</tr>
 
</tr>
 
</table>
 
</table>
Line 4,776: Line 4,841:
 
<table bgcolor=#ffffe0 width=996 cellpadding=2>
 
<table bgcolor=#ffffe0 width=996 cellpadding=2>
 
<tr valign="top">
 
<tr valign="top">
<td colspan=2>[[image:PencilTips.PNG|link=]]</td>
+
<td width=25>[[image:PencilTips.PNG|link=]]</td>
 +
<td><span style="font-weight: 700; font-size: 15px;">Search Options:</span></td>
 
</tr>
 
</tr>
 
<tr valign="top">
 
<tr valign="top">
<td>
+
<td colspan=2>
 
<table>
 
<table>
 
<tr valign="top">
 
<tr valign="top">
Line 7,096: Line 7,162:
 
</table>
 
</table>
 
<br>
 
<br>
 +
<table width=1000>
 +
<tr valign="top">
 +
<td><span id="Paint Clone"></span>
 +
==='''Using the Scrapbook Clone Brush'''===
 +
</td>
 +
</tr>
 +
</table> <!-- END Section Nav Buttons -->
 +
 +
<table width=1000>
 +
<tr valign="top">
 +
<td>
 +
When using the <span style="font-size: 15px; font-weight: 700; color: white; background-color: black;">&#160;Scrapbook Clone&#160;</span> brush its <span style="font-weight: 700; font-size: 15px; color: gold; background-color: black;">&#160;Radius&#160;</span> and <span style="font-weight: 700; font-size: 15px; color: gold; background-color: black;">&#160;Scale&#160;</span> settings in the <span style="font-weight: 700; font-size: 15px; color: white; background-color: #797979;">&#160;Tool Options Palette&#160;</span> are important.</td>
 +
</tr>
 +
</table>
 +
<br>
 +
<table width=1000 bgcolor=#000000 cellpadding=2>
 +
<tr valign="top">
 +
<td>
 +
<table bgcolor=#ffffff cellpadding=2>
 +
<tr valign="top">
 +
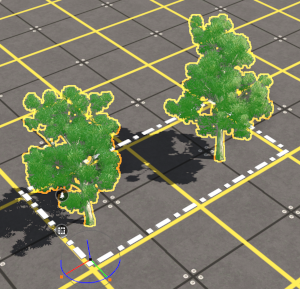
<td><span style="font-weight: 700; font-size: 15px;">For Example:</span> Two trees as shown below are captured as a Scrapbook with a size of 2x1 baseboard squares.<br>
 +
[[image:ScrapbookCloneBrushOriginal.png|link=]]<br>
 +
The '''Brush Tool''' target is set to '''Scrapbook Data''' and its action set to '''Scrapbook Clone'''. The effects of different <span style="font-weight: 700; font-size: 15px; color: gold; background-color: black;">&#160;Radius&#160;</span> and <span style="font-weight: 700; font-size: 15px; color: gold; background-color: black;">&#160;Scale&#160;</span> settings in the <span style="font-weight: 700; font-size: 15px; color: white; background-color: #797979;">&#160;Tool Options Palette&#160;</span> are shown below.
 +
<br>
 +
<table>
 +
<tr valign="top">
 +
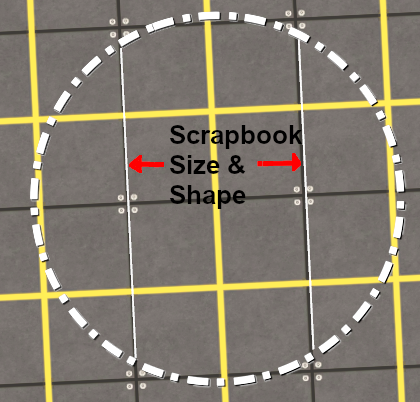
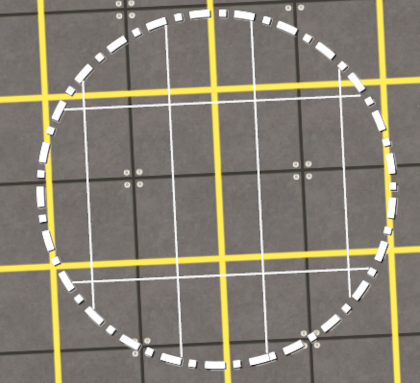
<td colspan=2>The '''Scrapbook Clone''' brush action will normally show the '''scaled size''' and '''shape''' of the scrapbook within the brush shape itself, in this case a circle.</td>
 +
</tr>
 +
<tr valign="top">
 +
<td width=420>[[image:ScrapbookCloneBrushCircle01.png|link=]]</td>
 +
<td><br>
 +
[[image:DotPoint1.JPG|link=]] When the brush radius is the same as the scaled scrapbook size then a single copy of the scrapbook will be painted into the brush.<br><br>
 +
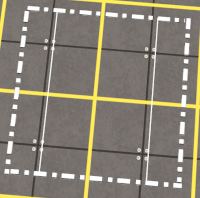
An exception will be when the scrapbook is not square, as shown, in which case some of the scrapbook may be cloned and painted in the spaces on each side of the marked scrapbook shape but this will depend on the contents of the scrapbook. In this situation it may be better to select the <span style="font-weight: 700; font-size: 15px; color: gold; background-color: black;">&#160;Natural&#160;</span> brush shape in the <span style="font-weight: 700; font-size: 15px; color: white; background-color: #797979;">&#160;Tool Options Palette&#160;</span>.
 +
<table>
 +
<tr valign="top">
 +
<td>
 +
<table>
 +
<tr valign="top">
 +
<td width=10>[[image:DotPoint.JPG|10px|link=]]</td>
 +
<td>A single <span style="font-weight: 700; font-size: 15px; background-color: lightcyan;">&#160;Left Click&#160;</span> will paint the entire scrapbook within the brush shape.</td>
 +
</tr>
 +
<tr valign="top">
 +
<td>[[image:DotPoint.JPG|10px|link=]]</td>
 +
<td>A <span style="font-weight: 700; font-size: 15px; background-color: lightcyan;">&#160;Left Click and Drag&#160;</span> will paint and clone the scrapbook as the mouse moves across the terrain.</td>
 +
</tr>
 +
</table>
 +
</td>
 +
<td width=200>[[image:ScrapbookCloneBrushNatural01.png|link=]]<br>
 +
Using the <span style="font-weight: 700; font-size: 15px; color: gold; background-color: black;">&#160;Natural&#160;</span> brush shape
 +
</td>
 +
</tr>
 +
</table>
 +
</td>
 +
</tr>
 +
<tr valign="top">
 +
<td>[[image:ScrapbookCloneBrushCircle03.png|link=]]</td>
 +
<td><br>
 +
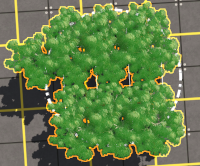
[[image:DotPoint2.JPG|link=]] By reducing the brush radius or increasing its scale (or both) then only part of the scrapbook will fit into the brush (no scrapbook brush outline will be shown)
 +
<table>
 +
<tr valign="top">
 +
<td width=10>[[image:DotPoint.JPG|10px|link=]]</td>
 +
<td>A single <span style="font-weight: 700; font-size: 15px; background-color: lightcyan;">&#160;Left Click&#160;</span> will only paint the central part of the scrapbook.</td>
 +
</tr>
 +
<tr valign="top">
 +
<td>[[image:DotPoint.JPG|10px|link=]]</td>
 +
<td>A <span style="font-weight: 700; font-size: 15px; background-color: lightcyan;">&#160;Left Click and Drag&#160;</span> will paint and reveal more of the scrapbook as the mouse moves across the terrain.</td>
 +
</tr>
 +
</table>
 +
</td>
 +
</tr>
 +
<tr valign="top">
 +
<td>[[image:ScrapbookCloneBrushCircle02.png|link=]]</td>
 +
<td><br>
 +
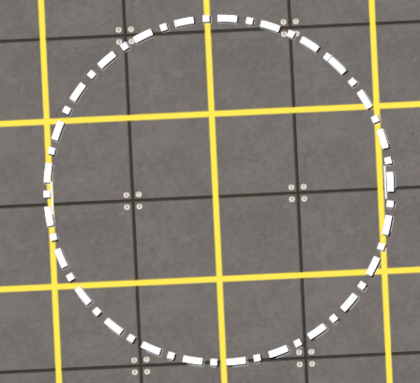
[[image:DotPoint3.JPG|link=]] By increasing the brush radius or reducing its scale (or both) then the scrapbook will be cloned so that several copies will be painted into the brush.<br>
 +
These are shown as additional scrapbook shapes within the brush area.
 +
<table>
 +
<tr valign="top">
 +
<td width=10>[[image:DotPoint.JPG|10px|link=]]</td>
 +
<td>A single <span style="font-weight: 700; font-size: 15px; background-color: lightcyan;">&#160;Left Click&#160;</span> will paint multiple copies of the scrapbook within the brush shape as shown below.</td>
 +
</tr>
 +
</table>
 +
<br>
 +
[[image:ScrapbookCloneBrushCircle02P.png|link=]]</td>
 +
</tr>
 +
<tr valign="top">
 +
<td>[[image:ScrapbookCloneBrushCircle04.png|link=]]</td>
 +
<td><br>
 +
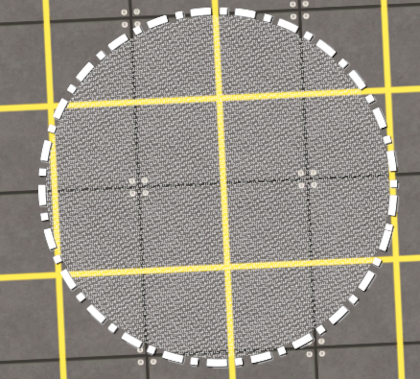
[[image:DotPoint4.JPG|link=]] By reducing the brush scale to an extreme (e.g. 1%) then the scrapbook will be cloned multiple times.
 +
<table>
 +
<tr valign="top">
 +
<td width=10>[[image:DotPoint.JPG|10px|link=]]</td>
 +
<td>A single <span style="font-weight: 700; font-size: 15px; background-color: lightcyan;">&#160;Left Click&#160;</span> will fill '''each individual''' "micro-grid" inside the brush shape (shown as a "mesh pattern" in the image) with a scaled down but complete copy of the entire scrapbook.</td>
 +
</tr>
 +
</table>
 +
<br>
 +
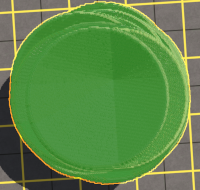
This will almost certainly cause performance issues (long delays, "freezing") as the program attempts to both scale and clone the scrapbook. The end result is shown below.<br>
 +
[[image:ScrapbookCloneBrushCircle04P.png|link=]]</td>
 +
</tr>
 +
</table>
 +
</td>
 +
</tr>
 +
</table>
 +
</td>
 +
</tr>
 +
</table>
 +
<br>
 +
==='''Scrapbook Tool Options Settings'''===
 +
 
<table width=1000>
 
<table width=1000>
 
<tr valign="top" align="center">
 
<tr valign="top" align="center">
Line 7,258: Line 7,432:
 
</table>
 
</table>
 
<br>
 
<br>
<span style="font-weight: 700; font-size: 15px;">Pasting a Scrapbook</span>
+
==='''Pasting a Scrapbook'''===
  
 
<table bgcolor=#000000 width=800 cellpadding=2>
 
<table bgcolor=#000000 width=800 cellpadding=2>
Line 7,287: Line 7,461:
 
</table>
 
</table>
 
<br>
 
<br>
==='''Setting the Filters'''===
+
==='''Setting the Scrapbook Filters'''===
  
 
<table bgcolor=#000000 width=1000 cellpadding=2>
 
<table bgcolor=#000000 width=1000 cellpadding=2>

Revision as of 07:39, 19 December 2024

The information in this Wiki Page applies to the palettes and windows found in Trainz Plus and TRS22 Platinum Surveyor (Surveyor 2.0) and in Driver.

          Next Down Bottom

Contents

InfoPaletteFocus S20.png
S20 PaletteAssets.png
DriverPalette S20.png
CommodityPickerPalette S20.png
BrushTools S20.png
LayersPalette S20 SessionLayersOpen.png
S20 PalettePackages.png
LogsPalette S20.png
SessionInfoPalette S20.png
AssetPreviewPalette S20.png
BrushToolsScrapBrush S20.png
ScrapbookNewNamedPinned S20.png
S20 PalettePackages.png
SessionOptionsPalette S20.png
ScheduleInfoPaletteDriver.png


The Trainz Plus World

Skip Down   Top   Next Down Bottom
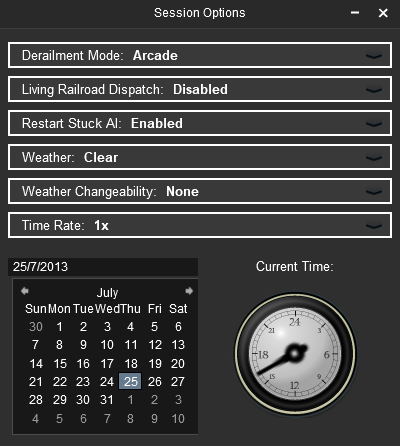
When you start Trainz Plus and TRS22 Platinum the world presented will look something like the following images, but what you actually see can be highly customised to your own preferences.


 Surveyor 2.0 

S20 SurveyorScreen.png

The dark grey strips on the left and right of the screen contain Palettes that have been Docked into the positions shown. Palettes are where selections can be made, information displayed and controls set.
NotePad.PNG The main difference between a Palette and a Window is that palettes can be docked or grouped together, windows cannot. All those in Surveyor can be docked so they are Palettes


Shown in the image above are 6 Palettes from top left to bottom right:-
DotPoint.JPG Layers
DotPoint.JPG Filter
DotPoint.JPG Assets
DotPoint.JPG Tools
DotPoint.JPG Tool Options
DotPoint.JPG Info
Not shown are 5 more Palettes that have been hidden from view:-
DotPointBlueSquare.png Scrapbook
DotPointBlueSquare.png Asset Preview
DotPointBlueSquare.png Content Packages
DotPointBlueSquare.png Logs
DotPointBlueSquare.png Drivers


 Driver 

NotePad.PNG The main difference between a Palette and a Window is that palettes can be docked or grouped together, windows cannot. All those in Driver cannot be docked so they are Windows


All the windows in Driver are normally hidden.
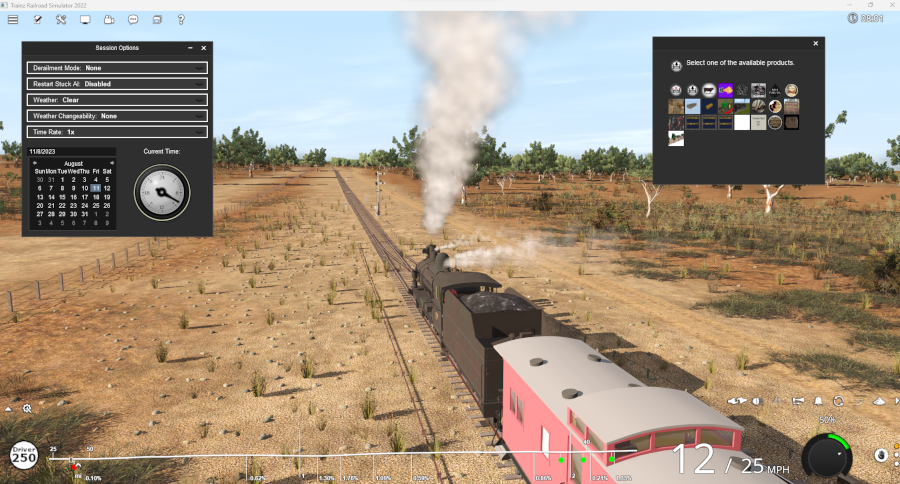
S20 DriverScreen.png

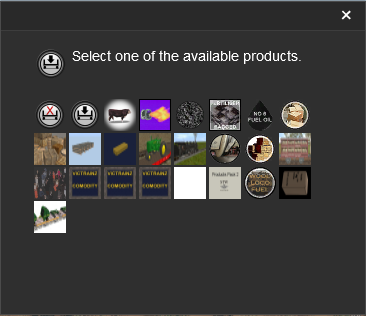
Shown in the image above are 2 Windows:-
DotPoint.JPG Session Options
DotPoint.JPG Commodity Picker
Not shown are 4 more Windows:-
DotPointBlueSquare.png Session Info
DotPointBlueSquare.png Driver Control Centre (the Surveyor Drivers palette)
DotPointBlueSquare.png Waybills
DotPointBlueSquare.png Schedule Info


Hiding and Showing Palettes and Windows

Skip Down Skip Up   Heading    
BlueDot10x10.png Palettes and Windows, in both Surveyor and Driver, are hidden and revealed using the SurveyorWindowIcon.png Window Menu.


PencilTips.PNG In Surveyor the visible/hidden state of each palette will be saved when you close the program. When you restart each palette will be returned to that last saved state.


The visible and hidden Palettes and Windows in the screenshots shown above have had their visibility set by:-

 Surveyor 
WindowsMenu S20.png
 Driver 
WindowsMenu Driver.png
Steps: To Hide or Show a palette/window:-
DotPoint1.JPG Left Click on the SurveyorWindowIcon.png Window Menu
 
  The popup menu will show:-
BulletTick.png visible palettes/windows have ticks next to their names - this includes those that are visible but minimised
BulletNoTick.png invisible (hidden) palettes/windows have no ticks next to their names
  minimised palettes and windows (e.g. the Mini Map or Drivers as shown in the images) are also listed below the bottom dividing line
DotPoint2.JPG To hide a visible palette or window, or to reveal an invisible one, simply Left Click on its name OR on the BulletTick.png BulletNoTick.png icon next to its name
DotPoint3.JPG To show a minimised palette or window Left Click on its name


See also PageLink.PNG Minimise Maximise Close below.


Docking and Undocking Palettes

Skip Down Skip Up   Heading    
BlueDot10x10.png Palettes in Surveyor are normally Docked, locked into fixed positions on both sides of the Surveyor Screen. They can be Undocked and freed to move anywhere on the screen.
BlueDot10x10.png Windows in Driver are Undocked and are free to move anywhere on the screen. They cannot be Docked.


NotePad.PNG Notes:

DotPoint.JPG In Surveyor the docked or undocked state and position of each palette will be saved when you close the program. When you restart each palette will be returned to that last saved state.
DotPoint.JPG In Driver the position of a window will NOT be saved when you close the program.


Undocking a Palette

PalettesUndocking1 S20.png
Steps: To Undock a palette from its docked position on either side of the screen:-
DotPoint1.JPG Move the mouse pointer onto the Title Bar of the palette to be undocked. The pointer will take the shape of a 4 headed arrow
PalettesUndocking2 S20.png DotPoint2.JPG Left Click and Drag the palette to any position on the screen
DotPoint3.JPG Release the mouse button in the new position
NotePad.PNG Notes:
DotPoint.JPG If an Undocked palette is Hidden or Minimised and made Visible again it will be returned to its previous Undocked position
DotPoint.JPG If an Undocked palette is Closed and reopened again it will be returned to its previous Undocked position


PencilTips.PNG All palettes that are docked to the two sidebars on the screen can be hidden by pressing the  Ctrl  +  Space  keys. Another press of the same keys will reveal them again.
The palettes that are Undocked and "free floating" will not be hidden and can still be used. This is a good way to clear out some of the screen real estate to provide more working space


Docking a Palette

PalettesDocking S20.png
Steps: To reverse the process and dock a palette:-
DotPoint1.JPG Move the mouse pointer onto the Title Bar of the free palette that is to be docked
 
DotPoint2.JPG Left Click and Drag the palette to the desired position in a docking area. A light grey area will show the palettes docking position
 
DotPoint3.JPG Release the mouse button and the palette
 
The palette does not have to be returned to its original position.


PencilTips.PNG Free floating (Undocked) palettes can be docked together in Surveyor to form a docked group that is still free floating


Resizing Palettes and Windows

Skip Down Skip Up   Heading    
BlueDot10x10.png Only Surveyor palettes that are Undocked can be resized. Some palettes have to be resized to display all their available information.
BlueDot10x10.png Most Driver windows cannot be resized.


PencilTips.PNG
DotPoint.JPG In Surveyor the resized state of each palette will be saved when you close the program. When you restart each palette will be returned to that last saved state.
DotPoint.JPG In Driver the resized state of a window will NOT be saved when you close the program.


PalettesResizing S20.png
Steps: To resize a palette or window:-
DotPoint1.JPG Move the mouse pointer onto any corner or onto an edge (left, right or bottom) of the palette/window. When it is in the correct position the pointer "mouse" arrow will change to a "two headed" arrow - if it does not change then it is a window that cannot be resized.
DotPoint2.JPG Left Click and Drag the pointer to expand or reduce the size of the palette or window. Palettes and windows have a maximum and minimum size beyond which they cannot be extended or reduced
DotPoint3.JPG Release the mouse button when the palette or window has reached the required size
NotePad.PNG Notes:
DotPoint.JPG If a resized palette is Hidden or Minimised and made Visible again it will be returned to its previous size
DotPoint.JPG If a resized palette is Closed and reopened again it will be returned to its previous size


NotePad.PNG If a resized palette is returned to a docking area on either side of the screen then its dimensions will return to its default (original) values


Minimise Maximise Close

Skip Down Skip Up   Heading    
BlueDot10x10.png Minimising will hide a palette or window but retain its size and position data.
BlueDot10x10.png Maximising will return a palette or window to the screen using its last size and position data.
BlueDot10x10.png Closing will remove a palette or window from the screen but its size and position data will be saved. When it is next opened it will be shown on the screen using its last size and position data.


NotePad.PNG Notes:

DotPoint.JPG All Surveyor palettes can be minimised
DotPoint.JPG Only two Driver windows can be minimised:-
RedDot10x10.png Session Options, and
RedDot10x10.png Driver Control Center


The image below shows a Surveyor 2.0 screen with an open window box (the Find Object Tool) and two Undocked palettes (Info and Layers)
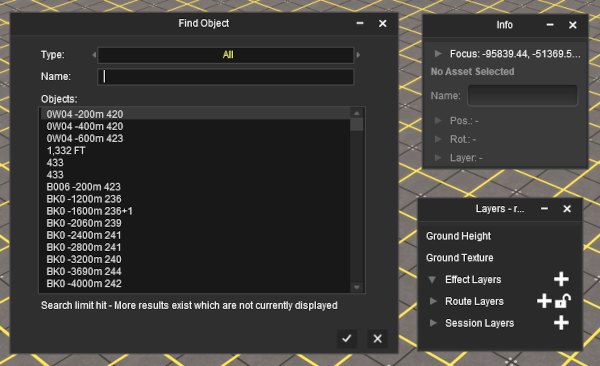
PalettesWindowsOpen S20.png
Each of the windows and palettes shown can be:-
Options:
Ablue.png individually Minimised by a Left Click on the  -  icon in each of their top menu bars
Bblue.png individually Closed by a Left Click on the  x  icon in each of their top menu bars
Cblue.png simultaneously Minimised in a single action from the SurveyorWindowIcon.png Window Menu by selecting  Minimise All Windows  WindowsMenuMinimise S20.png
NotePad.PNG Minimising will "remember" the size and position of a palette or window so that it can later be restored to the same size and position
PalettesWindowsMenu S20.png
NotePad.PNG Notes:

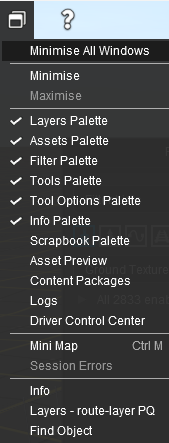
A Left Click on the SurveyorWindowIcon.png Window Menu will show all the palettes and windows, visible and hidden, plus any that are minimised.
DotPoint.JPG In the image shown on the left the minimised windows are listed at the bottom of the menu list in the Minimised Windows Area as Find Object, Info and Layers. Layers is also shown with the name of the currently selected layer.
DotPoint.JPG Note that the Layers and Info palettes are listed twice - once with a BulletTick.png icon in the Palette Area, which indicates that they are "active", and again in the Minimised Windows Area at the bottom, which indicates that they are "active" but "minimised".
Steps: To Maximise a palette or window:-
DotPoint1.JPG Left Click on its name or title in the Minimised Windows Area at the bottom of the list.
DO NOT click on the name of the palette or window shown with the BulletTick.png icon in the upper Palettes section - this will CLOSE it


PencilTips.PNG You can Hide all the palettes in Surveyor that are docked in the two side panels and leave those that are undocked or "free floating" visible. Press the  Ctrl  +  Space  keys to hide and show the side panels and their palettes. The side panels will also be hidden freeing up screen space to display more of your Trainz World


The Info Palette

Skip Down Skip Up Top Next Up Next Down Bottom
This is a  Surveyor Only  palette


PalettesIcon S20.png If the Info Palette is not visible on the screen then refer to PageLink.PNG Hiding and Showing Palettes and Windows at the top of this document. Some Info Palette functions will also require the Assets Palette and the Tool Options Palette.


This palette can be easily overlooked but it has some very useful features:-
BlueDot10x10.png naming objects
BlueDot10x10.png providing precise data and control over the "focus" - the position of the cursor
BlueDot10x10.png providing precise data and control over the position and orientation of objects (it can be used instead of the Free Move Tool and the Fine Adjustment Tool)
BlueDot10x10.png identifying and setting the "home" layer and binding layer of a selected object
BlueDot10x10.png used for locking and unlocking a selected objects layer


The components of the Info Palette are identified in the image below.

InfoPalette S20.png
BlueDot10x10.png Every item in the palette can be edited.
BlueDot10x10.png Each of the small arrowhead icons in the palette will open to display more information and controls or a drop down menu of options.


NotePad.PNG
DotPoint.JPG The Asset Name is the name given to the asset by its creator and the name that will appear in the asset list of Content Manager and in the Assets Palette
DotPoint.JPG The Object Name is the optional name that you have given the object so that it can be quickly located in the route and/or session. Some objects, such as station name signs, will require an Object Name that will be visible in Surveyor and Driver


Palette Coordinates

Skip Down Skip Up   Heading    
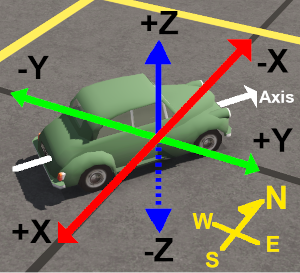
Information.png All the positional data and controls in the  Info Palette  are defined in the following ways:-
 x:  is ALWAYS the  North-South  compass direction regardless of the direction that an object is facing
 y:  is ALWAYS the  East-West  compass direction regardless of the direction that an object is facing
 z:  is ALWAYS the  Vertical  direction (perpendicular to the compass directions) regardless of how an object has been rolled or tilted
NotePad.PNG Notes:

DotPoint.JPG distances are measured in metres from the North-West corner of the first baseboard. If that baseboard is later deleted then distances will still be measured from its original and now "virtual" North-West corner.
DotPoint.JPG  +  positive distances are in the  South ,  East  and  Up  directions
DotPoint.JPG  -  negative distances are in the  North ,  West  and  Down  directions
DotPoint.JPG New boards added to the North of the first baseboard will have negative x coordinates and new boards added to the West of the first baseboard will have negative y coordinates.
PositionXYZ S20.png


Info Settings Menu

Skip Down Skip Up   Heading    

All the Focus, Position and Rotation settings have drop down menus that allow values to be transferred to and from other settings and other tools.
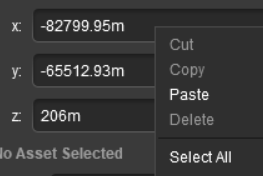
InfoPaletteSettingDropMenu1 S20.png

InfoPaletteSettingDropMenu2 S20.png
Steps:
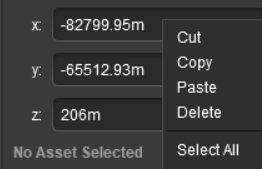
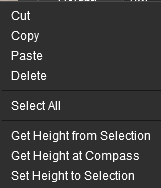
DotPoint1.JPG Right Click inside an Info Palette setting box
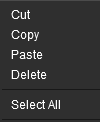
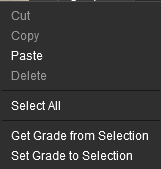
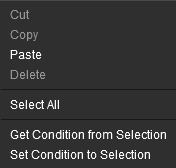
The first time the popup menu is opened it will only show two active options - Paste and Select All.
 Paste  will paste the contents of your Operating System (Windows, MacOS) clipboard into the setting. If data is already present then the new data will be added to it, not replace it
 Select All  will highlight the contents of the selected setting. You can also achieve this with a Left Click and Drag across the contents of the setting
DotPoint2.JPG Right Click inside the same Info Palette setting box
Once the value in a setting has been selected (highlighted) the popup menu will show all options as active.
 Cut  will copy the contents of the selected setting into your Operating System clipboard. The contents will then be deleted from the setting
 Copy  will copy the contents of the selected setting into your Operating System clipboard without deleting it
 Delete  will delete the contents of the selected setting. You can also achieve this with a Left Click and Drag across the contents and then press the  Delete  key


Next to the z co-ordinate in both the Focus and Position is a small white down arrowhead. Left Click on the arrowhead to open its menu.

InfoPaletteFocusMenu S20.png There is only one option in the sub-menu.
Left Click on the  Use Height for Brush  option to copy the current z value to the Tool Options Palette  Height  setting.


Focus Info and Controls

Skip Down Skip Up   Heading    
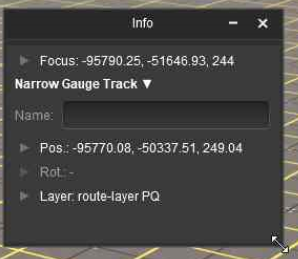
BlueDot10x10.png The Focus shows the current position and height of the Cursor object.

Open up the Focus by a Left Click on its arrowhead icon.

InfoPaletteFocus S20.png


The current cursor position is shown in the  x: ,  y:  and  z:  text entry boxes. These values can be edited to move the cursor to a new position but CARE will be needed.

PencilTips.PNG On the right of each data entry box is a pair of Up/Down arrow controls. Left Click and Drag up or down on these to adjust the position in smaller increments down to centimetres


NotePad.PNG Notes:

If you enter an x or y value that is "out in empty space" (beyond the edge of a boundary baseboard) then the cursor will be refocused at a point on the baseboard edge that is the closest to the entered co-ordinates.


PencilTips.PNG If it has not been deleted you can identify the North-West corner of the original (first) baseboard by entering 0 as the Focus  x  and  y  co-ordinates


Asset Name Menu

Skip Down Skip Up   Heading    
BlueDot10x10.png "Asset Name" refers to the name of the asset as displayed in the Assets Palette and in Content Manager. This is not the same as the Object Name (see the next section)


You must have an object (or objects) selected for an Asset Name to be shown and for this menu to be available.

InfoPaletteMulti S20.png If more than one object has been selected then the name and position data shown will be for the last selected object. If different objects (with different kuid codes) have been selected then a count of the additional objects will be added. The (+2) shown in the object name in the image on the left indicates that 2 additional different objects are in the group of selected objects.


Next to the Asset Name is a small white Down Arrowhead. Left Click on the arrowhead to open its menu.

InfoPaletteMenu S20.png
Asset Name Menu Options
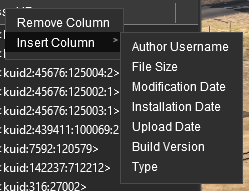
 Copy  copies the asset name and <kuid> into your operating systems clipboard. If more than two assets have been selected then only the first two will be copied
 Show Asset Details  opens a new window showing the image and description of the selected object
 List Assets in New Window  opens up Content Manager and lists all the selected objects
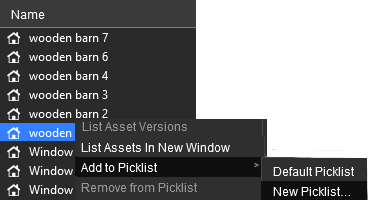
 Add to Picklist  adds selected objects to a Picklist
 Remove from Picklist   NOT WORKING  (a known bug)
use this same option found in the Filter Palette or Content Manager instead
 Select in Assets Palette  selects and highlights the selected object in the Assets Palette


Object Name

Skip Down Skip Up   Heading    
BlueDot10x10.png "Object Name" refers to the name that you give to an object


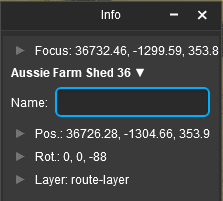
You can give any object in your Trainz World an identifying name. In some cases a name is vital for AI and session operations, in other cases it will be needed as a display feature - for example: to be shown on a station nameboard. You must have the object (or objects) selected for this option to be available. If more than one object has been selected then only the last object (the one with the Context Icon) will be affected
InfoPaletteObjectName S20.png
Steps: To name (or rename) an object:-
DotPoint1.JPG Left Click inside the Name text entry box
DotPoint2.JPG Enter a name
DotPoint3.JPG Press the  Enter  key


ObjectsUsingSameName.png
There is no ban on two or more objects using the same name


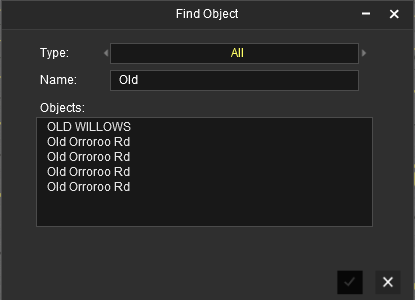
In the image shown on the left there are 4 objects all named Old Orroroo Rd.

This will not cause any problems for scenery objects apart from finding the exact one you want with the Finder Tool ( Ctrl  +  F  keys) as shown in the image on the left - Which of the 4 "Old Orroroo Rd" objects is the one that I need?

Stop.PNG WARNING:
Duplicate names will cause problems for Industries (including passenger enabled stations), Locomotives, Track Marks, Triggers, Switches, Signals, etc that have to be identified to control the operation of a session.
These objects must have unique names


Position Info and Controls

Skip Down Skip Up   Heading    

You must have an object (or objects) selected for the position data to be shown and edited. Open up the position data by a Left Click on its Pos: arrowhead icon.

InfoPalettePos S20.png The position of the selected object (or the last object if more than one is selected) is shown in the x, y and z text boxes. These values can be edited to move the object or objects to a new position but CARE will be needed.


PencilTips.PNGOn the right of each data entry box is a pair of Up/Down arrow controls. Left Click and Drag up or down on these to adjust the position in smaller increments down to centimetres


NotePad.PNG Notes:

If you enter an x or y value that is "out in empty space" (beyond the edge of a boundary baseboard) then the objects will be moved to that position and may vanish from view. The Undo command can be used to reverse the move or the Marquee Tool can be used to add a baseboard under the "floating" objects.


Rotation Info and Controls

Skip Down Skip Up   Heading    

You must have an object (or objects) selected for the rotation data to be shown and edited. Open up the rotation data by a  Left Click  on its Rot: arrowhead icon.

InfoPaletteRot S20.png The rotational orientation of the selected object (or the last object if more than one is selected) is shown in the r:, p: and y: text boxes (the letters stand for Roll, Pitch and Yaw). These values can be edited to rotate the object or objects in 3D space BUT not all objects can be rotated in certain directions.
NotePad.PNG Notes:

DotPoint.JPG If several objects have been selected then the last selected object, the one with the Context Icon, will be the centre of all rotations.
DotPoint.JPG Not all objects will allow rotations. For example, SpeedTree objects can only be rotated using the  y:  value ( r  and  p  entries will be ignored) while Spline objects cannot be rotated at all


PencilTips.PNGOn the right of each box is a pair of Up/Down arrow controls. Left Click and Drag up or down on these to adjust the rotation angle in increments of 1°.


NotePad.PNG Notes:

The rotation data and controls are defined in the following ways:-

 r:  ALWAYS rotates in the vertical plane around the selected objects Y axis (which was defined when it was created).
This is the same as the  Red  Rotational Anchor in the Fine Adjustment Tool
 p:  ALWAYS rotates in the vertical plane around the selected objects Y axis PLUS 90°.
This is the same as the  Green  Rotational Anchor in the Fine Adjustment Tool
 y:  ALWAYS rotates in the horizontal plane around the compass Z or Vertical axis regardless of how the object has been rolled or pitched.
This is similar to but NOT exactly the same as the  Blue  Rotational Anchor in the Fine Adjustment Tool. The difference will become obvious if the object has had a roll or pitch rotation applied before the yaw rotation
FineAdjust3DFrameSmall S20.png
 Rot:   y:  = East 90° North 180° West 270° South
Original
RotationAxis S20.png
Roll:  r: = 45 
RotationAxisRoll S20.png
Pitch:  p: = 45 
RotationAxisPitch S20.png
Yaw:  y: = 45 
RotationAxisYaw S20.png
  All rotations shown are 45° in the + (anticlockwise) direction
 

DotPoint.JPG Some objects (for example: SpeedTrees) will NOT allow Roll or Pitch rotations
DotPoint.JPG all angles are measured in degrees
DotPoint.JPG  +  positive angles are anticlockwise when viewed facing the rotation axis direction
DotPoint.JPG  -  negative angles are clockwise when viewed facing the rotation axis direction
DotPoint.JPG angles greater than 360° can be entered but will give the same result as the angle minus 360°. For example: 450° is exactly the same angle as 90° (450°-360°=90°)
DotPoint.JPG clockwise and anti-clockwise angles are complementary. For example: entering -270° (clockwise) will give the same angle as entering +90° (anticlockwise)


Layer Info and Controls

Skip Down Skip Up   Heading    
You must have an object (or objects) selected for the layer data to be shown and edited. Open up the layer data by a Left Click on its Layer: arrowhead icon.


NotePad.PNG Notes:

DotPoint.JPG the Info Palette is best used to show and edit the layer and binding layer assignments of individual selected objects
DotPoint.JPG operations such as creating, deleting, merging, renaming, moving and hiding layers are performed using the Layers Palette
DotPoint.JPG layers can be Locked and Unlocked using the Info Palette or the Layers Palette but the Layers Palette is often the better choice for these tasks


For a single selected object
InfoPaletteLayer S20.png This will show the:-
DotPoint.JPG current layer assigned to the selected object
DotPoint.JPG its assigned Binding Layer (if any)
DotPoint.JPG the Locked or Unlocked state of the assigned layer
  InfoPaletteLockedLayerBtn S20.png Layer is currently Unlocked. Click this button to Lock the layer
  InfoPaletteUnlockedLayerBtn S20.png Layer is currently Locked. Click this button to Unlock the layer
  Using this button will also change the Locked or Unlocked padlock icon shown next to the layer name in the Layers Palette
AssetsPaletteLockedUnlockedLayers S20.png
NotePad.PNG Notes:

DotPoint.JPG Objects in a Locked Layer cannot be deleted or moved
DotPoint.JPG Locked Layers can be deleted, moved and merged with other layers


For multiple selected objects
InfoPaletteLayersMulti S20.png
DotPoint.JPG If multiple objects all from the same layer have been selected then that layer name will be shown in the Layer box
DotPoint.JPG If multiple objects that are not all from the same layer have been selected then no layer name will be shown in the Layer box. Instead both the Layer and the Binding box will be left "blank" as shown in the image on the left


Assigning Objects to a Different Layer

Skip Down Skip Up   Heading    
BlueDot10x10.png The Active Layer is the layer used by the Placement Tool when objects are added to your Trainz World.


A selected object or group of selected objects can be assigned to a different layer. If multiple objects have been selected then they do not have to all be in the same layer.

InfoPaletteLayerDropBoxList S20.png
Steps: To change the assigned layer of an object or group of objects:-
DotPoint1.JPG  Left Click  on the Layer drop down box. The layer containing the object (for a single selected object only) will be shown with a BulletTick.png in front of its name
DotPoint2.JPG Select the destination layer name from the Drop Down Menu. See Warning below
The layer reassignment will start the instant the destination layer is selected
DotPoint3.JPG If you see a Debugging Window on the screen as the task is processed, it will inform you when the task has been completed. You can then close the window


NotePad.PNG Once a target layer has been selected then the  Select Layer  button, which sets the Active Layer, will become active IF the target layer is not the Active Layer. A  Left Click  on this button will set it as the Active Layer.


PencilTips.PNGYou can also set the Active Layer by selecting its name from the list in the  Layers Palette .


Stop.PNG WARNING:
DotPoint.JPG Setting a layer for an object will move that object to that layer
DotPoint.JPG Setting a layer for multiple objects that are in different layers will move ALL those objects to that layer
DotPoint.JPG If objects are moved from one layer group to another (such as from the Route Layers to the Session Layers) then it will change where those objects are saved (in the Route or in the Session)


Options: To set current layer to the Active Layer:-
Ablue.png If the  Select Layer  button is greyed out
InfoPaletteLayerSelectBtnOff S20.png then the selected object is now assigned to the current Active Layer so there is no need to use this option
Bblue.png If it is NOT greyed out
InfoPaletteLayerSelectBtnOn S20.png then the selected object is now assigned to a layer that is not the current Active Layer.  Left Click  on the  Select Layer  button to switch the Active Layer to the same layer as the object


Assigning Objects to a Binding Layer

SkipDown.png Skip Down   Heading    
BlueDot10x10.png The Binding Layer, or Bound Layer as it is also called, is a tool used in the development of your Trainz World. It allows you to temporarily assign an object to a second layer while it is still in its original layer. The object will then take on the properties (Locked or Unlocked, Hidden or Visible) of both layers.
Assigned
Layer
Binding
Layer
Object
Status
LayerUnLocked S20.png Unlocked LayerUnLocked S20.png or None LayerUnLocked S20.png Unlocked
LayerLocked S20.png LOCKED LayerLocked S20.png or LayerUnLocked S20.png or None LayerLocked S20.png LOCKED
LayerUnLocked S20.png Unlocked LayerLocked S20.png LOCKED LayerLocked S20.png LOCKED
LayerEyeOpen S20.png Visible LayerEyeOpen S20.png or None LayerEyeOpen S20.png Visible
LayerEyeClosed S20.png HIDDEN LayerEyeOpen S20.png or LayerEyeClosed S20.png or None LayerEyeClosed S20.png HIDDEN
LayerEyeOpen S20.png Visible LayerEyeClosed S20.png HIDDEN LayerEyeClosed S20.png HIDDEN
In Summary:-
DotPoint.JPG If the Assigned Layer or the Binding Layer of an object is Locked then the object will be Locked
DotPoint.JPG If the Assigned Layer or the Binding Layer of an object is Hidden then the object will be Hidden
NotePad.PNG Notes:

DotPoint.JPG Objects in a Hidden Layer cannot be seen and therefore, cannot be selected, deleted or moved
DotPoint.JPG The Layers Palette is the ONLY way to create, delete, name and hide layers


Some examples of using the Binding Layer:-
 Example 1: 
The problem: You need to stop an object from being selected so that you can you move other objects on or around it
The solution: Use the Layers Palette to create a new empty layer and lock it. Set the Binding Layer of the object to the new locked layer. The object will then be locked so it cannot be selected or moved even though its original layer is unlocked. When the edit has been completed delete the empty locked layer you just created to unlock all its bound objects and remove all their bindings
 Example 2: 
The problem: A group of objects (e.g trees) are blocking access to another object.
The solution: Use the Layers Palette to create a new empty layer and hide it. Set the Binding Layer of the blocking objects to the new hidden layer. The blocking objects will no longer be visible and cannot be selected even though their original layer is still visible. When the edit has been completed delete the empty hidden layer you just created to make all its bound objects visible and remove all their bindings


InfoPaletteBindingDropBox S20.png
Steps: To change the assigned binding layer of an object or group of objects:-
DotPoint1.JPG Left Click on the Binding drop down box. For a single selected object only the binding layer (which may be <none>) will be shown with a BulletTick.png in front of its name
DotPoint2.JPG Select the Binding layer name from the drop down list. Note: the objects assigned layer will not appear in the list because an object cannot be bound to its own layer
The layer reassignment will start the instant the layer is selected
DotPoint3.JPG If you see a Debugging Window on the screen as the task is processed, it will inform you when the task has been completed. You can then close the window


As an example, the image below shows what you will see for a single object that has had:-
InfoPaletteLayerSetBindingSet S20.png
DotPoint.JPG its assigned layer changed (in the example from "route-layer" to "Station Industries")
DotPoint.JPG its binding layer set (in the example to "Multi Industries")
DotPoint.JPG the newly assigned layer is locked so you have the option to UNLOCK it
DotPoint.JPG the newly assigned layer is not the Active Layer so you have the option to make it the Active Layer


LinkWiki.PNG

More information on creating, editing and using Layers can be found on the Trainz Wiki at:-

How to Use Layers


The Tools Palette

  Skip Up Top Next Up Next Down Bottom
This is a  Surveyor Only  palette


PalettesIcon S20.png If the Tools Palette is not visible on the screen then refer to PageLink.PNG Hiding and Showing Palettes and Windows at the top of this document


S20 PaletteTools.png
BlueDot10x10.png The Tools Palette is at the core of the new interface and takes the place of all the Tool Flyouts that have been the standard for Trainz Surveyor for many years. Some of the tools are new while others have been given a makeover and new abilities. The tools manipulate the Surveyor World you see in many different ways.


Tools and keymap for S20 The  Context Tool  is attached as an icon to a selected or newly placed object. The icon and its Context menu will vary according to the type of object.


PalettesIcon S20.png Various brush tools make use of the Tool Options Palette, the Assets Palette, the Info Palette, the Layers Palette and the Scrapbook Palette. If a palette required by one of the brush tools is not visible on the screen then refer to PageLink.PNG Hiding and Showing Palettes and Windows at the top of this document.


The Brush Tool

S20 BrushToolIcon.png Keyboard Shortcut:  W 
The  Brush Tool  "paints" the ground height, ground textures, effect layers and scrapbook scenes in the Trainz World
Brush Tools
The Brush Tool has two drop down menu lists.

The first drop down menu will set the "Brush Target" which is the type of brush.

The Targets are:-
BulletTick.png Ground Height
BulletTick.png Ground Texture
BulletTick.png Scrapbook Data
BulletTick.png <List of Effect Layers>
BulletTick.png Edit Effect Layers
BrushToolsGroundOptions S20.png
NotePad.PNG If you have any Effect Layers then they will appear as Targets in this drop down list. Select an Effect Layer to use the brush to paint with that layer.
The Brush Targets  Ground Height ,  Scrapbook Data  and  Effect Layers  have a second drop down menu that controls the Brush Action.
For more detailed information on using the Brush Tool see the Trainz Wiki page WikiLink.PNG How to Use the Surveyor 2.0 Tools


The Placement Tool

S20 PlacementToolIcon.png Keyboard Shortcut:  E 
The  Placement Tool  adds objects to a Trainz World
Placement Tools
The Placement Tool places all types of objects except ground textures and effect layers. Use the Brush Tool to add ground textures and effect layers.
SceneryMeshFilter S20.png all non-spline scenery assets   ScenerySplineFilter S20.png all spline scenery assets
TrackSplineFilter S20.png all track spline assets   TrackMeshFilter S20.png all track (non spline) assets (signals, etc)
TrainFilter S20.png all rolling stock assets  


For more detailed information on using the Placement Tool see the Trainz Wiki page WikiLink.PNG How to Use the Surveyor 2.0 Tools


The Eyedropper Tool

S20 DropperToolIcon.png Keyboard Shortcut:  R 
The  Eyedropper Tool  identifies and selects objects in a Trainz World
EyedropperTools S20.png
PencilTips.PNG The Eyedropper is also inside all the tools in this palette so you can quickly identify any object without having to switch to the Eyedropper Tool and back again. Hold down the  Alt  key to activate this feature in other tools


For more detailed information on using the Eyedropper Tool see the Trainz Wiki page WikiLink.PNG How to Use the Surveyor 2.0 Tools


The Free Move Tool

S20 FreeMoveToolIcon.png Keyboard Shortcut:  S 
The  Free Move Tool  moves objects around a Trainz World
FreeMoveTools S20.png
NotePad.PNG Notes:

The Free Move Tool can move any selected object or objects (except Ground Textures and Effect Layers) in any direction horizontally. Vertical movements can be achieved by using the Height control in the Tool Options Palette.


For more detailed information on using the Free Move Tool see the Trainz Wiki page WikiLink.PNG How to Use the Surveyor 2.0 Tools


The Fine Adjustment Tool

S20 FineAdjustmentToolIcon.png Keyboard Shortcut:  D 
The  Fine Adjustment Tool  makes 3D adjustments (XYZ position and rotations) to objects in a Trainz World
Fine Adjustment Tools
NotePad.PNG Notes:

The Fine Adjustment Tool can move any selected object or objects (except Ground Textures and Effect Layers) in any direction horizontally and vertically. It can also rotate those objects through 3 different axes of rotation.

The most obvious feature of the Fine Adjustment Tool is the 3D Anchor Frame it adds to a selected object. The frame is made of 3 straight and 3 curved coloured lines, called Anchors, which control position and orientation.
FineAdjust3DFrame S20.png The Anchor controls are:-
 The Horizontal and Vertical Anchors 
 Red   Green   Blue  move the object (forward and back, or up and down) in the direction of the Anchor line
 The Rotational Anchors 
 Red   Green   Blue  rotate the object (clockwise and anti-clockwise) along the Anchor arc line.  Note: Not all objects will allow rotations in all directions 
 The Object Anchor 
     (black central dot) moves the object in any horizontal direction


For more detailed information on using the Fine Adjustment Tool see the Trainz Wiki page WikiLink.PNG How to Use the Surveyor 2.0 Tools


The Marquee Tool

S20 MarqueeToolIcon.png Keyboard Shortcut:  F 
The  Marquee Tool  selects and copies objects, deletes baseboards, adds new baseboards and sets their properties, adds texture to baseboards in a Trainz World, creates scrapbooks
MarqueeTools S20.png
NotePad.PNG Notes:

DotPoint.JPG The Marquee Tool draws out a rectangular area, the Marquee Selection Area, on the route. Any objects (including Ground Heights, Ground Textures and Effect Layers) that are inside the Marquee Selection Area or touched by its boundary can be selected to be added to a Scrapbook, moved, rotated or deleted (scenery objects only)
DotPoint.JPG The Marquee Selection Area can be drawn outside the baseboards to add new baseboards or over existing baseboards to delete or convert them


For more detailed information on using the Marquee Tool see the Trainz Wiki page WikiLink.PNG How to Use the Surveyor 2.0 Tools


The Tool Options Palette

Skip Down   Top Next Up Next Down Bottom
This is a  Surveyor Only  palette


PalettesIcon S20.png If the Tool Options Palette is not visible on the screen then refer to PageLink.PNG Hiding and Showing Palettes and Windows at the top of this document


BlueDot10x10.png This palette is used by various tools to set controls and parameters. For a detailed description of all the options presented by the Tools Palette for the different tools, see the Trainz Wiki page WikiLink.PNG How to Use the Surveyor 2.0 Tools


All the Tool Options controls and settings are shown in the image below. The controls are shown in the image as being "inactive". An "active" control will have its icon (to the left of the control name) shown in  Gold . Different Brush Types and Brush Actions will activate different controls.
ToolOptionsPaletteNone S20.png

PencilTips.PNG On the right of each data entry box is a pair of Up/Down arrow controls. Left Click and Drag up or down on these to adjust the value in smaller increments
 Radius   All Brushes  the brush radius (metres)
Range:  5m and above for 5m and 10m grid resolutions

0.12m and above for HD Terrain (available in Trainz Plus only)

For Effect Layers the minimum brush size will vary. See Notes: below
 Height   Set Ground Height   Water Effect Layer   Object Placement  the brush or object height (metres)
Range:  -3000m to 3000m
 Sensitivity   All Ground Heights   Ground Textures   Scrapbook Data   Water Effect Layers  the rate at which the ground height/water layer is raised/lowered or the texture being "painted" becomes visible
Range:  1% (very slowly) to
100% (very quickly)
 Grade   Ground Height Grade   Water Effect Layer   Spline Object Placement  the slope of the ground, spline or water effect layer
Range:  0% (flat) to
±100% (steep but not vertical)
 Angle     Ground Height Grade   Water Effect Layer  grade direction (compass degrees)
Range:  (North) to ±359°
a negative value reverses the grade direction
 Rotation   Ground Textures   Scrapbook Data  initial rotation angle (degrees)
Range:  to ±360°
 Scale   Ground Textures   Scrapbook Data (Clone Brush)  the brush scaling factor
Range:  0.01% = smallest to

100% = full size to

>100% larger than full size
 Intensity   TurfFX & Clutter Effect Layers  the effect layer density within the brush area
Range:  1% (almost none) to
100% (maximum)
 Condition   Track Spline Object Placement  sets the track condition (or "ride comfort") for each segment
Range:  1% (terrible track condition) to

50% (average track condition) to
100% (perfect track condition)

 Shape   Scrapbook Data  brush shape
Options:  BrushToolsScrapShapes S20.png Circle and Square will set the brush to the selected shape
Natural will set the brush to the same shape as the Marquee that created the scrapbook, which may be rectangular
 Color   Color Effect Layer  colour selection (RGB and Brightness values) - Trainz Plus only
Range: 
BrushToolsColorLayerPicker S20.png
 Left Click  on the coloured box next to the title Color to open the colour selector.
Set a Colour: Select a colour by either:-
DotPoint.JPG a  Left Click  on the colour in the colour picker device, OR
DotPoint.JPG enter its RGB value in Hexadecimal
Optionally: Set a brightness value for the selected colour by moving the slider up or down
Reset:  Left Click  the Reset button (the circular arrow on the bottom right) to cancel your changes and reset the colour to its default value. This default value is set using the Edit Effect Layer... - see Edit Color Effect Layer below


NotePad.PNG Notes:

DotPoint.JPG Unlike Surveyor Classic, there is no upper limit to the brush  Radius . Brushes of hundreds of metres (even kilometres) in size are possible. However, the program performance will decrease as the brush radius increases. If you are using the brush to set an entire baseboard, or many baseboards, to a specific height then the Marquee Tool would be a better choice.
DotPoint.JPG The  Grade  is defined as vertical rise divided by horizontal distance converted to a percentage figure. So a grade of 100% (the maximum allowed) would mean a slope formed by the height and distance both being the same value (e.g. a height increase of 50m over a distance of 50m). A vertical slope (e.g. a cliff) would have an infinite grade which is currently impossible in Surveyor.
DotPoint.JPG The  Rotation  controls the starting angle for placing a scrapbook or a texture when painting and is often used to avoid pattern repetition. As in Surveyor Classic, holding down the  [  or  ]  keys while painting a texture will continuously change the rotation angle
DotPoint.JPG For TurfFX and Clutter effect layers the minimum brush  Radius  will depend on the configuration settings (asset density, resources used, etc) of the layer that is being painted. If the  Radius  setting is below the minimum for the selected layer then the brush circle will turn red and it will not paint
DotPoint.JPG
Stop.PNG Warning:
Setting extreme values for the  Scale  and the  Radius  when using the  Scrapbook Data Clone Brush  can cause performance issues (i.e. long delays) while the program attempts to scale and clone the scrapbook contents


Tool Options Popups

Skip Down Skip Up   Heading    
BlueDot10x10.png Most of the data entry boxes in the Tool Options Palette have a Popup Menu. Right Click inside a box to bring up its menu


ToolOptionsPopup.png
Tool Popup Common Options for  Radius   Angle   Sensitivity   Rotation   Scale   Intensity 
 Cut  copies and deletes the highlighted value in the data entry box into your Operating System (Windows, MacOS) clipboard
 Copy  copies the highlighted value in the data entry box to your Operating System clipboard
 Paste  copies the value from your Operating System clipboard into the data entry box
 Delete  deletes the highlighted value in the data entry box
 Select All  selects (highlights) the current value in the data entry box


PencilTips.PNG Highlight the value in the text box (use a Left Click and Drag over the data entry or Left Click the  Select All  option first) before choosing the  Cut ,  Copy  or  Delete  options above


ToolOptionsPopupHeight.png
Tool Popup Options for  Height 
All of the Tool Popup Common Options above plus ...
 Get Height from Selection  copies the Height value of the Selected Object and places it into the data entry box
 Get Height at Compass  copies the Height value of the Compass Rose and places it into the data entry box. This is the Focus z value from the Info Palette
 Set Height to Selection  applies the Height value to the Selected Object


ToolOptionsPopupGrade.png
Tool Popup Options for  Grade 
All of the Tool Popup Common Options above plus ...
 Get Grade from Selection  copies the Grade value of the Selected Object and places it into the data entry box
 Set Grade to Selection  applies the Grade value to the Selected Object


NotePad.PNG

The Grade setting only applies to Spline Objects, Ground Heights (Grade) and Water Effect Layers


ToolOptionsPopupCondition.png
Tool Popup Options for  Condition 
All of the Tool Popup Common Options above plus ...
 Get Condition from Selection  copies the Condition value of the Selected Track Spline and places it into the data entry box
 Set Condition to Selection  applies the Condition value to the Selected Track Spline


NotePad.PNG

The Condition setting only applies to Track Spline Objects


Tool Options Active Controls

Skip Down Skip Up   Heading    
BlueDot10x10.png Different Tool Palette and Brush Type selections will activate different option controls


Some examples of when the controls will become active are:-

Ablue.png If a Brush Tool is selected then the exact controls that will be active will vary between the different brushes and brush actions. For example, selecting the  Ground Height Brush  and the  Set Height  brush action will active the following Tool Options.
BrushToolsHeightSet S20.png
 Radius  the brush radius (metres)
Range:  5m and above for 5m and 10m grid resolutions
0.12m and above for HD Terrain (available in Trainz Plus only)
 Height  the exact height, in metres, that the ground will be raised (or lowered) to
Range:  -3000m to +3000m
 Sensitivity  the speed at which the ground height will be changed
Range:  1% (very slowly) to
100% (very quickly)
PencilTips.PNG On the right of each data entry box is a pair of Up/Down arrow controls. Left Click and Drag up or down on these to adjust the value in smaller increments


Bblue.png If a Track Spline Object is selected with the Free Move Tool or the Fine Adjustment Tool then the following Tool Options will become active.
PlacementSplineTools S20.png
 Grade  the track gradient. A positive grade will set the 2nd endpoint higher than the 1st. A negative grade will set the 2nd endpoint lower than the 1st.
Range:  0% = flat ("Plateau" in Classic) to
±100% = steep (but not vertical)
 Condition  the track condition of each track segment
Range:  1% (terrible track condition) to

50% (average track condition) to
100% (perfect track condition)

PencilTips.PNG
DotPoint.JPG Use the Free Move Tool or the Fine Adjustment Tool to select multiple track segments and set their track condition simultaneously
DotPoint.JPG The Track Condition can also be set for each individal track segment in its Context Menu  Edit Properties  option
DotPoint.JPG On the right of each data entry box is a pair of Up/Down arrow controls. Left Click and Drag up or down on these to adjust the value in smaller increments


Cblue.png If the Scrapbook Data Brush is selected to paint the current Scrapbook into the Trainz World then certain controls that will affect the painting of the Scrapbook will, depending on the brush action selected, become active.
 Scrapbook Brush 
Brush options
 Scrapbook Clone 
Clone options
 Radius  the brush radius (metres)
Range:  5m and above for 5m and 10m grid resolutions
0.12m and above for HD Terrain (available in Trainz Plus only)
 Sensitivity  if the  Ground Height  option has been enabled in the Scrapbook Palette filter settings, then this will set the rate or speed at which the ground height will change
Range:  1% (very slowly) to
100% (very quickly)
 Rotation  the starting angle (or orientation) of the scrapbook
Range:  to ±360° (larger angles can be entered)
 Scale  the scaling factor as a % used by the  Scrapbook Clone  action
Range:  0.01% = smallest to

100% = full size to

>100% larger than full size
 Shape  the physical shape of the scrapbook brush
Options:  BrushToolsScrapShapes S20.png  Circle  and  Square  will set the brush to the selected shape with the  Radius  setting the brush size
   Natural  will set the brush to the same shape as the Marquee that created the scrapbook, which may be rectangular. The  Radius  setting will scale the brush size
PencilTips.PNG On the right of each data entry box is a pair of Up/Down arrow controls. Left Click and Drag up or down on these to adjust the value in smaller increments


Stop.PNG Warning:
Setting both a large  Radius  and a small  Scale  will cause performance issues


LinkWiki.PNG More examples and more detailed descriptions of the Tool Options Palette Active Controls can be found on the Trainz Wiki at:-
How to Use S20 Tools: The Brush Tool


The Assets Palette

Skip Down Skip Up Top Next Up Next Down Bottom
This is a  Surveyor Only  palette


BlueDot10x10.png The Assets Palette provides lists of assets that can be used with the Placement Tool, Free Move Tool, Fine Adjustment Tool, Marquee Tool and the Eyedropper Tool.
BlueDot10x10.png The Filter Palette provides the tools used to narrow down the lists provided by the Assets Palette.


PalettesIcon S20.png If the Assets Palette and the Filter Palette are not visible on the screen then refer to PageLink.PNG Hiding and Showing Palettes and Windows at the top of this document.
NotePad.PNG From Trainz Plus and TRS22PE SP4 build number 126273 (July 2024) and later the filter functions that were originally in the Assets Palette have been moved to the new Filter Palette. To use the filters ensure that the Filter Palette is visible on the screen


PencilTips.PNG When using the Eyedropper - either the Eyedropper Tool (press  R ) or the Eyedropper Icon (press and hold down the  Alt  key) - the Filter Palette is used to restrict the eyedropper to only "seeing" and selecting certain objects or types of objects.


Using the Assets Palette

Skip Down Skip Up   Heading    
When used by itself, the Assets Palette will be restricted to showing the list of assets for the asset type currently selected in the Filter Palette, regardless of whether the Filter Palette is visible or not. The default asset type shown in the Assets Palette for a displayed, or minimised, unedited Filter Palette will be Ground Textures. However, if the Filter Palette is closed ( Left Click  on its menu bar  x  icon) then the Assets Palette will default to displaying the list of ALL installed assets


AssetsPaletteNew S20.png
At the top of the palette is the Search Box is where you can enter text, such as the name or part of the name of an asset. UPPER/lower case is not important. The search will return all assets that contain the entered text in their names or descriptions.
PencilTips.PNG The Search Box will also accept a list of <kuid> codes separated by commas that can be created by Content Manager.
Steps: To use <kuid> codes in the Search box:-
DotPoint1.JPG In Content Manager select each of the the assets to be included in the search
DotPoint2.JPG  Right Click  on one of the assets and select the  List Assets in New Window  option
DotPoint3.JPG In Content Manager  Left Click  inside the Asset KUID list of the new window and press  Ctrl  +  A  to highlight all the asset <kuid> codes and then press  Ctrl  +  C  to copy them into your system clipboard
DotPoint4.JPG Back in Surveyor  Left Click  inside the Assets Palette  Search  box and press  Ctrl  +  V  to paste the <kuid> codes
Only those assets in the <kuid> codes list that match the current Filter Palette settings will be shown in the asset list.


AssetsPaletteNewPBRAsphalt S20.png  
AssetsPaletteNewKUID S20.png  
NotePad.PNG In each case the search results shown in the Assets Palette will be taken from the list already created by the filter set in the Filter Palette. In the examples shown on the left this starting list is the Ground Textures.

To change the starting list you must change the filter in the Filter Palette


Steps: To Select an asset from the List View to be placed in your Trainz World:-
DotPoint1.JPG Left Click on its name in the list
DotPoint.JPG the asset name will be highlighted with a  Light Grey  background
DotPoint.JPG the correct Tool or Brush Target in the Tools Palette will be automatically selected
DotPoint.JPG you can then immediately place or paint the asset in your Trainz World
PencilTips.PNG
More than one asset can be selected (see Note below)
DotPoint.JPG To select multiple assets in the list use  Shift  +  Left Click  or  Ctrl  +  Left Click 
DotPoint.JPG To select the entire list select one asset first then use  Ctrl  +  A 
NotePad.PNG Selecting multiple assets will not allow you to place all those assets in your Trainz World with a single click. Only the first selected asset will be added.
The reasons for selecting multiple assets would be to add them all to a Picklist, or to your OS clipboard, or to display them in a Content Manager window


Each asset in the list has a Popup Menu. Right Click on an asset to open its menu. You can also select multiple assets as described above and then Right Click on any of the selected assets to open the common popup menu.
The options that are available are:-
 Copy  to copy the details (<kuid> code and name) of the selected asset or assets into your system clipboard
 List Assets in New Window  will open a Content Manager window to display the details of the selected asset or assets
 Add to Picklist >  you will be asked to select an existing Picklist or create a new one. The selected asset or assets will be added to that Picklist

If the list you have opened is a Picklist then the last option shown will be:-

 Remove from Picklist  the selected asset or assets will be removed from the Picklist. See the Known Issue note on the right.
Bug.png Known Issue:
There is a bug that greys out the  Remove from Picklist  option so it cannot be selected.
Workarounds: Two alternative solutions are available:-
  1. Use Content Manager to remove assets from a Picklist
  2. Use the working  Remove from Picklist  option in the Filter Palette - see PageLink.PNG The Filter Palette for the details


PencilTips.PNG To get a better view or more details about an asset, choose one of the following:-
Options:
Ablue.png Double Left Click on an asset name to open its Asset Properties window, OR
Bblue.png Open the Asset Preview Palette and then Left Click on an asset name in the Assets Palette. This will create a rotating image of the asset in the Preview Palette. The Preview Palette can be resized.
Cblue.png Left Click on the Thumbnail icon AssetsPaletteListToggleViewIcon S20.png at the end of the  Name Search  box. See PageLink.PNG Thumbnail View below for more details.


Expanding the Assets List View

Skip Down Skip Up   Heading    
The Assets Palette can be expanded to provide more information about each listed asset. See PageLink.PNG Docking and Undocking Palettes and Resizing Palettes at the top of this document.


AssetsPaletteListExtended S20.png

Steps: To move and resize columns:-
DotPoint1.JPG To Move: Left Click and Drag the column heading left or right to a new position
DotPoint2.JPG To Resize: Left Click and Drag the dividing line between two column headings left or right to reduce or increase the column width
 
Steps: To sort the data in a column:-
DotPoint1.JPG resize the undocked Assets Palette by dragging its right edge further out to the right. This will reveal additional columns of data in an identical display to what you would see in Content Manager
DotPoint2.JPG to sort the data in a column, Left Click on the column heading. Each Left Click will cycle through different sorting options

Just like in Content Manager, additional columns can be added, removed, resized and moved to a different position.

Steps: To add new columns
DotPoint1.JPG Right Click on a column heading where you want to insert a new column
AssetsPaletteListAddColumn S20.png
DotPoint2.JPG Select the option  Insert Column  and then select the column to be added
Steps: To remove a column
DotPoint1.JPG Right Click on the column heading and select the option  Remove Column 


NotePad.PNG Notes:

DotPoint.JPG If the palette is docked to another it will be resized to the same width as the palette it is docked to.
DotPoint.JPG You can hide, and even close, the palette and its new size and position will be restored when it is made visible again. Left Click on its Minimise  -  or Close  x  icon on its top menu bar, and then restore it to the screen using the SurveyorWindowIcon.png Window Menu. See PageLink.PNG Minimise Maximise Close at the top of this document.


Thumbnail View

Skip Down Skip Up   Heading    
As an alternative to the list view of assets there is a thumbnail view option. This works best when the Assets Palette has been undocked. See PageLink.PNG Docking and Undocking Palettes at the top of this document.


AssetsPaletteNewPBRAsphaltThumbnail S20.png  
Steps: To switch to the Thumbnail View:-
DotPoint1.JPG undock and resize the Assets Palette as described in PageLink.PNG Docking and Undocking Palettes and Resizing Palettes above.
DotPoint2.JPG Left Click the Thumbnail icon AssetsPaletteListToggleViewIcon S20.png at the end of the  Name Search  box
Steps: To switch back to the List View:-
DotPoint1.JPG Left Click the Thumbnail icon AssetsPaletteListToggleViewIcon S20.png at the end of the  Name Search  box


PencilTips.PNG If the Filter Palette is closed then the Assets Palette will default to displaying the list of ALL installed assets


Steps: To Select an asset from the Thumbnail View to be placed in your Trainz World:-
DotPoint1.JPG Left Click on its thumbnail
DotPoint.JPG the thumbnail will be surrounded by a blue border or it will have a blue background
DotPoint.JPG the correct Tool or Brush Target in the Tools Palette will be automatically selected
DotPoint.JPG you can then immediately place or paint the asset in your Trainz World


PencilTips.PNG To get a better view or more details about an asset, choose one of the following:-
Options:
Ablue.png Double Left Click on an asset name to open its Asset Properties window, OR
Bblue.png Open the Asset Preview Palette and then Left Click on an asset name in the Assets Palette. This will create a rotating image of the asset in the Preview Palette. The Preview Palette can be resized.


NotePad.PNG Notes:

DotPoint.JPG If the assets in the list are constructed from 3D meshes then their thumbnail views will be built from the meshes and their textures. If they are ground textures then the actual textures will be shown. The thumbnail.jpg image that should be supplied with each asset is not be used - the exceptions are assets with no meshes and no textures. This overcomes common problems caused by missing, generic, incorrect or confusing thumbnails that give you no useful information about each asset. Some actual examples from the DLS:-
Scenery Mesh Asset
AssetsPaletteRoadsignImages S20.png AssetsPaletteRoadsignThumbnail S20.png
Supplied Thumbnail Palette Displayed Thumbnail
 
Ground Texture Asset
AssetsPaletteGroundThumbnailJPG S20.png AssetsPaletteGroundThumbnailAsset S20.png
Supplied Thumbnail Palette Displayed Thumbnail
DotPoint.JPG If the asset is animated then its animation will play in the thumbnail


Picklists and Search Filters

Skip Down Skip Up   Heading    
BlueDot10x10.png the Assets Palette also manages your saved Picklists and gives you access to your saved Search Filters


 Using Search Filters and Picklists 

FilterPaletteOpenSelections S20.png
Steps: To access your Picklists and Search Filters
DotPoint1.JPG In the Filter Palette  Left Click  on the Asset Type data box (showing Ground Textures in the image on the left) or on the double arrowhead as shown on its right to open up its lists of filters.


The currently selected Asset Type (e.g. Ground Textures), Search Filter or Picklist will have a BulletTick.png in front of its name in the drop down list.


FilterListSurveyorColourCoded S20.png
The drop down list shows all the:-
DotPoint.JPG Asset Types in the top section will list all the installed assets sorted by their Asset Type. These Types are built into Trainz and cannot be altered
DotPointBlueSquare.png Search Filters in the middle section will list all the Search Filters, both built in (such as Faulty and Open for Editing) and those that you have created and saved yourself
DotPointGreenSquare.png Picklists in the lower section will list all the Picklist, both built in (the Default Picklist) and those that you have created and saved yourself
DotPoint2.JPG to select and open a specific Asset Type, Search Filter or Picklist  Left Click  on its name in the list
DotPoint3.JPG the Assets Palette list will then show all those assets that match the selected Asset Type, Search Filter or Picklist


FilterNamesOz S20.png For example, selecting the saved Picklist Oz Houses will list all the assets that have been added to that particular Picklist. Likewise, selecting the saved Search Filter Updates Available will display all the assets that return a positive match for that filter


PencilTips.PNG The assets found by the Search Filter or in the Picklist can be narrowed down further by entering a text string in the Search box. For example typing house (UPPER/lower case is not important) will restrict the list to only showing those assets containing the text string "house" in their names or descriptions
At the bottom of the drop down list (you may have to scroll down to see it) is an option  Edit Filters and Picklists... . This option will allow you to select and edit a Picklist or Search Filter.


NotePad.PNG For more detailed instructions on creating and editing Picklists and Search Filters in Surveyor 2.0 and Content Manager see the Trainz Wiki Page WikiLink.PNG How to Manage Filters and Picklists


 Creating and Editing a Picklist 

BlueDot10x10.png Picklists can be created and edited directly from the Assets Palette
BlueDot10x10.png There are other more limited editing options available in the Assets Palette  Edit Filters and Picklists...  option


To create a new picklist, or add assets to an existing picklist, the first step is to select the asset or assets to be added.

Steps: To Create a new Picklist or to add assets to an existing Picklist:-
DotPoint1.JPG In the Filter Palette select the type of asset that will be added to the new or existing Picklist
DotPoint2.JPG In the Assets Palette select the asset or assets to be added.
  To select just a single asset:-
 
DotPoint.JPG  Right Click  on the asset name
PencilTips.PNG The Thumbnail icon AssetsPaletteListToggleViewIcon S20.png next to the Search box will toggle the list of assets between text and thumbnail views. But the thumbnail view works best when the Assets Palette is undocked and resized. See PageLink.PNG Thumbnail View above for more information
  To select multiple assets:-
 
DotPoint.JPG  Shift  +  Left Click  on the first and last asset names in a sequence of multiple assets to be added. Then  Right Click  on one of the selected assets, OR
DotPoint.JPG  Ctrl  +  Left Click  on the names of any number of individual assets to be added. Then  Right Click  on one of the selected assets


DotPoint3.JPG A popup menu will appear.  Left Click  on the option  Add to Picklist > . A new popup menu will appear


PickListFromAssets S20.png The menu will list the options Default Picklist (which may be empty), New Picklist... and any Picklists that you have created (Rail Yard Clutter in the example image shown).
DotPoint4.JPG To Add the selected asset or assets to an existing Picklist,  Left Click  on the name of the Picklist in the new popup menu OR
  To Create a New Picklist and add the selected asset or assets to that list,  Left Click  on the option  New Picklist... . You will be asked to enter a name for the new Picklist


 Editing a Search Filter 

BlueDot10x10.png Search Filters can be created and edited using the Assets Palette  Edit Filters and Picklists...  option


A summary of the editing process for Search Filters is provided here. For the full details see the Trainz Wiki Page WikiLink.PNG How to Manage Filters and Picklists


Steps: To edit a Search Filter:-
DotPoint1.JPG  Left Click  on the Filter Palette Asset Type drop down menu to open the list of Asset Types, Search Filters and Picklists
DotPoint2.JPG Scroll down the list to locate and  Left Click  on the  Edit Filters and Picklists...  option. This will open a window listing all the installed and saved Search Filters and Picklists
PencilTips.PNG  Left Click  on the column heading and select Insert Column to add a new column that will identify the list type - Picklist or Search Filter
DotPoint3.JPG  Right Click  on a Search Filter to be edited and select,  Left Click  on, the  Edit  option
This will display Data Fields and Data Values for the selected Search Filter
FilterEditMenu03 S20.png Filter lines can be:-
DotPoint.JPG Added
DotPoint.JPG Deleted
DotPoint.JPG Changed
A  Left Click  on the Save button will save the edited filter using the same name.


The Filter Palette

Skip Down Skip Up Top Next Up Next Down Bottom
This is a  Surveyor Only  palette


PalettesIcon S20.png If the Filter Palette and the Assets Palette are not visible on the screen then refer to PageLink.PNG Hiding and Showing Palettes and Windows at the top of this document. The Filter Palette and Assets Palette are used together.


The Filter Palette made its appearence in Trainz in the July 2024 quarterly update to Trainz Plus and in TRS22PE SP4.

This palette is used to:-
BlueDot10x10.png search the installed assets to provide asset lists for the tools in the Tools Palette
BlueDot10x10.png in Trainz Plus bulk replace objects in your Trainz World with assets selected from the Assets Palette


FilterPalette S20.png

The Filter Palette has three parts. Each is explained in the following sections:-

DotPoint.JPG Filter Actions controls how the filter is applied
DotPoint.JPG Filter Selections sets the search parameters
DotPoint.JPG Filter Toggles identifies the objects that will be replaced with the Bulk Replace Assets Tool
All three, particularly the last two, communicate with the Assets Palette


Filter Actions

Skip Down Skip Up        
BlueDot10x10.png The Filter Actions control how the Filter Selections affect the visibility and accessability of objects in your Trainz World


The Filter Actions drop down list controls how the filters are applied. To open the list  Left Click  on the drop down box or on the double arrows on its right.
FilterPaletteOpenActions S20.png The top drop down box will provide four actions:-
BulletTick.png Filter Disabled
BulletTick.png Filter List
BulletTick.png Filter Selection
BulletTick.png Filter Visibility


FilterPaletteActions S20.png


These actions will affect the display and selection of objects in your Trainz World
Filter Actions:
 Filter Disabled  this action disables the Filter Palette so that it has no filtering effect on the Assets Palette which will then display All (Installed) Content including those assets that are Obsolete or Disabled. Its main use is in the Bulk Replace Assets Tool (available in  Trainz Plus only) but it can also be used to temporarily switch off the filters without having to delete them
 Filter List  this action is the default setting for the Filter Palette and displays, in both the Filter Palette and the Assets Palette, all the installed assets that match any search entered using the Filter Selection Options (the Asset Type icons and the Drop Down List of asset types, search filters and picklists). It has no effect on the operation of the tools in the Tools Palette or on the objects displayed on the screen in your Trainz World
 Filter Selection  this action will restrict the tools in the Tools Palette to only working on those objects that are in the Assets Palette filtered list. Objects that are not in the filtered list will still be visible in your Trainz World but cannot be selected
 Filter Visibility  this action will hide all objects in your Trainz World that are not in the Assets Palette filtered list which also means that they cannot be selected. The only exceptions are Ground Textures and Effect Layers which will be visible but, unless they are also in the filtered list, cannot selected.
For examples of how the Filter Actions are used to restrict the selection and/or visibility of objects in a Trainz World see the Trainz Wiki Page WikiLink.PNG How to Use S20 Tools - Narrowing the Search


Filter Selections

Skip Down Skip Up SkipMinorDown.pngSkipMinorBlank.png Heading    
BlueDot10x10.png The Filter Selections identify the type of assets that will be listed by the filter


The Filter Selections are activated by either a Left Click on a icon that represents a type of asset (e.g. Trains), or by selecting the type of asset from a drop down list. The drop down box also provides additional selections that are not available in the icons.


Options: Choose from:-

Ablue.png Left Click on an asset selection icon
Filter Icons
GroundTextureFilter S20.png all ground textures
SceneryMeshFilter S20.png all non-spline scenery assets
ScenerySplineFilter S20.png all spline scenery assets
TrackSplineFilter S20.png all track spline assets
TrackMeshFilter S20.png all track (non spline) assets (signals, etc)
TrainFilter S20.png all rolling stock assets
PresetFilter S20.png all Effect Layer presets
OR
Bblue.png Left Click the Content Drop-down Box

Filter List
Then select the asset type you want

FilterSelectSceneryObject S20.png
NotePad.PNG Notes:

The All Content option at the top of the menu will show:-
DotPoint.JPG ALL the installed assets (in white), and
DotPoint.JPG ALL the installed Obsolete or Disabled assets (in grey)
If you are going to be using this option then it is recommended that you undock and enlarge the Assets Palette to show the Status column.
See PageLink.PNG Expanding the Assets List View for the details


PencilTips.PNG If you need to display more than one type of asset (e.g. track splines and track objects) in the same list then make a Picklist.
See the Trainz Wiki Page WikiLink.PNG How to Manage Filters and Picklists for the details


FilterPaletteAssetsEnabled S20.png Below the icons and selection box the Filter Toggle will report the number of assets that will be present in the list returned by the filter. In this case, selecting Scenery Splines has returned a list containing 4374 assets, but the exact figure will vary between users and installs.


Using the Filter and Assets Palettes

    SkipMinorDown.pngSkipMinorUp.png      
BlueDot10x10.png The Filter Palette is always used with the Assets Palette


PencilTips.PNG The most useful way to use filters to locate assets is to dock the Filter Palette and the Assets Palette together. Once docked both the palettes can be resized if needed - resizing one will also resize the other. See the sections on PageLink.PNG Docking Palettes and Resizing Palettes for more information.


FilterAssetsPaletteScenerySplines S20.png The image on the left shows the docked Filter and Assets Palettes displaying the filtered list for a Scenery Splines filter.

Using the Asset Filter search text box, as described in the PageLink.PNG Assets Palette section above, the list can be cut down or "refined" by entering a search term.

In the example shown below, the search has been refined by adding the text "fence" (UPPER/lower case is not important). The list will now only contain assets that have the text "fence" in their names or descriptions.

FilterAssetsPaletteSceneryFenceSplines S20.png


Steps: To Select an asset from the list to be placed in your Trainz World:-
DotPoint1.JPG Left Click on its name in the list
DotPoint.JPG the asset name will be highlighted with a  Light Grey  background
DotPoint.JPG the correct Tool or Brush Target in the Tools Palette will be automatically selected
DotPoint.JPG you can then immediately place or paint the asset in your Trainz World


PencilTips.PNG Search Options:
DotPoint.JPG The Search Box will also accept a list of <kuid> codes separated by commas. This list can be created by Content Manager by selecting the assets then the  List Assets in New Window  option. Copy the assets list from Content Manager into your system clipboard, then paste it into the Assets Palette Search Box. Only those assets in the <kuid> codes that match the current Filter Selection will be shown in the asset list.
DotPoint.JPG You can enter a search text without selecting an asset type. In the Selection Drop Down box select the option  All Content . The filter will search through all the assets types to find matches with your entered search.


Filter Toggles

Skip Down Skip Up   Heading    
BlueDot10x10.png The Filter Toggles are used to identify object to be replaced using the Bulk Asset Replace Tool found in Trainz Plus
BlueDot10x10.png They can be used to further reduce the size of the Assets Filtered List


In the Filter Palette open the Filter Toggles by a  Left Click  on either the small arrowhead on the left of the Enabled box or on the "Enabled" message itself.

FilterPaletteClickToggleListOpen S20.png

This will open the Filter Palette Toggle List of assets and a separate  Search  text box. The Toggle List list is identical to the list shown in the Assets Palette except that each item can be toggled or switched ON or OFF by the check mark on its left.


FilterPaletteToggleListOpen S20.png
Once it has been opened:-
DotPoint.JPG the palette can be Expanded to reveal additional columns. The columns can be moved, resized, deleted and extra columns added. See PageLink.PNG Expanding the Assets List View for the details
DotPoint.JPG each column can be Sorted by a Left Click on a column heading. Each Left Click will cycle through different sorting options


The Filter Palette and the Assets Palette are normally linked so that the list of toggled assets in the Filter Palette is duplicated in the Assets Palette.
If an asset is:-

  • toggled OFF in the Filter Palette it will disappear from the list in the Assets Palette
  • If it is toggled back ON it will reappear in the Assets Palette list


Items in the Toggle List can be selected (highlighted)
DotPoint.JPG To select a single item in the list  Left Click  on its name
DotPoint.JPG To select multiple items in the list use  Shift  +  Left Click  or  Ctrl  +  Left Click 
DotPoint.JPG To select the entire list  Left Click  on one of the asset names then press the  Ctrl  +  A  keys


Each asset in the list has a:-
Toggle Button that can be toggled ON or OFF for the Bulk Replace Assets Tool.
DotPoint.JPG You can toggle an individual asset, ON/OFF by a Left Click on its toggle icon
DotPoint.JPG You can toggle a group of selected assets ON/OFF by a Left Click on the toggle icon of any selected asset
Popup Menu Right Click on an asset to open its menu. The available options are:-
 Copy  to copy the details (<kuid> code and name) of the selected asset or assets into your system clipboard
 List Assets in New Window  will open a Content Manager window to display the details of the selected asset or assets
 Add to Picklist >  you will be asked to select an existing Picklist or create a new one. The selected asset or assets will be added to that Picklist

If the list you have opened is a Picklist then the last option shown will be:-

 Remove from Picklist  the selected asset or assets will be removed from the Picklist


Bulk Replace Asset Tool (Trainz Plus Only)

Skip Down Skip Up SkipMinorDown.pngSkipMinorBlank.png Heading    
BlueDot10x10.png This tool is available in Trainz Plus only
BlueDot10x10.png It will replace ALL seleted objects with a single selected replacement asset
BlueDot10x10.png All objects, and its replacement, must be the same Asset Type
BlueDot10x10.png The replacement will occur throughout the entire route


This tool is only available in Trainz Plus
In TRS22PE use the Surveyor Classic  Bulk Asset Update/Replace  option


This tool uses the Filter Toggles described above to identify the object or objects in your Trainz World that will be replaced by a single selected asset.

The process involves following a set sequence of steps:-

DotPoint1.JPG Check the Compatibility of the objects being replaced and their replacement asset
DotPoint2.JPG Use the toggles to Identify the Objects to be Replaced
DotPoint3.JPG Disable the Filter Action to allow the replacement asset to be selected
DotPoint4.JPG Identify the Replacement Asset using the Assets Palette
DotPoint5.JPG Perform the Bulk Replace operation


1. Check the Compatibility

    SkipMinorDown.pngSkipMinorUp.png      
You can bulk replace:-
Tick.PNG GroundTextureFilter S20.png one or more different Ground Textures with a single Ground Texture and NOT with any other type of asset
Tick.PNG SceneryMeshFilter S20.png one or more different Scenery Meshes with a single Scenery Mesh and NOT with any other type of asset. None of the meshes can include track‡
Tick.PNG ScenerySplineFilter S20.png one or more different Scenery Splines with a single Scenery Spline and NOT with any other type of asset. None of the splines can include track‡
Tick.PNG TrackSplineFilter S20.png one or more different Track Splines with a single Track Spline and NOT with any other type of asset. Fixed Track assets are NOT track splines
Tick.PNG TrackMeshFilter S20.png one or more different Track Objects with a single Track Object and NOT with any other type of asset
this includes fixed assets and splines with built-in track (e.g. industries, bridges, tunnels)
You cannot bulk replace:-
Cross.PNG TrainFilter S20.png Rolling Stock (locomotives, wagons)
Cross.PNG PresetFilter S20.png Presets (effect layers)


2. Identify the Objects to be Replaced

    SkipMinorDown.pngSkipMinorUp.png      
PencilTips.PNG Before you proceed any further it would be a good idea to either know the exact name of the asset you will be using as the replacement or have it visible in the Surveyor Trainz World View to identify it with the Eyedropper


The Filter Selection and Filter Toggle tools are used to identify the object or objects in the route that you want to replace.

Steps: To Find the Type of object to be Replaced:-
DotPoint1.JPG In the Filter Palette set the Filter Action to  Filter List 
DotPoint2.JPG Use the Filter Selections (the row of icons or the drop down list) to select the type of object that you want to replace remembering the Compatibility Rules listed above. All objects must be of the same type (e.g. all scenery meshes or all track objects) and not a mixture such as scenery meshes and track objects.


Use the Toggles and, if applicable, the Filter Toggle  Search  box to narrow down the list.
Steps: To Refine the Search:-
DotPoint1.JPG In the Filter Palette open the  Filter Toggles  by a Left Click on the arrowhead or on the "№ of assets enabled" counter
DotPoint2.JPG Optional: In the Filter Palette enter a search term in the  Search  box located just below the asset enabled count. This will narrow the list of toggled items. The rules for entering a search are exactly the same as used in the Assets Palette  Search  box
PencilTips.PNG If there are many assets to be selected or the list of possible assets is still very long then creating a Picklist with the required assets may be a better option
DotPoint3.JPG In the Toggle List toggle ON all the objects that you want to be replaced and toggle OFF those that you do not want to replace
NotePad.PNG See the Example below for tips on how to select blocks of assets to be toggled and how to quickly set multiple toggles ON or OFF simultaneously
FilterPaletteSearchBox S20.png

FilterPaletteToggleList S20.png


 Example:  Preparing to bulk replace multiple narrow gauge tracks with a different track of the same gauge
DotPoint1.JPG Set the Filter Selection to  Track 


FilterPaletteBulkReplaceExample 1 S20.png
In this case there are 781 assets of type Track installed so the search will need to be refined further

DotPoint2.JPG Refine the search


The track splines to be replaced all have the text NG42 in their names so this is the obvious search text to use. NG42 has been entered into the Filter Palette  Search  box, not the one in the Assets Palette, to locate all assets that use that text in their names or descriptions.
FilterPaletteBulkReplaceExample 2 S20.png


The 781 assets have now been reduced to just 18.

DotPoint3.JPG Toggle the assets


If your search returns only a few assets then it may be quicker to individually toggle OFF the assets you don't want replaced. Otherwise the following method may be suitable:-

Steps:
DotPoint1Blue.png In the Toggle List select one of the assets
DotPoint2Blue.png Press  Ctrl  +  A  to highlight them all
DotPoint3Blue.png Left Click on the Toggle icon of any one of the assets to set them all to OFF


FilterPaletteBulkReplaceExample 4 S20.png

DotPoint4Blue.png Select the assets to be replaced.

Start with a  Left Click  on the name of the first asset to be replaced. This will also clear the highlighting on all the other assets.

If multiple assets are to be selected then:-
DotPoint.JPG if all the assets are in a single block then use  Shift  +  Left Click  on the name of the last asset of the group
DotPoint.JPG if the assets are scattered throughout the list then use  Ctrl  +  Left Click  on the name of each additional asset
FilterPaletteBulkReplaceExample 6 S20.png
DotPoint5Blue.png Left Click on the Toggle icon of any one of the selected assets to set them all to ON
FilterPaletteBulkReplaceExample 7 S20.png


This  Example  continues in the next section.


3. Disable the Filter Action

    SkipMinorDown.pngSkipMinorUp.png      

In the Filter Palette select  Filter Disabled  from the Filter Actions drop down menu.

This will break the connection between the Filter Palette and the Assets Palette. The Assets Palette will be set to show  All Content 


 Example:  Continued
DotPoint4.JPG Disable the Filter Action

In the Filter Palette Filter Action drop down menu select the first option  Filter Disabled 
FilterPaletteBulkReplaceExample 8 S20.png

This only affects the Assets Palette filtered list which will be reset to display All Content.
FilterPaletteBulkReplaceExample 9 S20.png

Note: The assets shown as greyed out are installed but obsolete, disabled or otherwise unavailable for use.


This  Example  continues in the next section.


4. Identify the Replacement Asset

    SkipMinorDown.pngSkipMinorUp.png      
Only a single asset has to be selected from the Assets Palette and it must be the same type of asset as those selected for replacement.


PencilTips.PNG After you have disabled the Filter Action, there is a quick way to identify the replacement asset if it is already present in your Trainz World
Steps: To quickly identify the replacement asset in your Trainz World:-
DotPoint1.JPG move the mouse pointer onto the object to be selected as the Replacement
DotPoint2.JPG hold down the  Alt  key and Left Click on the object

This will immediately select the replacement asset in the Assets Palette.


 Example:  Continued
DotPoint5.JPG Select the replacement asset
Options: Choose one of:-
Ablue.png the Eyedropper method described in the Tips above. This will automatically select the asset in the filtered list, OR
Bblue.png In the Assets Palette enter an optional search term in the Assets Palette  Search  box and then  Left Click  on the asset name in the Assets Palette filtered list


In this example a search term is used to find the replacement.
FilterPaletteBulkReplaceExample 10 S20.png


Perform the Bulk Replace Assets operation described in the next section to complete this  Example 


5. Bulk Replace Assets

    SkipMinorDown.pngSkipMinorUp.png      
Stop.PNG WARNING:
The Bulk Replace Assets will occur throughout the ENTIRE route


Steps: To Bulk Replace Assets:-
DotPoint1.JPG In the Assets Palette filtered list Right Click on the replacement asset to open its menu
DotPoint2.JPG Select the last item,  Bulk Replace Filtered Assets 
FilterPaletteBulkReplaceExample 11 S20.png
With the exception of unusually small or simple routes, a progress bar will be shown. For large routes the replacement process may take a few minutes.
FilterPaletteBulkReplaceExample 12 S20.png

NotePad.PNG Notes:

DotPoint.JPG Clicking the  Cancel  button will terminate the replacement process at the point shown by the position of the progress bar. So some, or many, of the replacements will have already been made.
DotPoint.JPG After termination, or after the replacement process has been completed, pressing the  Ctrl  +  Z  keys will Undo all the replacements


The Layers Palette

Skip Down Skip Up Top Next Up Next Down Bottom
This is a  Surveyor Only  palette


PalettesIcon S20.png If the Layers Palette is not visible on the screen then refer to PageLink.PNG Hiding and Showing Palettes and Windows at the top of this document


BlueDot10x10.png This palette is used to manage layers, both object (route and session) and effect (TurfFX, clutter and water) layers
BlueDot10x10.png It can create, rename, merge, delete, move, hide/show and lock/unlock layers and set the Active Layer
Layers Palette in S20 The Layers Palette will show all the layers in their groups (Effect, Route and Session) plus the Ground Height and Ground Textures special "layers". In the image on the left all the Layer Groups have been minimised (the arrowhead symbol to the left of each group name is pointing to the right).
DotPoint.JPG The  Route Layers Group , along with the Ground Height, Ground Textures and Effect Layers Group, are saved and loaded with the Route
DotPoint.JPG The  Session Layers  group, along with any Session Rules and commodity settings, is saved and loaded with the Session. A Session Layers group, but one without any stored objects and using the Session default settings, will always be present when a Route is loaded without a Session


Lock the Route Layer Group

BlueDot10x10.png All the Route Layers can be locked against accidental alteration.

The Route Layers Group has a open padlock icon next to its name - shown as LayerUnLocked S20.png (unlocked).

Steps: To lock/unlock all the Route Layers:-
DotPoint1.JPG Left Click on the unlocked (open padlock) icon to lock ALL the Route Layers
The icon will change to LayerLocked S20.png (locked)
DotPoint2.JPG Left Click on the locked (closed padlock) icon to unlock ALL the route layers
The icon will change to LayerUnLocked S20.png (unlocked)


Open a Layer Group

Skip Down Skip Up   Heading    

To the left of each group name is a small arrowhead pointing to the right. Left Click on the arrowhead to open up the group.
Layers palette with session layers open The image on the left shows that the Session Layers is open and its individual layers are now displayed. To close or minimise the group Left Click on the arrowhead again.

The image shows that the Session Layers contains 3 individual layers:-

DotPoint.JPG the top layer in the Session Layers group is always named session-layer. It is possible to rename this layer and move it to a new position but those actions are NOT recommended for the session-layer.
DotPoint.JPG likewise, the top layer in the Route Layers Group is always named route-layer. It is also possible to rename this layer and move it to a new position but again those actions are NOT recommended for the route-layer.
DotPoint.JPG there are two additional user created layers in the Session Layers group. They are named Track Markers and Rail Workers - layer names are chosen by the creator and do not necessarily indicate their contents or purpose
DotPoint.JPG the Rail Workers layer is highlighted with  Light Grey  background which means that it has been selected by a Left Click and is now the Active Layer where any newly placed assets will be added


Add a New Layer

BlueDot10x10.png You cannot create new Layer Groups but you can add new layers to a existing group.
Each Layer Group has a LayerAdd S20.png icon next to its name. Left Click on the icon to add and name a new layer to that group. If you are adding a new Effect Layer then you will also have to identify the type of effect - TurfFX, Clutter, Water or (in Trainz Plus only) Color.


Renaming a Layer

Skip Down Skip Up   Heading    
LayerRename S20.png
Steps: To rename a layer:-
DotPoint1.JPG Right Click on a layer name and select  Rename Layer..  from the popup menu. You cannot rename a Layer Group.
DotPoint2.JPG You will be asked to enter a new name for the layer.


PencilTips.PNG While you are free to rename any layers (but not the Layer Group names), it is recommended that you DO NOT rename two specific layers:-

DotPoint.JPG route-layer
DotPoint.JPG session-layer
These layers are used to store critical objects (track and track objects in the case of the route-layer and (optionally) rolling stock in the case of the session-layer). Using these two layer names in every Trainz World can make it easier (and less confusing) to manage those assets. But this is a recommendation only.


Deleting a Layer

Stop.PNG Warning: Deleting a Layer will delete every object that has been assigned to that layer


LayerDelete S20.png
Steps: To delete a layer:-
DotPoint1.JPG Right Click on a layer name and select  Delete Layer  from the popup menu. You cannot select a Layer Group name to be deleted.
You will be given a warning that you are about to delete a layer.
DotPoint2.JPG if you confirm the delete order then the layer and  ALL OF ITS CONTENTS  will be deleted
DotPoint3.JPG depending on the contents of the layer and the size of the Trainz World, the process may take some time. You will be shown a progress bar in a message window during the delete operation
  LayersDelete S20.png
DotPoint4.JPG when the message  Operation complete, layers updated successfully  appears close the message window
The deleted layer and its contents can be restored (after the delete has completed) using the  Ctrl  +  Z  keys


Moving a Layer

Skip Down Skip Up   Heading    
BlueDot10x10.png Layers can be individually moved up and down within the same Layer Group or between the Route Layers Group and the Session Layers Group.


NotePad.PNG Notes:

Stop.PNG Warning: Moving layers between the Session Layers Group and the Route Layers Group will move the contents of those layers from one Layer Group to the other. This will change where the layers and their contents are saved (in the Route or in the Session)
Stop.PNG Warning: Layers containing Track Objects (signals, switches, buffers, track signs, etc) cannot be moved to a position that is above the layer containing the track
DotPoint.JPG there is NO ADVANTAGE in moving a layer within the same Layer Group except if you are preparing for a layer merge operation (see PageLink.PNG Merging a Layer below)
DotPoint.JPG layers cannot be moved into or out of the Effect Layers group
DotPoint.JPG the Ground Height and Texture layers are special "single layer" groups, not groups of layers, and cannot be moved or have other layers added to them


LayersMove1 S20.png
Steps: To move a layer:-
DotPoint1.JPG Left Click and Drag the layer name up or down to its new position. Note: You cannot move a Layer Group.

In the image on the left the Rail Workers layer is being moved up from the Session Layers Group into the Route Layers Group. This will also change where the assets in that layer are saved from the Session to the Route
DotPoint2.JPG release the layer in its new position.
DotPoint3.JPG depending on the contents of the layer and the size of the Trainz World, the process may take some time. You will be shown a progress bar in a message window during the move operation
DotPoint4.JPG at the conclusion, hopefully, you will be shown a message "Operation complete"
LayersMoveSuccess S20.png
NotePad.PNG If instead you get an error message then the most likely cause will be moving a layer containing Track Objects to a position that is above the layer containing the track
DotPoint5.JPG close the progress message window
The move can be reversed (after it has completed) by using the  Ctrl  +  Z  keys


NotePad.PNG Notes: Moving Layers - What Could Possibly Go Wrong? 😀

Well, a great deal it seems. You may get a different message during the layer move operation.
LayersMoveFailure S20.png
The most common error when moving layers is, as the message above states, an invalid hierarchy (Translation: "The layers are in the wrong order"). This occurs when a layer is moved to an incorrect level for the type of objects it contains. It is Track Splines and Track Objects (e.g. signals, switches, speed signs, etc) that cause this problem.
The situation that created the error messages shown above is shown in the image below left:-
LayersMoveFail S20.png
DotPoint.JPG all the track splines, the  parent track  identified in the error messages, are in the route-layer
DotPoint.JPG track objects, in this case signals but any track objects could have been used, have been placed in the Signals layer. This layer, according to the order of the layers from the top to the bottom, is one layer below the route-layer that contains the track where the signals are attached. In this position, physically below the route-layer, the Signals layer and the track objects it contains will cause no problems
DotPoint.JPG the Signals layer is being moved up to a position shown by the dashed red line. The new position, again according to the order of the layers from the top to the bottom, is one layer above the route-layer.
PencilTips.PNG The final error message shown is confusing and, from a commonsense point of view, incorrect.

 Trackside objects cannot be in a layer below the layer their track is in. 
Best Advice: Ignore the word below and replace it with the word above so the message reads
 Trackside objects cannot be in a layer above the layer their track is in. 

Solutions to This Problem:

Options:
Ablue.png use the route-layer to hold the track splines and never move any layer containing track objects, or any layer at all to be absolutely safe, above this layer
PencilTips.PNG Always keep the route-layer containing all the track at the very top of the Route Layers Group
OR
Bblue.png use the route-layer to hold the track splines and ALL track objects
Track objects such as Trackmarks and Triggers that are needed for a Session but not the Route can still be placed in the Session Layers group as long as the layer used remains in the Session Layers group


Merging a Layer

Skip Down Skip Up   Heading    
BlueDot10x10.png A layer can be merged with the layer immediately above it


LayerMerge S20.png
Steps: To merge two layers:-
DotPoint1.JPG Right Click on a layer name in the Layers Palette
DotPoint2.JPG select the  Merge Layer Up  option from the popup menu


NotePad.PNG Notes:

DotPoint.JPG the selected layer will be merged with the layer immediately above it
DotPoint.JPG you may need to move the layer being merged into the correct position before the merge (see Moving a Layer above)
DotPoint.JPG depending on the contents of the layer, the process may take some time. You will be shown a progress bar in a message window during the merge operation
DotPoint.JPG the merged layers and their contents can be restored (after the merge has completed) back into two separate layers by using the  Ctrl  +  Z  keys
DotPoint.JPG layers in the Effect Layers Group cannot be merged. In place of  Merge Layer Up  the popup menu for an Effect Layer will have an  Edit Layer  option


Hiding Layers

BlueDot10x10.png Each individual layer has an Eye icon that controls the state (visible or hidden) of that layer


Left Click on the Eye icon to toggle its state between visible and hidden.
If the Eye icon is:-
LayerEyeOpen S20.png Open then layer is visible in both Surveyor and Driver
LayerEyeClosed S20.png Closed then layer is hidden in both Surveyor and Driver
NotePad.PNG Notes:

DotPoint.JPG Hiding a layer will protect its objects from being selected, deleted and moved
DotPoint.JPG New assets can be added to a hidden layer by confirming the action in a dialogue window which will make the layer visible
DotPoint.JPG Objects can be assigned to a hidden layer using the Info Palette
DotPoint.JPG Hidden layers can still be deleted, renamed, moved and merged


Locking Layers

Skip Down Skip Up   Heading    
BlueDot10x10.png Each individual layer has a Padlock icon that controls the state (locked or unlocked) of that layer
BlueDot10x10.png The Route Layers Group has a Padlock icon that controls the state (locked or unlocked) of ALL the Route Layers


Left Click on the Padlock icon to toggle its state between locked and unlocked
If the Padlock icon is:-
LayerUnLocked S20.png Open then layer is unlocked
LayerLocked S20.png Closed then layer is locked
NotePad.PNG Notes:

DotPoint.JPG Locking a layer will protect its objects from being deleted and moved
DotPoint.JPG New assets can be added to a locked layer by confirming the action in a dialogue window which will unlock the layer
DotPoint.JPG Objects can be assigned to a locked layer using the Info Palette
DotPoint.JPG Locked layers can still be deleted, renamed, moved and merged


Setting the Active Layer

BlueDot10x10.png The Active Layer is the layer where new objects will be automatically added when using the Placement Tool
BlueDot10x10.png Only Route and Session layers can be selected as the Active Layer
The active layer is shown in the palette with its name on a  Light Grey  background. The name of the current Active Layer is also shown in the Layer Palette Title Bar. In the images below the Rail Workers layer from the Session Layers Group is the current Active Layer.
LayersPalette S20 ActiveLayer.png   LayersPalette S20 ActiveLayer2.png
Steps: To set a new Active Layer:-
DotPoint1.JPG Left Click on the layer name.


PencilTips.PNG You can also use the Info Palette to set the layer occupied by a selected object as the Active Layer


Move an Object to Another Layer

Skip Down Skip Up   Heading    
BlueDot10x10.png Use the Info Palette to move objects to another layer.
The Info Palette will show the layer assigned to the currently selected object. An object is selected by using the Free Move Tool (the  S  key) or the Fine Adjustment Tool (the  D  key) found in the Tools Palette.

Info palette

Layer control

Steps: To assign a selected object to a layer:-
DotPoint1.JPG Switch to the Info Palette. If this palette is not visible then refer to PageLink.PNG Hiding and Showing Palettes and Windows at the top of this document
DotPoint2.JPG Left Click on the small arrowhead next to the layer name. This will open the layer properties for the selected object
DotPoint3.JPG Left Click the Layer drop down box to select a new layer for the object
Stop.PNG Warning: You cannot move Track Objects (signals, switches, buffers, track signs, etc) into a layer that is above the layer that contains the track
DotPoint4.JPG if required, Left Click the Binding drop down box to select a new binding layer for the object. See the section PageLink.PNG Assigning Objects to a Binding Layer for more information on Binding objects to layers
DotPoint5.JPG if required, Left Click the  Lock Layer  button to lock the selected layer. If the layer is already locked then this will be shown as an  Unlock Layer  button


PencilTips.PNG Multiple objects from the same layer or from different layers can be selected and assigned to another layer
Stop.PNG Warning: Setting a layer for multiple objects that are in different layers will move ALL those objects to that layer - except those objects that are in locked layers. If this moves any of them from one Layer Group to another (such as from the Route Layers Group to the Session Layers Group) then it will change where those objects are saved (in the Route or in the Session)


The Scrapbook Palette

Skip Down Skip Up Top Next Up Next Down Bottom
This is a  Surveyor Only  palette


PalettesIcon S20.png If the Scrapbook Palette is not visible on the screen then refer to PageLink.PNG Hiding and Showing Palettes and Windows at the top of this document. Some Scrapbook Palette functions will also require the Tool Options Palette.


BlueDot10x10.png This palette manages the Scrapbooks that you have created yourself, installed from other sources (such as the DLS) or came installed with Trainz. It also controls which parts of a scrapbook are pasted or painted into the Trainz World.
NotePad.PNG Notes:

Scrapbooks, when created, will contain:-
DotPoint.JPG Ground Heights
DotPoint.JPG Ground Textures
DotPoint.JPG Effect Layers - if present
DotPoint.JPG Selected Objects - scenery, splines, track, signals, etc
DotPoint.JPG But  NOT Rolling Stock (Trains) 
Ground heights, textures and effect layers are always included in a scrapbook but you can control which scenery objects are added by manually selecting them or using the filter controls in the Assets Palette
NotePad.PNG Notes:

Scrapbooks, when painted or pasted, can contain any combinations of:-
DotPoint.JPG Ground Heights
DotPoint.JPG Ground Textures
DotPoint.JPG Effect Layers
DotPoint.JPG Scenery Objects (Meshes) - individual buildings, trees, signals, etc
DotPoint.JPG Scenery Splines - roads, track, fences, etc
You have options that will control which of these data categories are transferred and how they are transferred from the scrapbook into the Trainz World.


ScrapbookToolsTop S20.png
ScrapbookPinnedIcon S20.pngScrapbookUnPinnedIcon S20.png Left Click on the pin icon to Lock (blue pin) and Unlock (white pin) the scrapbook. Locked scrapbooks are permanent (but can still be deleted). Unlocked scrapbooks will "expire" (self delete) after 5 days
DeleteIcon S20.png Left Click on the delete icon to delete the current scrapbook - most scrapbooks can be deleted (see Notes: Deleting Built-in Scrapbooks below on how to deal with the exceptions to this)
NotePad.PNG Deleting a scrapbook WILL NOT delete any objects that it has painted or pasted into the route. The scrapbook simply identifies the objects, it has no control over them after they have been added to the route.
ScrapbookThumbnail S20.png The thumbnail of the currently displayed scrapbook and the one that will be painted or pasted into the Trainz World
ScrapbookCounter S20.png Identifies the currently displayed scrapbook (the first number) and the total number of stored scrapbooks (the second number)
ScrapbookLeftRight S20.png Left Click on the  <  or  >  to move forwards or backwards through the stored scrapbooks to select the scrapbook that will be added to the Trainz World
  The scrapbook name can be edited. Simply Left Click inside the name box to edit or replace the current name then Left Click on the image OR press the  Enter  key


NotePad.PNG Notes: Deleting Built-in Scrapbooks

Some scrapbooks are installed with Trainz and cannot be deleted. These scrapbooks have the label Prefab at the front of their names (you may have to scroll to the front of the name to see it). While they cannot be deleted they can be "disabled" so that they won't appear as an installed scrapbook. Unlocking them will not cause them to "expire" - after 5 days they will just become locked again.
Steps: To disable built-in scrapbooks
DotPoint1.JPG Open Content Manager and locate the "permanent" scrapbook or scrapbooks.
Search Tips: Name: starts with "Prefab"; Status: is Built-in; Type: is Misc
DotPoint2.JPG Highlight (select) the scrapbook assets individually or as a group
DotPoint3.JPG Open the Content menu and select the  Disable  option
You can reverse this and enable any or all of these scrapbooks at any time if you need them.


Creating a New Scrapbook

Skip Down Skip Up   Heading    
A new scrapbook can be created by either:-
Options:
Ablue.png Individually selecting one or more objects OR
Bblue.png Drawing a Marquee Selection Area around one or more objects and:-
Then choose one of the following:-
Ablue.png press  Ctrl  +  C  to copy the selection to a new scrapbook OR
Bblue.png press  Ctrl  +  X  to cut the selection to a new scrapbook - the object or objects will be removed from the Trainz World OR
Cblue.png open the SurveyorEditIcon.png Surveyor Edit Menu and select  Cut  or  Copy 
NotePad.PNG Notes:

DotPoint.JPG Rolling Stock Objects cannot be added to a Scrapbook but they can be saved as a Consist Asset in the Assets Palette
DotPoint.JPG Regardless of how it is created, the ground height, ground textures and, if present, effect layers under the selected objects will always be added to the scrapbook.


PencilTips.PNG You don't have to use the Marquee Tool to create a new Scrapbook. You can use the Free Move Tool or the Fine Adjustment Tool to select any number of objects and then press  Ctrl  +  C . The selected objects, along with the ground height, ground textures, and any effect layers, will be copied into a new Scrapbook


When a new Scrapbook is created by a  Cut  or  Copy , it will appear in the Scrapbook palette with some basic details.
ScrapbookNew S20.png
The newly created scrapbook will be given:-
DotPoint.JPG a name consisting of the date and time of its creation
DotPoint.JPG a thumbnail
PencilTips.PNG The thumbnail image will be taken using the current camera POV (point of view). Move the cursor position and zoom in/out to get the best possible shot of the Scrapbook objects before giving the  Cut  or  Copy  options
DotPoint.JPG a scrapbook number (it will be inserted as №1 scrapbook)
DotPoint.JPG an expiry date which will be set 5 days after its creation - this will countdown each day until 0 when the new scrapbook will be deleted


NotePad.PNG Notes:

DotPoint.JPG Scrapbooks use very little memory so there is no real limit to how many you can store in the palette but finding the one you want will be more difficult as the list grows longer
DotPoint.JPG Rolling Stock Objects cannot be added to a Scrapbook but they can be saved as a Consist Asset in the Assets Palette


PencilTips.PNG
DotPoint.JPG Most scrapbooks, old and new, can be deleted at any time by a Left Click on the Delete DeleteIcon S20.png icon. See Notes: Deleting Built-in Scrapbooks in the section above for the exceptions
DotPoint.JPG Deleting a Scrapbook after it has been pasted does not delete the objects that it has added to the Trainz World


There are two changes that can be made to the new scrapbook:-
DotPoint.JPG Give it a name - Left Click inside the Name Text Box and type a new name. To set its new name Left Click on the image OR press the  Enter  key
DotPoint.JPG Make it permanent - Left Click the white Pin icon (ScrapbookUnPinnedIcon S20.png) to change it to blue. The scrapbook will no longer expire but it can still be deleted at any time
Pinned scrapbooks are always shown with a blue pin icon ScrapbookPinnedIcon S20.png and the words "pinned, no expiry" displayed next to their scrapbook


PencilTips.PNG The Pinning of any scrapbook can be reversed so that it will expire in 5 days time. Simply Left Click the Blue pin icon to change it back to White.
ScrapbookNewNamedPinned S20.png


BlueDot10x10.png Once a scrapbook has been Pinned it becomes an asset and will appear in Content Manager


ScrapbookEntryCM S20.png
NotePad.PNG Notes:

DotPoint.JPG If a Pinned scrapbook is deleted from the Scrapbook Palette then it will also be deleted as an asset from Content Manager
DotPoint.JPG If a scrapbook asset is deleted (or disabled) in Content Manager then it will also be deleted from the Scrapbook Palette


The scrapbook asset can be saved as a CDP file and uploaded to the DLS.

PencilTips.PNG You can archive your scrapbooks as CDP files to keep the number of installed scrapbooks to a minimum. If an archived scrapbook is needed then you can use the Import Content Files option in Content Manager to add it to the Scrapbook Palette. It can be deleted from the palette later, when no longer needed.


Painting or Pasting a Scrapbook

Skip Down Skip Up   Heading    

Painting a Scrapbook

Existing Scrapbooks can be painted into the Trainz World using the Brush Tool (see the Trainz Wiki page WikiLink.PNG How to Use the Surveyor 2.0 Tools) or Pasted into the Trainz World.
When the  Scrapbook Data  Target is selected in the Brush Tool, a second drop down box will give a choice of two brush Actions that control how the scrapbook will be applied.
The actions are:-
BulletTick.png Scrapbook Brush
BulletTick.png Scrapbook Clone
BrushToolsScrapbookOptions S20.png
Scrapbook Brush Actions:
 Scrapbook Brush  will resize the scrapbook contents to fit the selected brush shape and size

 Scrapbook Clone  will paint the scrapbook sized according to the Tool Options Palette  Scale  setting. See Notes below


NotePad.PNG Notes:

 Scrapbook Brush  will resize the scrapbook contents to fit the selected brush shape and size.
DotPoint.JPG If the brush is small then the scrapbook contents will be compressed closer together
DotPoint.JPG If the brush is large then the contents will be spaced further apart
DotPoint.JPG Every Left Click will paste another complete scrapbook copy
DotPoint.JPG The  Scale  setting in the Tool Options Palette is ignored.
 Scrapbook Clone  will paste the scrapbook sized according to the  Scale  setting (100% = original size)
DotPoint.JPG If the brush is the same size as the scaled scrapbook then a single exact copy will be pasted
DotPoint.JPG If the brush is smaller than the scaled scrapbook in size then only the central part of the scrapbook will be revealed and more will be added when the brush is moved around until the "painted" area covers the same area as the scaled scrapbook. Further painting will clone or tile the scrapbook contents
DotPoint.JPG If the brush is larger than the scaled scrapbook in size then the contents will be cloned or tiled to fill the set brush radius
 
Stop.PNG WARNING:

Take care if setting both the  Scale  and the  Radius . Using extreme values for both, such as a very large brush radius and a very small scale value, can cause performance issues (i.e. long delays) while the program attempts to scale and clone the scrapbook contents


PencilTips.PNG Tool Options Palette Controls
DotPoint.JPG The active scrapbook brush options for each action are shown in the Tool Options Palette with a  Gold  coloured icon next to their names. Those options that have their icon greyed out will be ignored by the selected action, but they can still be edited.
DotPoint.JPG Most of the data entry boxes in the Tool Options Palette have a Popup Menu (Right Click inside the box) that can be used to collect and distribute data - see the Wiki Page WikiLink.PNG How to Use the Surveyor 2.0 Palettes for more details.


Using the Scrapbook Clone Brush

When using the  Scrapbook Clone  brush its  Radius  and  Scale  settings in the  Tool Options Palette  are important.


For Example: Two trees as shown below are captured as a Scrapbook with a size of 2x1 baseboard squares.

ScrapbookCloneBrushOriginal.png
The Brush Tool target is set to Scrapbook Data and its action set to Scrapbook Clone. The effects of different  Radius  and  Scale  settings in the  Tool Options Palette  are shown below.

The Scrapbook Clone brush action will normally show the scaled size and shape of the scrapbook within the brush shape itself, in this case a circle.
ScrapbookCloneBrushCircle01.png

DotPoint1.JPG When the brush radius is the same as the scaled scrapbook size then a single copy of the scrapbook will be painted into the brush.

An exception will be when the scrapbook is not square, as shown, in which case some of the scrapbook may be cloned and painted in the spaces on each side of the marked scrapbook shape but this will depend on the contents of the scrapbook. In this situation it may be better to select the  Natural  brush shape in the  Tool Options Palette .

DotPoint.JPG A single  Left Click  will paint the entire scrapbook within the brush shape.
DotPoint.JPG A  Left Click and Drag  will paint and clone the scrapbook as the mouse moves across the terrain.
ScrapbookCloneBrushNatural01.png

Using the  Natural  brush shape

ScrapbookCloneBrushCircle03.png

DotPoint2.JPG By reducing the brush radius or increasing its scale (or both) then only part of the scrapbook will fit into the brush (no scrapbook brush outline will be shown)

DotPoint.JPG A single  Left Click  will only paint the central part of the scrapbook.
DotPoint.JPG A  Left Click and Drag  will paint and reveal more of the scrapbook as the mouse moves across the terrain.
ScrapbookCloneBrushCircle02.png

DotPoint3.JPG By increasing the brush radius or reducing its scale (or both) then the scrapbook will be cloned so that several copies will be painted into the brush.
These are shown as additional scrapbook shapes within the brush area.

DotPoint.JPG A single  Left Click  will paint multiple copies of the scrapbook within the brush shape as shown below.


ScrapbookCloneBrushCircle02P.png
ScrapbookCloneBrushCircle04.png

DotPoint4.JPG By reducing the brush scale to an extreme (e.g. 1%) then the scrapbook will be cloned multiple times.

DotPoint.JPG A single  Left Click  will fill each individual "micro-grid" inside the brush shape (shown as a "mesh pattern" in the image) with a scaled down but complete copy of the entire scrapbook.


This will almost certainly cause performance issues (long delays, "freezing") as the program attempts to both scale and clone the scrapbook. The end result is shown below.

ScrapbookCloneBrushCircle04P.png


Scrapbook Tool Options Settings

 Scrapbook Brush 
Brush options
 Scrapbook Clone 
Clone options


 Radius  the brush radius (metres) - see Notes: below
Range:  5m and above for 5m and 10m grid resolutions
0.12m and above for HD Terrain (available in Trainz Plus only)
 Sensitivity  if the  Ground Height  option has been enabled in the Scrapbook Palette filter settings, then this will set the rate or speed at which the ground height will change
Range:  1% = slowest to
100% = fastest
 Rotation  initial rotation angle (degrees) - see Notes: below
Range:  0° to ±360° (larger angles can be entered)
 Scale  the scrapbook scaling factor - see Notes: below
Range:  0.01% = smallest to

100% = full size to

>100% larger than full size
 Shape  brush shape
Options:  BrushToolsScrapShapes S20.png  Circle  and  Square  will set the brush to the selected shape with the  Radius  setting the brush size
   Natural  will set the brush to the same shape as the Marquee that created the scrapbook, which may be rectangular. The  Radius  setting will scale the brush size
NotePad.PNG The  Height  setting has no effect on the Scrapbook. This feature is controlled by the Scrapbook Palette Filter  Ground Height  options.
PencilTips.PNG On the right of each data entry box is a pair of Up/Down arrow controls. Left Click and Drag up or down on these to adjust the value in smaller increments


NotePad.PNG Notes:

DotPoint.JPG Unlike Surveyor Classic, there is no upper limit to the brush  Radius . Brushes of hundreds of metres (even kilometres) in size are possible. However, the performance will decrease as the brush radius increases.
DotPoint.JPG The  Rotation  controls the starting angle for pasting the scrapbook objects. In Surveyor Classic you could only rotate and paste in 90° increments. In S20 you can rotate and paste at any angle.
DotPoint.JPG The  Ground Height  options in the Scrapbook Filters control how the terrain heights in the Scrapbook are applied
DotPoint.JPG Take care if setting both the  Scale  and the  Radius . Using extreme values for both, such as a very large brush radius and a very small scale value, can cause performance issues (i.e. long delays) while the program attempts to scale and clone the scrapbook contents


Pasting a Scrapbook

The current Scrapbook can be Pasted into the Trainz World at the cursor (the Compass Rose) position by either:-
Options:
Ablue.png pressing  Ctrl  +  V , OR
Bblue.png selecting  Paste  from the Context Menu of a selected object
In both cases the scrapbook contents will be pasted using the original scrapbooks size. It will be pasted inside a Marquee Selection Area that can be moved and resized. The objects that are pasted and how they are pasted is controlled by the current Scrapbook Palette filter settings


Setting the Scrapbook Filters

PencilTips.PNG You will probably need to undock and resize the Scrapbook palette to make full use of its filters. Refer to PageLink.PNG Hiding and Showing Palettes and Windows at the top of this document for undocking and resizing instructions


Steps: To Open the Scrapbook Filters
DotPoint1.JPG Left Click on the arrowhead next to the  Filters:  label below the scrapbook image to open the scrapbook filters.
These filters control which elements in the scrapbook are added to the Trainz World and how they are added.


ScrapbookToolsBottom S20.png


PencilTips.PNG Sample Filter Settings:-
You can vary the appearance of the scrapbook when added to a route by painting or pasting it with different filter combinations. For example:-
 Ground Height:   None  ground height data will not be pasted and the ground heights already in the target area will be used
 Ground Texture:  Overwrite  textures present in the scrapbook will replace those already in the target area
 Meshes:  Add  scenery objects in the scrapbook will be added to those already in the target area
 Splines:  Add  scenery splines in the scrapbook will be added to those already in the target area
 Effect Layers:   None  effect layers in the scrapbook will not be pasted and any already in the target area will be used
PencilTips.PNG You can also add more variety when painting a Scrapbook by changing its Tool Options Palette  Scale  and  Rotation  settings in combination with different Filter selections (as shown above)
 Scrapbook Painting/Pasting Options 
 What Data to Transfer 
    Ground Height  terrain height(s) used in the scrapbook
    Texture  textures used in the scrapbook
    Meshes  scenery objects (e.g. trees, buildings) used in the scrapbook
    Splines  spline objects used in the scrapbook
    Effect Layers  effect layers (TurfFX, Clutter, Water Layer) used in the scrapbook
 How to Transfer the Data
    None  do not paste/paint this feature
    Add  add this feature to those already present
    Overwrite  use this feature to replace those already present
For the Ground Height:-
    None  do not paste/paint the scrapbook ground heights, use the existing ground heights instead
    Absolute  use the ground heights in the scrapbook to replace the existing ground heights
    Relative  use the difference between the existing ground heights and those used in the scrapbook


The Asset Preview Palette

  Skip Up Top Next Up Next Down Bottom
This is a  Surveyor Only  palette


PalettesIcon S20.png If the Asset Preview Palette is not visible on the screen then refer to PageLink.PNG Hiding and Showing Palettes and Windows at the top of this document.


BlueDot10x10.png This palette gives a rotating 3D view of an asset that has been selected in the Assets Palette. It works with all assets except effect layers.
AssetPreviewPalette S20.png The Asset Preview Palette can be enlarged once it has been undocked.

The current Surveyor 2.0 version has no display or control options and lacks the "zoom" and other features found in the Preview function of Content Manager.


The Content Packages Palette

Skip Down   Top Next Up Next Down Bottom
This is a  Surveyor Only  palette


PalettesIcon S20.png If the Content Packages Palette is not visible on the screen then refer to PageLink.PNG Hiding and Showing Palettes and Windows at the top of this document.


BlueDot10x10.png This palette is mainly intended for content creators, particularly MPS (Multi Player Surveyor) content. It helps manage, prepare and upload to the MPS Server a user created "Content Package". The web site for the TCCP (Trainz Content Creation Program), which is not MPS specific, can be found at info.trainzsimulator.com/tccp


For a more technical description of using the Content Packages Palette see the Trainz Wiki page WikiLink.PNG Content Packages


NotePad.PNG Notes:

DotPoint.JPG The Content Packages Palette is intended for use by  Content Creators , particularly those creating  MPS (Multi Player Surveyor) routes . But it can be used by anyone to help manage installed packages and identify their details and contents.
DotPoint.JPG Its content creation function does not support session data - it is for routes only


The palette lists all the installed Content Packages that have assets available for use. Two special packages are included in the list:-

DotPoint1Blue.png All Installed Content which covers all offline (non-MPS) content, and
DotPoint2Blue.png multiplayersurveyor which includes all the default content on the live MPS Server
S20 PalettePackages.png
Each package in the list can be individually:-
DotPoint.JPG Enabled - which means its assets will be available for use in a new user created package OR
DotPoint.JPG Disabled - which means its assets will NOT be available for use in a new user created package
The top package. All Installed Content is enabled by default but it can be disabled


Steps: To Enable a package:-
DotPoint1.JPG Left Click on the S20 PalettePackagesDisabled.png (Disabled icon) after the name of the package
To Disable a package:-
DotPoint2.JPG Left Click on the S20 PalettePackagesEnabled.png (Enabled icon) after the name of the package


PencilTips.PNG Once you have enabled a package, the  Revert  button will become active. Click it to Disable all enabled packages except the All Installed Content package (which can be disabled manually).


NotePad.PNG Enabling packages in an MPS Route will prompt other users who download the Route to install the same packages


Content Package Details

Skip Down Skip Up   Heading    
S20 PalettePackagesViewDetails.png
Steps: To view the details of a package:-
DotPoint1.JPG Right Click on the package name
DotPoint2.JPG Select the option  View Details 


Some packages will display the message S20 PalettePackagesNoDetails.png

If details are available then something like the following example will be shown.
S20 PalettePackagesDetailWindow.png
Details:
DotPoint.JPG description
DotPoint.JPG status e.g. Purchased (installed), Purchased (update available)
DotPoint.JPG ID code
DotPoint.JPG version - packages that have been Uninstalled will show (not installed)


Options:
S20 PalettePackagesUninstall.png
Left Click to uninstall the package but first read the Warning below
S20 PalettePackagesListFeatured.png
Left Click to open a Content Manager window listing the contents of this package


NotePad.PNG If you  Uninstall  a package it will still appear in the palette content package list until the palette is either Hidden or Closed. Uninstalled packages can be reinstalled later using the Content Store


Stop.PNG Warning:

If you Uninstall a package you will also delete any Packaged assets it contains that may be needed by other assets on your system, such as routes. Packaged assets may (or may not) be found on the DLS - that is a decision made by the creator of the package. They are not Payware but come as part of an installed DLC package. Trainz has no way of knowing if a "packaged" asset it is about to delete had previously been "Installed from the DLS", and could therefore be needed elsewhere, or was only installed with the package.

Uninstalling a package can leave you with some (or many) "Missing dependency" error messages. The remedy is to use Content Manager to first perform a DBR (database repair) and then download the missing dependencies from the DLS BUT it is possible that some of the "missing dependencies" can only be found in the DLC Package you have just uninstalled.


Testing the Packages

Skip Down Skip Up   Heading    
BlueDot10x10.png While you can manually select the packages to be enabled, an easier option may be to let the program perform that task.


With or without any packages enabled, Left Click on the icon showing 3 horizontal bars (bottom right) to open a menu.
S20 PalettePackagesMenu.png

 Automatically Enable Required Packages  attempts to automatically identify and enable the minimum number of packages required by the current route. This only affects the packages listed in the palette and nothing else
 List Assets Unsupported by Enabled Packages  this will either:-
Ablue.png open Content Manager with a window displaying all the assets (objects) used in the current route that are not found in the enabled packages, OR
Bblue.png give the preferred result as shown in the following message
S20 PalettePackagesAllSupported.png


Steps: To identify the assets that are required by the current route that are not supported by the enabled packages:-
DotPoint1.JPG Disable all packages - the  Revert  button will reset any enabled packages leaving only the top package enabled
DotPoint2.JPG Select the menu option  Automatically Enable Required Packages . There may be a delay of a few seconds.
DotPoint3.JPG Select the menu option  List Assets Unsupported by Enabled Packages 


Dealing with Unsupported Assets

Skip Down Skip Up   Heading    
Ablue.png If you have manually selected and enabled the packages you want to include and have been shown a list of assets that are not supported by your selection, then you will need to identify the missing packages (if any) and add them manually.
Steps: To identify and add missing packages:-
DotPoint1.JPG Left Click on the first asset in the Content Manager window
DotPoint2.JPG open the Content Menu and select the option Report Containing Packages
DotPoint3.JPG note the ID of the package. If no ID is shown then the asset does not belong to an installed package (see option Bblue.png below for dealing with these assets)
DotPoint4.JPG repeat for each asset in the Content Manager list
DotPoint5.JPG Enable the identified missing packages. The IDs of all the installed packages can be found by using the steps described in PageLink.PNG Content Package Details above
Bblue.png If you have used the  Automatically Enable Required Packages  option then any unsupported assets found will not belong to any installed packages. In this case you will need to create a new package using TCCP and add them to that package - see the Trainz Wiki Page at WikiLink.PNG TCCP Content Creation. If that is not a suitable option then you will need to either remove the unsupported assets from the route or replace them with supported assets.


Apply and Upload

Skip Down Skip Up   Heading    

Once you have enabled the required packages, you need to prepare the route for uploading to the live MPS Server

Steps:
DotPoint1.JPG Left Click the  Apply  button at the bottom of the palette window.
  You may be shown an error report which will list the assets, by their kuids, that have failed a compliance test. In this case the package creation will not proceed. You will need to identify each asset listed in the report and take any necessary action, such as replacing the assets or removing them from the route.
If there is no error report then you will be shown the following message:-
S20 PalettePackagesApplyConfirm.png
NotePad.PNG Note:

If you have NOT already saved this route then it will be saved using "New Route" as its name. Left Click  Cancel , save using your preferred route name and then return to the Content Packages Palette.

DotPoint2.JPG To accept the changes, Left Click  OK 


The next step is to upload the new package to the live MPS Server.

Steps:
DotPoint1.JPG Open the SurveyorSharingIcon.png Surveyor Sharing Menu from the Main Menu icons
SocialMenu.png
DotPoint2.JPG Select the option  Share Route . You will receive a warning that Session Data is not supported.
DotPoint3.JPG To proceed Left Click  OK 
To cancel the upload Left Click  Cancel 
DotPoint4.JPG Assuming that you selected  OK  then the route will be packaged and uploaded to the live MPS Server. A successful upload will be indicated by the final message as shown below:-
S20 PalettePackagesUploadCompleted.png A route that has been uploaded to the MPS Server will appear with a              colour band in the Surveyor Select a Route/Session window.


The Drivers Palette/Driver Control Center

Skip Down Skip Up Top Next Up Next Down Bottom
This is a  Surveyor  palette and a  Driver  window (where it is named the Driver Control Center)


PalettesIcon S20.png
DotPoint.JPG In Surveyor if the Drivers Palette is not visible on the screen then refer to PageLink.PNG Hiding and Showing Palettes and Windows at the top of this document
DotPoint.JPG In Driver to show the Driver Control Centre on the screen either:-
Ablue.png Left Click on the Driver Icon at the bottom left of the screen OR
Bblue.png open the SurveyorWindowIcon.png Window Menu and select the  Driver Control Center  option


NotePad.PNG Notes:

This has been redesigned for the Trainz Living Railroad (TLR) feature that is only available in Trainz Plus.

DotPoint.JPG some of its features can be used without the TLR
DotPoint.JPG it is NOT a replacement for the Driver Setup Rule in the Session Editor


BlueDot10x10.png This provides a full list of available drivers, their assigned trains and the tools to manage them in both Surveyor and Driver
BlueDot10x10.png In Driver it is named the Driver Control Center and is a Window


DriverPalette S20.png
NotePad.PNG
DotPoint.JPG The driver with the current camera focus is shown on a blue background
DotPoint.JPG In Surveyor this palette and its child windows can be minimised and resized
DotPoint.JPG In Driver this window can be minimised but NOT resized, however its child windows can be both minimised and resized
Next to the image of each driver is:-
DotPoint.JPG a thumbnail of their assigned locomotive (or No assigned location)
DotPoint.JPG the assigned locomotives Object Name. This can be set in Surveyor using either the PageLink.PNG Info Palette or the PageLink.PNG Driver Properties Tool
DotPoint.JPG the current control state of the train - the next command in their Driver Command List (driver Bald shown left), Manual Control (driver Aldair), Not in a Train (driver Kenny) or Idle (driver Jane)
Above each drivers image is a Tool Bar for that driver DriverPaletteTools S20.png
DriverPalettePlayerControl S20.png Left Click to open a drop down menu to assign this driver to:-
  DriverPaletteAssign S20.png  Not Assigned  (driver Jane shown left) will make the driver unavailable for use but will still remain in the driver list

 Player Controlled  will return them to active duty in the driver list

 Automatic Scheduler  this assigns control of the driver to the TLR (available in Trainz Plus only). The Living Railroad Dispatch setting must be Enabled in the PageLink.PNG Session Options Window
DriverPaletteDeleteDriver S20.png Left Click to Delete the current driver
DriverPaletteGetOffTrain S20.png If a driver has been assigned to a train (drivers Adair and Bald) then Left Click this icon to Remove the driver from this train. See PageLink.PNG Switching Drivers below
  DriverPaletteNotActive S20.png This indicates that the driver is classified as Not Assigned and is not available for use (driver Jane)
DriverPaletteSwitchTo S20.png If a driver has NOT been assigned to a train (driver Kenny) then Left Click this icon to select a train to assign to this driver. See PageLink.PNG Assigning Drivers below
  DriverPaletteNotActive2 S20.png This indicates that the driver is classified as Not Assigned and is not available for use
DriverPaletteViewDriverDetails S20.png Left Click to view and edit the details for the current driver and train. This is for use in TLR (available in Trainz Plus only). See PageLink.PNG Driver Properties below
DriverPaletteFocusOnDriver S20.png If a driver is assigned to a train Left Click this icon to change the camera focus and the blue background to this driver
DriverPaletteAddDriverIcon S20.png Located at the bottom of the driver list (you may have to scroll down) Left Click to Add a New Driver. See Adding a Driver below


PencilTips.PNG The Drivers Palette list can be scrolled up and down to reveal more available drivers.


Adding a Driver

Skip Down Skip Up   Heading    
BlueDot10x10.png New drivers can be added to the Drivers Palette


NotePad.PNG Notes:

A randomly selected driver will be automatically added to the Drivers Palette when a locomotive is added to your Trainz World. The driver will be assigned to the new locomotive


DriverPaletteAddDriverList S20.png
Steps: To add a new driver to the Drivers Palette:-
DotPoint1.JPG scroll down the driver list to the bottom to reveal the Add New Driver button DriverPaletteAddDriverIcon S20.png
DotPoint2.JPG Left Click on the button to open the Driver Selection window shown on the left
DotPoint2.JPG select (Left Click on) a driver and then Left Click on the tick icon Tick.PNG
The selected driver will be added to the end of the driver list but will be not be assigned to a train


PencilTips.PNG A driver can be deleted from the list at any time using the DriverPaletteDeleteDriver S20.png tool in the driver tool bar


Assigning Drivers

Skip Down Skip Up   Heading    
BlueDot10x10.png A driver that has no currently assigned train can have one assigned to them


Steps: To assign a driver to a train:-
DotPoint1.JPG
DriverPaletteSwitchTo S20.png  Move to Destination 
Left Click on the icon to select a new train for the driver. The Drivers Palette will change to the image shown below right
PencilTips.PNG If this tool cannot be selected then check if the driver has been set to  Not Assigned  or  Automatic Scheduler  (available in Trainz Plus only). If necessary you can change the setting to  Player Controlled  but that may affect other operations


Then:-

Choose one of the following:-

Options:

Ablue.png Left Click on a train in your Trainz World that does not already have an assigned driver. The selected driver will then be assigned to this train
Bblue.png Left Click on the DriverPaletteDeleteDriver S20.png icon OR press the  Esc  key to Cancel the selection operation and return to the normal Drivers Palette
Cblue.png Left Click on the Add New Driver button DriverPaletteAddDriverIcon S20.png to select and add a new unassigned driver to the palette as described in PageLink.PNG Adding a Driver above. Then repeat the process described from Step  1  above
DriverPaletteSelectDriverLoco S20.png


Switching Drivers

Skip Down Skip Up   Heading    
BlueDot10x10.png A driver that is currently assigned to a train can be reassigned to a different train or to no train


Steps: To switch a driver from one train to another:-
DotPoint1.JPG
DriverPaletteGetOffTrain S20.png  Get off Train 
Left Click on the icon to leave the assigned train so that the driver can be assigned to another or none
Once the driver has left the train, the icon will change to a new design
DotPoint2.JPG
DriverPaletteSwitchTo S20.png  Move to Destination 
This is optional. You can reasign the driver by a Left Click on the new icon to select a new train for the driver. The Drivers Palette will change to the image shown below right
PencilTips.PNG If this tool cannot be selected then check if the driver has been set to  Not Assigned  or  Automatic Scheduler . If necessary you can change the setting to  Player Controlled  but that may affect other operations such as the TLR

Then:1

Choose one of the following:-

Options:

Ablue.png Left Click on a train in your Trainz World that does not already have an assigned driver. The selected driver will then be assigned to this train
Bblue.png Left Click on the DriverPaletteDeleteDriver S20.png icon OR press the  Esc  key to Cancel the selection operation and return to the normal Drivers Palette
Cblue.png Left Click on the Add New Driver button DriverPaletteAddDriverIcon S20.png to select and add a new unassigned driver to the palette as described in PageLink.PNG Adding a Driver above. Then continue the process described from Step  2  above
DriverPaletteSelectDriverLoco S20.png


Driver Properties

Skip Down Skip Up   Heading    
NotePad.PNG Notes:

DotPoint.JPG These features are mostly intended for use in the Trainz Living Railroad (TLR) (available in Trainz Plus only) but some can be used with normal Sessions
DotPoint.JPG They will have no effect in the running of normal (non-TLR) Sessions


 In Surveyor and Driver 


After selecting the DriverPaletteViewDriverDetails S20.png View Driver Properties Tool, the following Properties window will open.
DriverPaletteEditCommands S20.png
 The Mini Map 
DotPoint.JPG driver location in the Trainz World
DotPoint.JPG it can be zoomed in and out
 Driver Settings 
Displays the currently assigned Driver Properties:-
DotPoint.JPG location (assigned train)
DotPoint.JPG assigned user
 Command Status 
DotPoint.JPG text description of the next command in the driver queue
DotPoint.JPG commands (as icons) waiting in the Driver Command Queue
 Activity Log 
DotPoint.JPG the progress of the driver


The Driver Settings and Command Status can be edited. The Activity Log can be filtered.


 In Driver 
In Trainz Plus Only: When used in Driver Mode a coloured line will appear above the track showing the path, or possible paths, when the next command in the Command Status queue is a movement command, such as Drive To..., Navigate To... or Couple To.... The path lines will not be shown when these commands are not being executed. The colour of the path lines are Blue, Green, Orange and Red.
DriverPaletteTrainPath S20.png
NotePad.PNG Notes: Path Colours:-

These colours identify the type of service and are a "Work In Progress". They may change in future releases
   Locomotive only
   Passenger (not yet implemented)
   Freight
   Active Path (for the selected driver)
If you do not want the coloured paths to appear then close the Driver Properties Window


NotePad.PNG Notes:

DotPoint.JPG The signals and switches along the path may not be correctly set until the train approaches and activates them
DotPoint.JPG In the current retail Trainz Plus version, the path will be visible as long as the Driver Properties window is open (but it can be minimised)
DotPoint.JPG The path options are controlled from the Main Display Menu, as shown below, and are independent of the Driver Properties window
DisplayMenuTrackPaths.png


To open the Driver Properties window in Driver, choose one of the following:-
Options:
Ablue.png From the Driver Icon:-
Steps:
DotPoint1.JPG Left Click on the Driver Icon at the bottom left of the screen
DotPoint2.JPG select the driver from the driver list (Left Click on its Eye icon if it is not the driver with the focus)
DotPoint3.JPG Left Click on the DriverPaletteViewDriverDetails S20.png View Driver Properties Tool for that driver
Bblue.png From the Window Menu:-
Steps:
DotPoint1.JPG Open the SurveyorWindowIcon.png Window Menu and select  Driver Control Center 
DotPoint2.JPG select the driver from the driver list (Left Click on its Eye icon if it is not the driver with the focus)
DotPoint3.JPG Left Click on the DriverPaletteViewDriverDetails S20.png View Driver Properties Tool for that driver


Left Click on the  Close  button to close the window and return to the Drivers Palette or Driver Control Center but closing it will turn off the path line. To keep the path line on the screen Minimise the window instead.


Driver Location

Skip Down Skip Up   Heading    
BlueDot10x10.png This allows you to move the driver to a new train and to view/edit the details of their current train


DriverPaletteLocation S20.png
Steps: To edit the driver location:-
DotPoint1.JPG Left Click on the white Down Arrowhead following the name of the assigned locomotive
DotPoint2.JPG select an option from the drop down menu


Choose one of the following:-
Options:
Ablue.png  Move to Train...  performs the same task as shown in PageLink.PNG Switching Drivers above, OR
Bblue.png  Get off Train  the driver assignment to this train will be terminated, OR
Cblue.png  Show <name of loco>  this will open a new Properties window showing details of the assigned train. Some of those details can be edited. See Train Properties below


Left Click on the  Close  button to close the window and return to the Drivers Palette.


 Train Properties 

The Show <name of loco> option will open the Train Properties window


DriverPaletteTrainDetailsWindow S20.png There are a number of control and display options built into this window.
Train Priority:
DriverPaletteShowPriority S20.png Left Click the white down arrowhead next to the label Priority and select a priority value  1 ,  2  or  3  to assign to this train
Classification:
DriverPaletteShowClassification S20.png Left Click the white down arrowhead and select a running classification for this train
Driver:
DriverPaletteShowDriver S20.png Left Click the white down arrowhead just below the Driver Image and select an option

 Show Driver <Name of Driver>  will re-open the Train Properties window if it had been closed or minimised

 Move to Train...  and  Get off Train  are the same as described above


Left Click on the  Close  button to close the window and return to the Driver Properties window.


 Script Properties 

DriverPaletteScriptProperties S20.png
Steps: To display the legacy script properties of the locomotive:-
DotPoint1.JPG Left Click on the window icon DriverPaletteScriptPropertiesIcon S20.png to open the Script Properties window
DotPoint2.JPG DriverPaletteScriptPropertiesWindow S20.png Left Click the Cross.PNG button to close the window


You can edit the Script Properties of a locomotive.
DriverPaletteScriptPropertiesEnableEditing S20.png

DriverPaletteScriptPropertiesWindowEdit S20.png
Steps: To edit the Script Properties:-
DotPoint1.JPG Left Click on the  Enable Editing  button
DotPoint2.JPG All the script controlled properties of that particular locomotive, as shown left, can be opened (Left Click on the link) and edited
DotPoint3.JPG To Save your edits Left Click on the  Save Changes  button, OR
To Cancel your edits Left Click on the  Cancel  button


Player Assignment

Skip Down Skip Up   Heading    
BlueDot10x10.png This allows you to set the driver control assignment


DriverPaletteAssign2 S20.png
Steps: To change a driver assignment:-
DotPoint1.JPG Left Click on the white Down Arrowhead following the name of the player
DotPoint2.JPG select an option from the drop down menu


Choose one of the following:-
Options:
Ablue.png  Not Assigned  makes the driver unavailable but keeps them in the driver list, OR
Bblue.png  Automatic Scheduler  this assigns control of the driver to the TLR (available in Trainz Plus only) but the Living Railroad Dispatch setting must be Enabled in the PageLink.PNG Session Options Window, OR
Cblue.png  Player Controlled  returns the driver to active duty in the driver list


Left Click on the  Close  button to close the window and return to the Drivers Palette.


Command Status

Skip Down Skip Up   Heading    
BlueDot10x10.png The Command Status displays the list of driver commands waiting for execution by the selected driver
BlueDot10x10.png New driver commands can be added and existing commands removed


DriverPaletteCommandStatusList S20.png A sample list of driver commands
DriverPaletteCommandStatusAdd S20.png
Steps: To add a command to the driver command list:-
DotPoint1.JPG Left Click on the Command Point identified by the red arrow in the image on the left
DotPoint2.JPG select the command from the pop up menu
NotePad.PNG The commands shown in the pop up menu are set by the WikiLink.PNG Driver Command Rule in the WikiLink.PNG Session Editor
DotPoint3.JPG repeat as needed for each new command


Steps: To remove a command from the driver command list:-
DotPoint1.JPG Left Click and Drag the command to be removed out of the Command Status area and release the mouse button


NotePad.PNG The changes you make to the Command Status list will also be made in the Driver Command Bar at the bottom right of the screen


Left Click on the  Close  button to close the window and return to the Drivers Palette.


Activity Log

Skip Down Skip Up   Heading    
BlueDot10x10.png This allows you to monitor the activity and progress of a driver


DriverPaletteDriverActivityLog S20.png This gives a detailed list of every operation started and completed by the selected driver. In the example shown on the left this includes gaining and releasing "permits" (access or permission) for each junction switch along the drivers path.

DotPoint.JPG the display area has a vertical scroll bar on the right for longer reports
DotPoint.JPG Left Click on the coloured dots to toggle them on/off and filter the log entries by message type
GreyDot10x10.png Grey ON shows general messages: Grey OFF hides general messages
YellowDot10x10.png Yellow ON shows warnings: Yellow OFF hides warnings
RedDot10x10.png Red ON shows error messages: Red OFF hides error messages
GreenDot10x10.png Green ON shows "task completed" messages: Green OFF hides "task completed" messages
DotPoint.JPG Left Click in the  Search  text box to enter a text string to filter the log entries


Left Click on the  Close  button to close the window and return to the Drivers Palette.


The Logs Palette

  Skip Up Top Next Up Next Down Bottom
This is a  Surveyor Only  palette


PalettesIcon S20.png In Driver to show the Logs Palette on the screen refer to PageLink.PNG Hiding and Showing Palettes and Windows at the top of this document


BlueDot10x10.png This palette displays the Trainz System Log which details the loading of assets, the operation of scripts, messages displayed on the screen (in Driver), etc. It is for diagnostic purposes.


LogsPalette S20.png
DotPoint.JPG the display area has a vertical scroll bar on the right for longer reports
DotPoint.JPG Left Click on the coloured dots to toggle them on/off and filter the log entries by message type
GreyDot10x10.png Grey ON shows general messages: Yellow OFF hides general messages
YellowDot10x10.png Yellow ON shows warnings: Yellow OFF hides warnings
RedDot10x10.png Red ON shows error messages: Red OFF hides error messages
GreenDot10x10.png Green ON shows "task completed" messages: Green OFF hides "task completed" messages
DotPoint.JPG Left Click in the  Search  text box to enter a text string to filter the log entries


NotePad.PNG Notes:

DotPoint.JPG This palette can be minimised and resized
DotPoint.JPG Left Click on the Cross.PNG icon to close the palette


The Session Options Window

    Top Next Up Next Down Bottom
This is a  Driver Only  window


PalettesIcon S20.png In Driver to show the Session Options Window on the screen refer to PageLink.PNG Hiding and Showing Palettes and Windows at the top of this document


BlueDot10x10.png This window allows you to change session settings in Driver "on the fly"


SessionOptionsPalette S20.png


NotePad.PNG Notes:

DotPoint.JPG This window can be minimised but it cannot be resized
DotPoint.JPG Left Click on the Cross.PNG icon to close the window
Each item shown in the window can be edited:-
DotPoint.JPG Left Click on a boxed item to select an option from its drop down menu (see below)
DotPoint.JPG In the calendar Left Click on date (the day and/or the left/right month arrows) to change the season of the year or enter a new date in the text entry box (the year entered does not matter)
DotPoint.JPG In the clock Left Click and Drag the clock hand around the dial to change the time of day


 Derailment Mode 
  sets the realism level of derailments. Options are None (no derailments will occur), Arcade (derailments will occur far more often than reality) and Realistic
 Living Railroad Dispatch 
  sets the operation of the TLR (Trainz Living Railroad - available in Trainz Plus only). Options are Enabled (feature is on) and Disabled (feature is off)
 Restart Stuck AI 
  sets whether or not attempts will be made to resolve AI conflicts and restart "stuck" AI controlled trains. Options are Enabled (feature is on) and Disabled (feature is off)
 Weather 
  sets the current weather conditions. Options are Clear, Cloudy, Drizzle, Rain, Stormy, Light Snow, Medium Snow, Heavy Snow
 Weather Changeability 
  sets the rate and scope of changes to the weather conditions during the session. Options are None (no weather changes), Periodic (minor and gradual changes) and Extreme (rapid and wide ranging changes)
 Time Rate 
  sets the speed at which time changes during the session. This does not affect the speed of trains or other operations. Options range from 1x (normal time) to 1440x (extremely rapid time)
 Current Time 
  sets, very inaccurately, the current time shown on the session clock.  Left Click and Drag  on the pointer shown on the clock dial. Each of the small dividing lines on the dial represents 36 minutes which makes accurate time setting difficult - approximations are best.


The Commodity Picker Window

    Top Next Up Next Down Bottom
This is a  Driver Only  window


PalettesIcon S20.png In Driver to show the Commodity Picker Window on the screen refer to PageLink.PNG Hiding and Showing Palettes and Windows at the top of this document.


BlueDot10x10.png This window allows you to change the commodities (products) carried by rolling stock in Driver "on the fly"


CommodityPickerPalette S20.png


NotePad.PNG Notes:

DotPoint.JPG This window cannot be minimised or resized
DotPoint.JPG Left Click on the Cross.PNG icon to close the window
Steps: To change the commodities (products) carried by a rolling stock object:-
DotPoint1.JPG move the mouse pointer onto a commodity icon in the Picker. A  Tooltip  identifying the product will appear on the pointer
DotPoint2.JPG Left Click on an icon to select its commodity. The message at the top of the palette will change to confirm the selection
CommodityPickerPaletteClick S20.png
DotPoint3.JPG move the pointer onto the rolling stock asset that will have its product queue restricted to the selected product only. The mouse pointer will have a Load icon CommodityPickerPaletteLoadIcon S20.png attached to it
DotPoint4.JPG Left Click on the rolling stock object to restrict it to the selected product only. If the change is accepted then the mouse pointer will change to the icon for the selected product CommodityPickerPaletteSetIcon S20.png
NotePad.PNG The selection will fail if the rolling stock object has not been configured to accept the selected commodity. Failure is indicated when the Load icon attached to the pointer does not change when a rolling stock object has been clicked


The Session Info Window

    Top Next Up Next Down Bottom
This is a  Driver Only  window


PalettesIcon S20.png In Driver to show the Session Info Window on the screen refer to PageLink.PNG Hiding and Showing Palettes and Windows at the top of this document.


BlueDot10x10.png This window displays the active message windows that were created for this session by a HTML Asset or a Message Popup Rule starting with the last one displayed


SessionInfoPalette S20.png
NotePad.PNG Notes:

This window can also be displayed by pressing the  F1  function key
DotPoint.JPG If no HTML Asset or Message Popup Rule exists in the session, or those present have not yet been activated, then nothing will be displayed
DotPoint.JPG This window cannot be minimised or resized
DotPoint.JPG Left and Right arrow icons at the bottom of the palette will allow you to move forward and back through any other message windows that have been activated for this session
DotPoint.JPG A Tick.PNG icon indicates no more messages. Left Click on the Tick.PNG or the Cross.PNG icons to close the window


The Waybill Window

    Top Next Up Next Down Bottom
This is a  Driver Only  window


PalettesIcon S20.png In Driver to show the Waybill Window on the screen refer to PageLink.PNG Hiding and Showing Palettes and Windows at the top of this document.


BlueDot10x10.png This window displays the commodity deliveries and pickups for this train


WaybillPaletteDriver.png
NotePad.PNG Notes:

DotPoint.JPG This window cannot be minimised or resized
DotPoint.JPG Left Click on the Cross.PNG icon to close the window


The Schedule Info Window

    Top Next Up   Bottom
This is a  Driver Only  window


PalettesIcon S20.png In Driver to show the Schedule Info Window on the screen refer to PageLink.PNG Hiding and Showing Palettes and Windows at the top of this document.


BlueDot10x10.png This window displays the Trainz Living Railroad (TLR) (available in Trainz Plus only) schedule for the train


ScheduleInfoPaletteDriver.png
NotePad.PNG Notes:

DotPoint.JPG This window is fully functional in the Trainz Living Railroad (TLR) (available in Trainz Plus only) feature
DotPoint.JPG This window cannot be minimised or resized
DotPoint.JPG Left Click on the Cross.PNG icon to close the window


    Top Next Up    


Trainz Wiki

TrainzWiki.png

More Tutorials and Guides to Using Trainz

LinkWiki.PNG

Related Links


This page was created by Trainz user pware in February 2023 and was last updated as shown below.

Personal tools