How to Use Track Markers
m (→ Adding a Track Mark ) |
m (fixed HTML tag errors) |
||
| Line 444: | Line 444: | ||
</table> | </table> | ||
<br> | <br> | ||
| − | |||
===<span style="color: white; background-color: blue;"> Set the Track Mark Properties </span>=== | ===<span style="color: white; background-color: blue;"> Set the Track Mark Properties </span>=== | ||
| Line 484: | Line 483: | ||
<td>[[image:Steps.PNG|link=]]</td> | <td>[[image:Steps.PNG|link=]]</td> | ||
<td><span style="font-size: 17px; font-weight: 700;">Steps:</span><br> | <td><span style="font-size: 17px; font-weight: 700;">Steps:</span><br> | ||
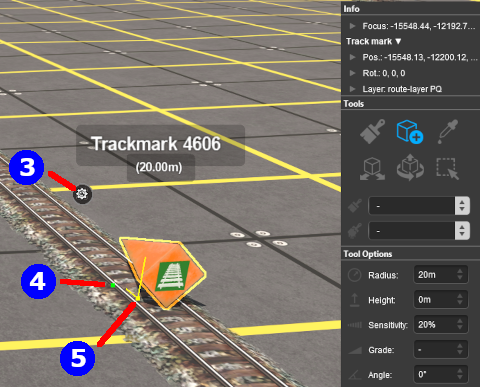
| − | + | [[image:DotPoint.JPG|10px|link=]] '''Left Click and Drag''' forward or backward on the '''Green Dot''' next to the '''Track Mark''' ([[image:DotPoint4Blue.png|link=]] in the images above and below) to increase or reduce its '''Trigger Radius''' | |
| − | + | ||
</td> | </td> | ||
</tr> | </tr> | ||
| Line 505: | Line 503: | ||
<td>[[image:Steps.PNG|link=]]</td> | <td>[[image:Steps.PNG|link=]]</td> | ||
<td><span style="font-size: 17px; font-weight: 700;">Steps:</span><br> | <td><span style="font-size: 17px; font-weight: 700;">Steps:</span><br> | ||
| − | + | [[image:DotPoint.JPG|10px|link=]] '''Left Click and Drag''' forward or backward on the '''Yellow Dot''' next to the '''Track Mark''' ([[image:DotPoint5Blue.png|link=]] in the images above and below) to move the '''Track Mark''' along the track | |
| − | + | ||
</td> | </td> | ||
</tr> | </tr> | ||
| Line 517: | Line 514: | ||
<table width=900> | <table width=900> | ||
<tr valign="top"> | <tr valign="top"> | ||
| − | <td>[[image:TrackmarkFineAdjust_S20.png|link=]]<td> | + | <td>[[image:TrackmarkFineAdjust_S20.png|link=]]</td> |
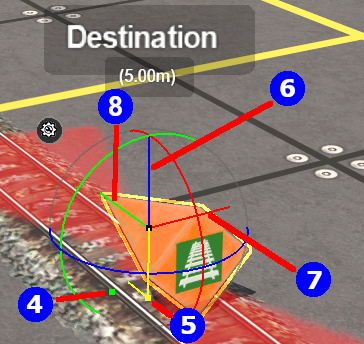
<td>[[image:DotPoint6Blue.png|link=]] <span style="font-weight: 700; font-size: 17px;">Reposition it Up/Down</span><br> | <td>[[image:DotPoint6Blue.png|link=]] <span style="font-weight: 700; font-size: 17px;">Reposition it Up/Down</span><br> | ||
This feature allows a '''Track Mark''' to be physically placed above the track so that it will not be hidden if a consist is parked on the '''Track Mark'''.<br> | This feature allows a '''Track Mark''' to be physically placed above the track so that it will not be hidden if a consist is parked on the '''Track Mark'''.<br> | ||
| Line 529: | Line 526: | ||
<td><span style="font-size: 17px; font-weight: 700;">Steps:</span><br> | <td><span style="font-size: 17px; font-weight: 700;">Steps:</span><br> | ||
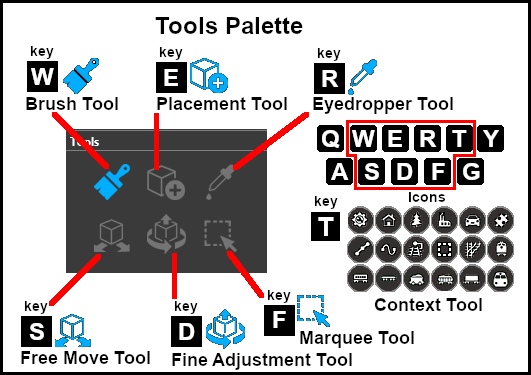
# Select the '''Fine Adjustment Tool''' (or press the <span style="font-weight: 700; font-size: 17px; color: white;background-color: black;"> D </span> key) | # Select the '''Fine Adjustment Tool''' (or press the <span style="font-weight: 700; font-size: 17px; color: white;background-color: black;"> D </span> key) | ||
| − | # '''Left''' | + | # '''Left Click snd Drag''' forward or backward on the '''Blue Vertical Axis Line''' above the '''Track Mark''' ([[image:DotPoint6Blue.png|link=]] in the image on the left) to move the '''Track Mark''' up or down |
| − | + | ||
</td> | </td> | ||
</tr> | </tr> | ||
| Line 568: | Line 564: | ||
<td><span style="font-size: 17px; font-weight: 700;">Steps:</span><br> | <td><span style="font-size: 17px; font-weight: 700;">Steps:</span><br> | ||
# Select the '''Fine Adjustment Tool''' (or press the <span style="font-weight: 700; font-size: 17px; color: white;background-color: black;"> D </span> key) | # Select the '''Fine Adjustment Tool''' (or press the <span style="font-weight: 700; font-size: 17px; color: white;background-color: black;"> D </span> key) | ||
| − | # '''Left''' | + | # '''Left Click snd Drag''' left or right on the '''Red Horizontal Axis Line''' above the '''Track Mark''' ([[image:DotPoint6Blue.png|link=]] in the image on the left) to move the '''Track Mark''' left or right of the track |
| − | + | ||
</td> | </td> | ||
</tr> | </tr> | ||
| Line 670: | Line 665: | ||
</table> | </table> | ||
| − | |||
<table> <!-- BEGIN Nav Buttons Table --> | <table> <!-- BEGIN Nav Buttons Table --> | ||
<tr valign="top"> | <tr valign="top"> | ||
Revision as of 14:09, 11 February 2023
The information in this Wiki Page applies to TANE, TRS19, Trainz Plus and TRS22.
|
|
|||||||||||
What are Track Marks?
The Trainz AI relies heavily on Track Marks to direct trains around a layout. They are only visible in Surveyor Mode.
| Track Marks are the targets for:- | |
| Drive To Trackmark and Navigate To Trackmark driver commands | |
| Drive Via Trackmark and Navigate Via Trackmark driver commands | |
| They can also be used as:- | |
| attachments for Navigation Points | |
| locations for Coupling operations | |
Route or Session?
| Track Marks can be placed in a Route layer or in a Session layer |
|
 |
Information on Route and Session layers can be found at:- |
Adding a Track Mark
|
In Surveyor Classic (S10)
Setting the Track Mark
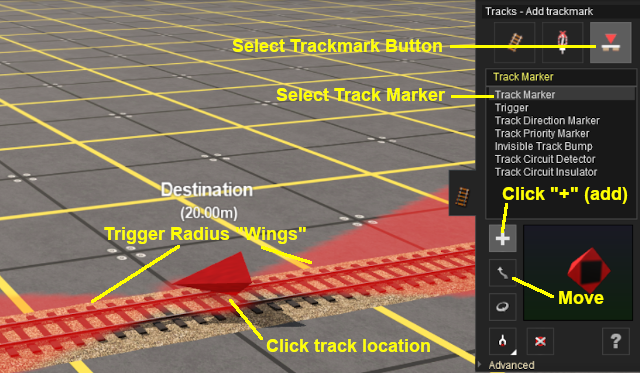 |
When placed, the properties window for the Track Mark will appear. |
||||||
|
Set the Trigger Radius
At the bottom of the Track Tools flyout menu is an Advanced button. Left click this button to open the Track Mark advanced tool set.
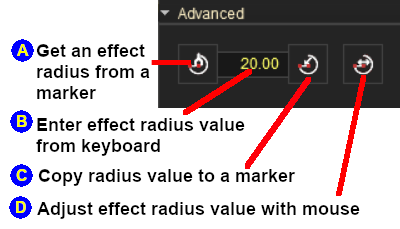 |
|
||||||
|
In Surveyor 2.0 (S20)
Surveyor 2.0 is currently only available for Trainz Plus Standard and Trainz Plus Gold subscription members.
Adding a Track Mark
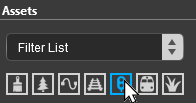
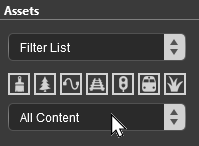
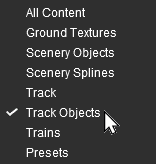
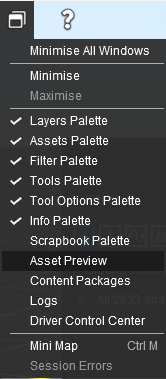
In the Asset Palette either:-
|
OR |
|
|
|||||||||||||||
|
||||||||
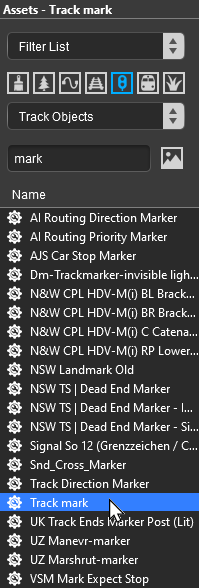
To narrow down the filter list, type "mark" (UPPER/lower case does not matter) in the Search Text Box
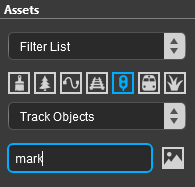 |
|
Place the Track Mark on the track.
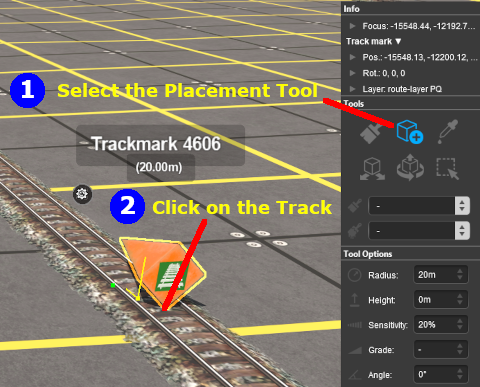
|
|
||||||||||||||||
Set the Track Mark Properties
 |
|
||||||
![]() Set its Trigger Radius
Set its Trigger Radius
The Trigger Radius controls how closely an AI train has to approach the marker to activate it (smaller radius = closer to the Track Mark).
|
|
|
 |
Steps:
|
|
|
|
Move the Track Mark
![]() Move it Along the Track
Move it Along the Track
|
|
|
 |
Steps:
|
|
|
|
 |
This feature allows a Track Mark to be physically placed above the track so that it will not be hidden if a consist is parked on the Track Mark.
|
|||||||||
![]() Reposition the it Left/Right
Reposition the it Left/Right
This feature allows a Track Mark to be physically placed left or right alongside the track so that it will not be hidden if a consist is parked on the Track Mark.
|
|
||||
 |
Steps:
|
|||
|
||||
|
|
||||
|
Assign a Track Mark to a New Layer
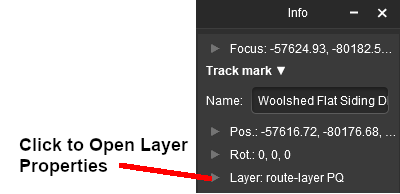
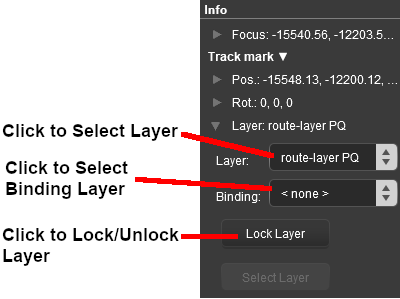
| The Info Palette will show the layer assigned to the currently selected object. To the left of the layer name is a small arrow object. | ||||||||||||
|
|
|
|||||||||||
Track Mark Operation
The most common use for Track Marks is as destinations for driver commands or as "way points" to direct a train to a destination via one or more intermediate places. They can also be used as the targets for Navigation Points and coupling operations.
 |
Information on adding driver commands can be found at:- |
| Drive To Trackmark and Drive Via Trackmark commands will NOT force the AI to find a clear path to the Track Mark if the shortest path is blocked | |
| Navigate To Trackmark and Navigate Via Trackmark commands will force the AI to find a clear path to the Track Mark if the shortest path is blocked. The path chosen may not be prototypical |
Navigation Points can be attached to Track Marks to provide users with session instructions.
 |
Information on navigation points can be found at:- |
Coupling Operations
An AI controlled train can be issued with a driver command to couple with the consist located at a specified Track Mark.
 |
The AI driver moves the train (or just the locomotive if it is by itself) to couple with the wagon that is closest to a specified trackmark. More information on this command can be found at This command must be downloaded from the DLS and installed in Trainz |
 |
Information on adding driver commands can be found at:- |
Related Links
 |
Trainz Wiki
 |
More Tutorials and Guides to Using Trainz |
This page was created by Trainz user pware in September 2019 and was last updated as shown below.

