 |
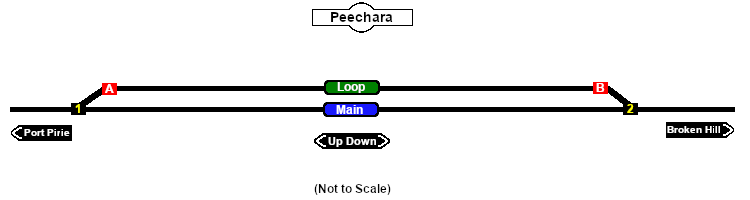
| For SAR Peterborough Narrow Gauge Division v2.0. For the original V1.0 click here |
 |
| Switches |
| No. |
Name |
Facing and L/R Directions
(default direction first) |
No. |
Name |
Facing and L/R Directions
(default direction first) |
|
 |
PC 1 |
Down (R) Main, (L) Loop |
 |
PCCP A |
Up (R) Catchpoint , (L) Port Pirie |
 |
PCCP B |
Down (L) Catchpoint , (R) Broken Hill |
 |
PC 2 |
Up (L) Main, (R) Loop |
|
| Switch Sets |
| Port Pirie - Main |
1 -R |
Broken Hill - Main |
2 -L |
| Port Pirie - Loop |
1 -L A -L |
Broken Hill - Loop |
2 -R B -R |
|
|
|

 |
