HowTo/Implement a Destination Sign System
Contents |
Introduction
This document was inspired by the release from NormP of Surfside Trams 2 for TS12. This is a fictional route with tramways on the Gold Coast in Australia. The Gold Coast is near Brisbane where trams were used up to 1972.
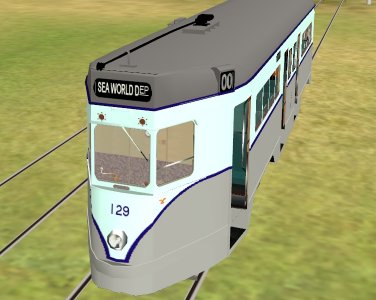
The Brisbane trams modelled by motorman1066 seemed appropriate to use on the route, so were added. To my surprise the destination boards for Brisbane appeared for use in the session. Consequently, a set of destination boards was made for the Surfside Trams route, and this document details the steps required to get them to work.
The Destination Boards
These work by script controlled texture replacement so the format and config.txt are important.
Motorman1066's trams all share the same destination boards for Brisbane, kuid2:108959:99901:2, and these are read into the tram script and provide an option selection from the properties button in surveyor. (more on this later)
To use this process on another route, eg Surfside Trams, a different set of destination signs is needed.
An asset with set of textures for the Gold Coast was built by cloning and editing motorman1066's Brisbane ones. In his case each texture has a destination name and route number. The two bits of data are separated by texture mapping and displayed on the destination sign and the route number sign as below.
Each texture looks as below.
In this case the boards are backlit at night with a white night mesh so the white text is transparent.
The Surfside destination boards are a small set with only 10 destinations. Here is the complete config.txt.
kuid                <kuid:XXXXXX:YYYYYY>
username            "SurfSideDestsignTextures"
kind                "texture-group"
trainz-build        2.9

extensions
{
  destnames-000000
  {
    0               "BLANK"
    1               "SEA WORLD DEPOT"
    2               "SEA WORLD"
    3               "CAVILL AVE"
    4               "SURFERS PARADISE"
    5               "PRIMARY SCHOOL"
    6               "BUNDALL"
    7               "SOUTHPORT POOL"
    8               "PACIFIC FAIR"
    9               "PACIFIC FAIR DEPOT"
  }
}

textures
{
  0                 "Blank.texture"

  1                 "dest0.texture"

  2                 "dest1.texture"

  3                 "dest2.texture"

  4                 "dest3.texture"

  5                 "dest4.texture"

  6                 "dest5.texture"

  7                 "dest6.texture"

  8                 "dest7.texture"

  9                 "dest8.texture"
}
category-class      "JO"
category-era        "1940s;1950s;1960s"
category-region     "AU"
description         "Destination signs for Normp's Surf-Side Trams.
                     Derived from destination boards for Motorman1066 Brisbane trams.
                     Developed from an original concept created by Peter Denhert."
author              "motorman1066 amended by PEV"
license             "etc"
organisation        "Selz Tramz Workshopz 2006"

thumbnails
{
  0
  {
    image           "destination sign 240.jpg"
    width           240
    height          180
  }
}
}
category-class "JO"
category-era "1940s;1950s;1960s"
category-region "AU"
description "Destination signs for Normp's Surf-Side Trams.
Derived from destination boards for Motorman1066 Brisbane trams.
Developed from an original concept created by Peter Denhert."
author "motorman1066 amended by PEV"
license "etc"
organisation "Selz Tramz Workshopz 2006"
thumbnails
{
0
{
image "destination sign 240.jpg"
width 240
height 180
}
}
Note the kind must be "texture-group" and category class must be "JO" (Other Textures).
Also note the sub-container name in the "extensions" container. It must start with lower case "destnames-" as shown above. Put your own user ID number after it.
The tram script generates a selection table which shows the items listed in the "extensions" container as destination board options.
Selecting from the list chooses the texture of the same number. So, from the above config.txt, texture 1 (dest0.texture) is SEA WORLD DEPOT and so on.
Tram Car (or loco) Requirements
In this case the trams were cloned from motorman1066's assets and the names changed to represent use by me on Surfside Trams route. The kuid-table is changed so that the asset for new destinations is included. See below:
The tram cars must be built to support texture replacement on the destination sign. The config.txt must have effects container named "destsign" in the mesh table as below.
mesh-table
{
 default
 {
   mesh                                "554 body/554 body.lm"
   auto-create                         1

   effects
   {
     destsign
     {
       kind                            "texture-replacement"
       texture                         "texture dest.texture"
     }
   }
 }
etc

kuid-table
{
  bogey                                 <kuid2:108959:50554:1>
  enginesound                           <kuid2:108959:53554:1>
  enginespec                            <kuid2:108959:51554:1>
  hornsound                             <kuid2:108959:54554:1>
  interior                              <kuid2:108959:55554:1>
  product                               <kuid:-3:10060>
  destsigntextures                      <kuid:329364:100013> ......  the new destination sign asset
}
Additionally the kuid-table of the tram config.txt can have the entry "destsigntextures", as above though not essential, which calls the kuid of the destination sign asset above.
The "texture dest.texture" is a blank sign the same as the blank in the destination sign asset. It is located in the same folder as the parent mesh (in this case the 554 body folder.)
The tram assets in this case have a script (tram.gs) of class called "Tram". The script from Peter Dehnert provides the interface to select destinations in Surveyor and to communicate with the "Change Destination Sign To" rule  allowing destinations to be changed by the driver AI.
Using the Destination Sign System
Firstly we add the "DestsignTable" Rule to the Session (or route, depending on layer setting). We can choose to be in the session layer to make the sessions more flexible.
Press the Edit Session Rules Button  at the top left of the surveyor screen.
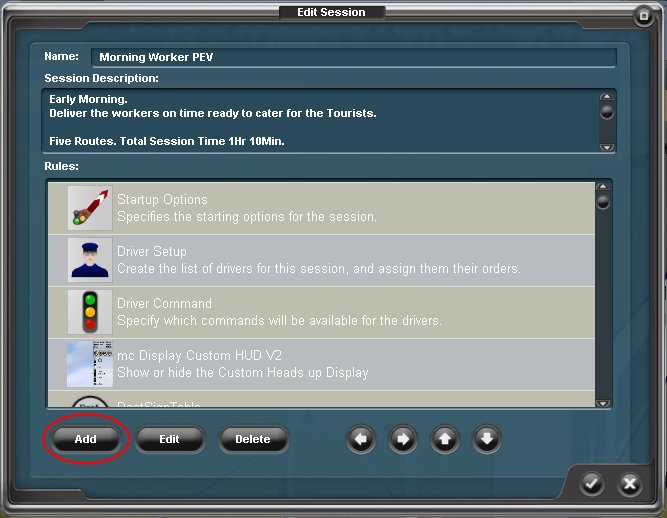
The Edit Session window will appear.
Press the Add button to add a rule to the session.
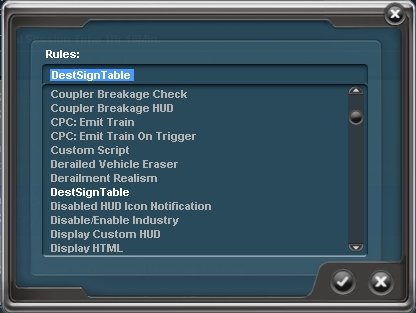
The selection box for Rules will appear.
Scroll down to find and select the "DestSignTable" rule.
The rule is added to the session as shown. This rule searches the session and route assets for kind "texture-group" assets and builds a table of such assets. It also adds the "Change Destination to"  to the driver command menu.
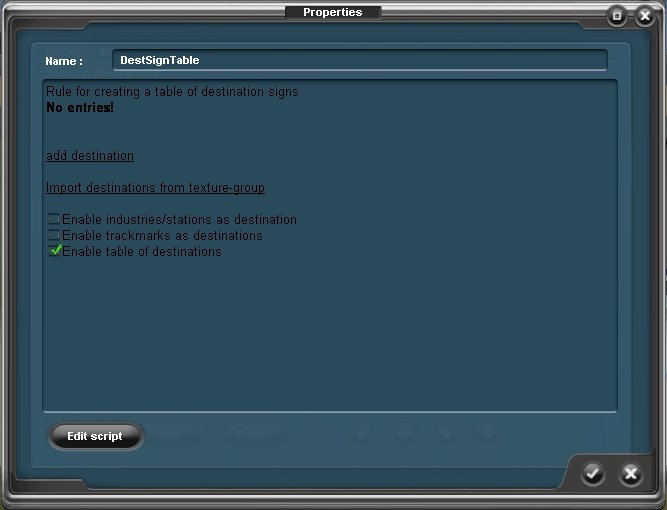
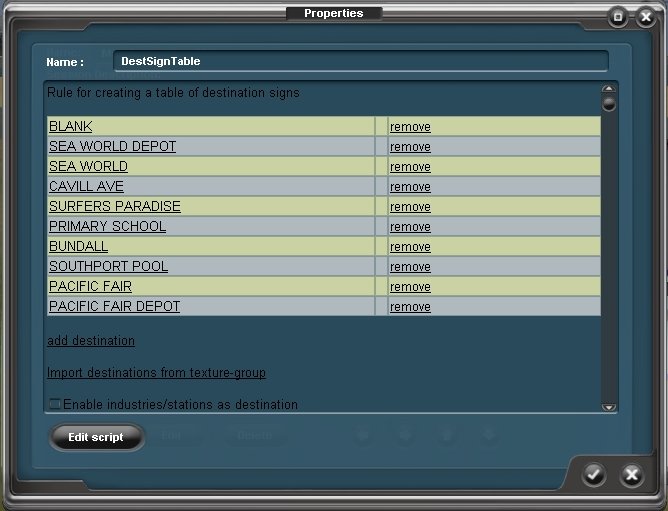
Select the "DestSignTable" rule from the Edit Session box and Press the Edit Button (circled in the image above). The Rule properties box is displayed.
Ensure that Enable industries/station as destination and Enable trackmarks as destinations are not checked (ticked) and that Enable table of destinations is checked (ticked) as shown.
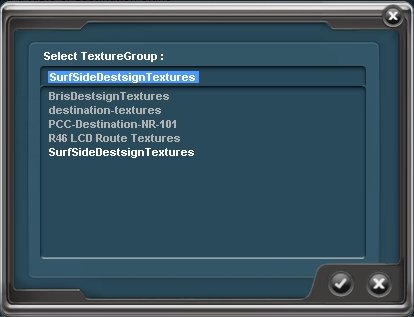
Click on Import destinations from texture-group. The "Select texture-group" box will be displayed.
Select the appropriate texture group.. in this case "SurfSideDestTextures".
A list of destinations will be added as below.
Accept the edits by clicking on the check (tick) button on the above windows.
This completes the set up of the "DestSignTable" rule; we can now add trams to our session.
We Have Added a Tram
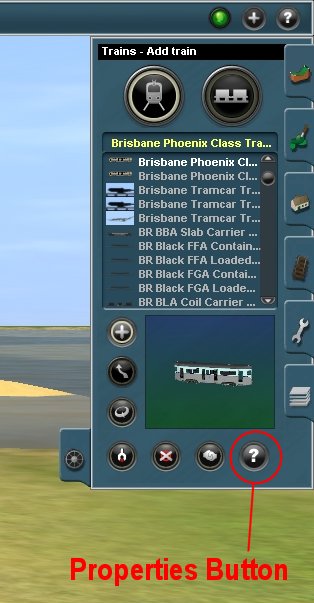
When we have placed the tram car on a track in Trainz Surveyor, press the properties button in the rolling stock tab,
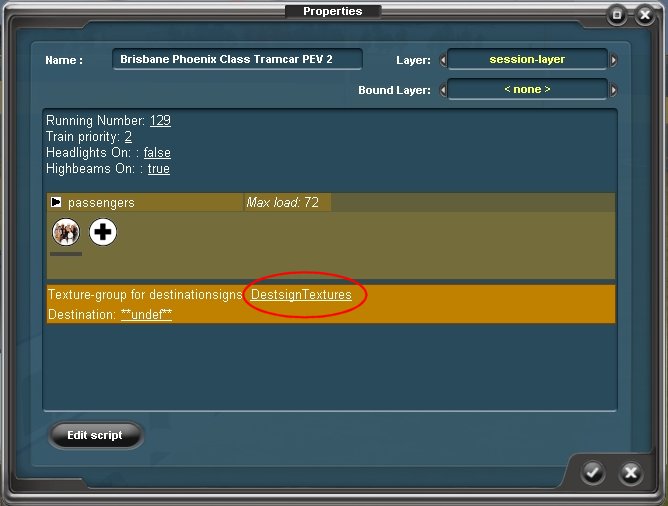
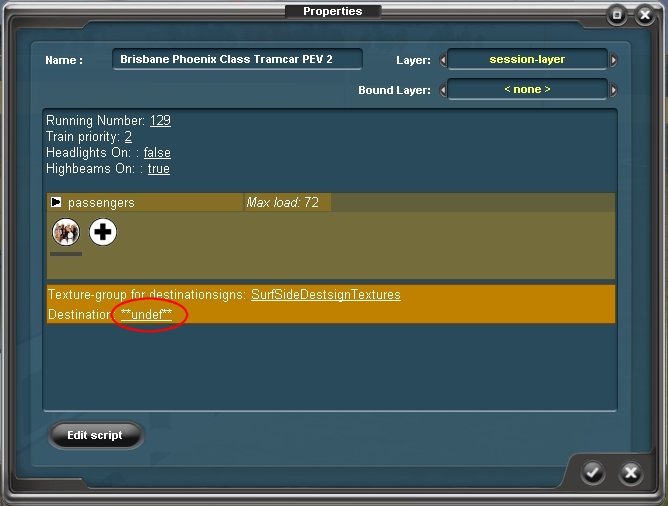
and left click on the tram itself. The tram properties window appears where we can add a running number and enable our destination list.
The circled text is the name of the texture-group for our destination sign.
If the texture group is incorrect, left click on the text and "Select texture-group" box will appear allowing us to change the texture group to "SurfSideDestsignTextures" as previously.
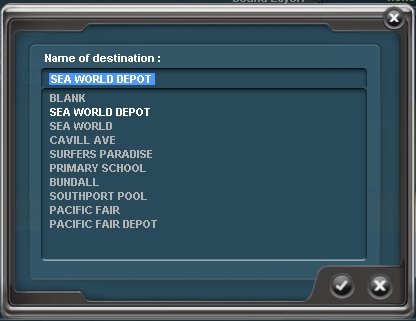
We can also select a destination sign immediately if desired by left clicking Destination text as shown.
The Destination selection box is displayed allowing us to choose an appropriate destination.
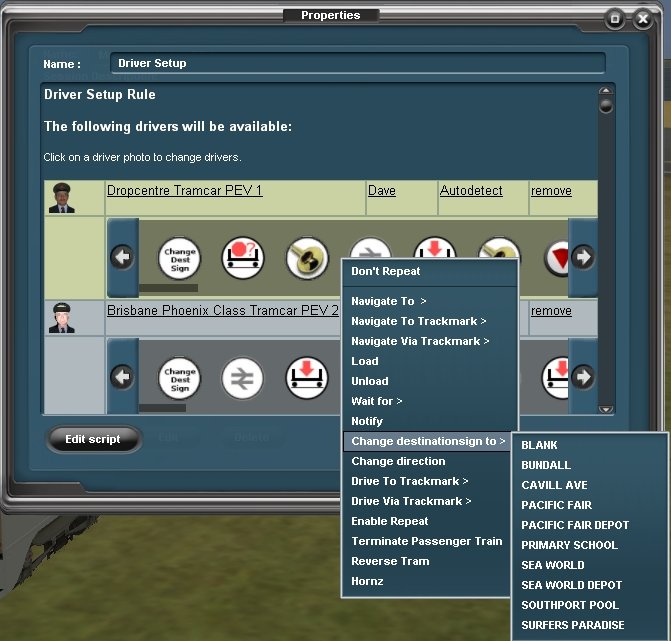
The Driver AI can be used to change destination signs at any time. Click on the green arrow to insert a driver command. From the menu choose "Change Destination To" and select a destination from the drop down menu.
The destinations can change automatically at the appropriate location with this driver command. When in Driver mouse over the icon to find the new destination.
