HowTo/Create a Neon Font Effect with PhotoShop C4
(Note: This is a work in progress)
Neon Text Effect – Photoshop CS4 Tutorial
In this tutorial I will show you how to create a Neon Text Effect, in Photoshop CS4 or even in earlier editions of PS or similar such paint programs with similar features. To be later used as a Texture for creating a Neon Sign.
Create a new file with a white background. Best make that a 512x512 pixel size for vertical signs or for upright signs a 1024x512 pixel size.
Type "HOTEL"; or whatever you might use for your Neon Sign, using black color with a thin font. The thin font is best for this exercise, almost any suitable
font will do.
As this is a layer, go to Layer/Flatten Image.
Then go to Image/Adjust/Invert: To get a negative, a reverse image with black background and with white letters on it.
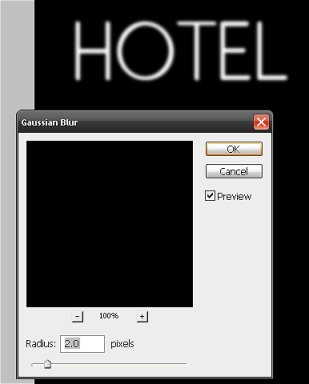
Next, add some Gaussian Blur:
Go to Filter/Blur/Gaussian Blur and try 2.0 as the value for Pixel Radius.
Now, lets try at Filter/Stylize/Solarize:
Where you get this picture below and which you could use as the Neon Sign unlit tube template. You might need to adjust brightness/contrast a little bit to
suit.
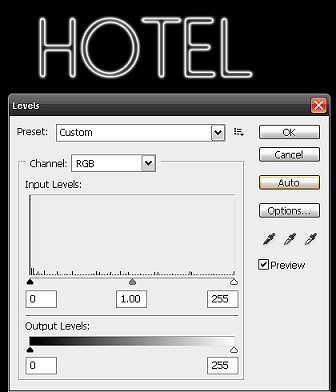
Next go to Image/Adjustments/Level/Auto:
Which will give you a brighter picture of the above one.
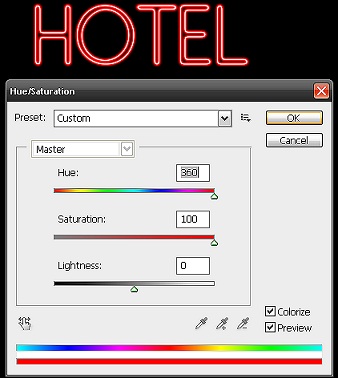
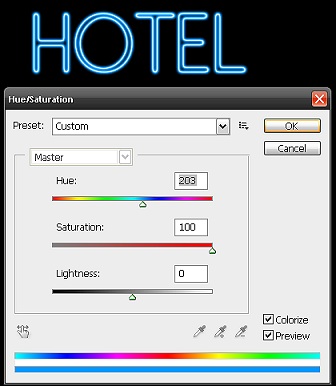
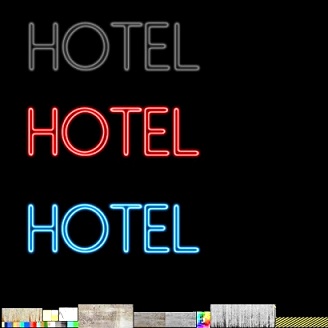
This is the main template to use for your Neon Text Effect by adding the following settings into the Image/Adjustments/Hue/Saturation window. As per these pictures below for red or blue. Try the "Hue" slider for any different colours you might want for your texture.
Last, copy and paste the previous saved pictures which I wrote and have shown above that might be used as an unlit neon tube picture together with any other colour you might
use as your main texture. As said previous, make your main texture map either:
- 512x512 pixels for horizontal signs, or
- 512x1024 (high) pixels for vertical Neon Signs.
On the main texture below at its bottom I already pasted other textures on it, possibly needed for any add ons. Don't paste these extra textures yet.
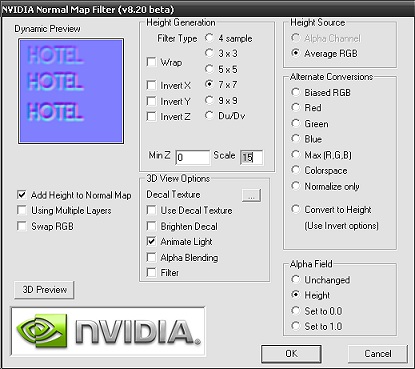
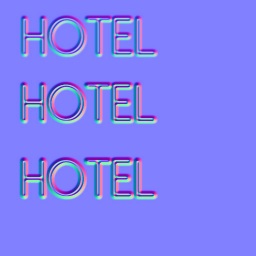
This main texture will be used to generate a Normal Map of it, providing you have the NVidea Normal Filter installed in your Photo Shop. If you do not have it, Google for it to get a d/load link for this filter. The finished normal map and its settings to create it are shown below. These settings can be altered for any special need you might have for creating normal maps. Experimenting will show you. You can also safely reduce any normal map of the same size of the main texture to half its size without hardly affecting the normal mapping effect. Try it!
By using a half size (50% reduced) normal map also cuts down on CDP file size etc. It goes without saying, if you reduce the normal map size by half, these need to be 256x256 or 256x512 pixels, depending on what size you used to start with.
Last to copy and paste any extra textures (the ones already seen on the main texture map) one might need for the Neon Sign Box, any posts or attachments to place/hang this onto buildings which one can see in the main texture further above already copied on any unused space in your texture map. Otherwise you need to blank this out in the normal map, if you created a normal effect for that extra texture.
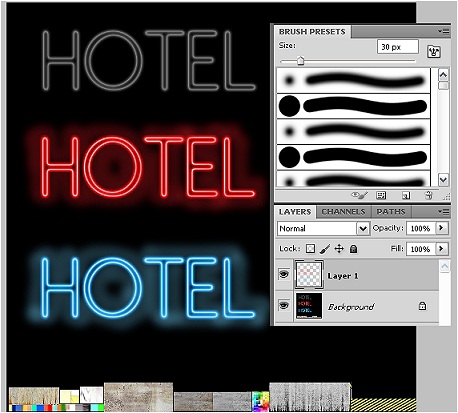
Now to place any shine of the lit neon sign onto the letters, again in PhotoShop, use a layer over the main texture, set this to anywhere from 30% to 80% transparency, depending how much shine one requires. Experiment! Remember, too much shine makes the effect too bright, experiment until satisfied. Use a soft diffuse brush at the required size fitting the letters, the picture will show you generally how to set that up. With the brush, shine the outline of the neon texture first, then the inside if needed.
Experiment with different fonts and settings of all these different settings shown here, you will be surprised that one particular setting shown here might not necessarily fit all Neon Text Effects.
Hey, if you went through all these steps above successfully, you have just created your first Neon Text Effect texture and how to implement this into your main texture map for creating a Neon Sign.
How to create a Neon Sign in 3DS Max will be another Tutorial soon (tm).
Original tutorial and images by Lendorf (Lennard Dorfer)
Lennard Dorfer aka Lendorf
Return To How To Guides


