HowTo/Build a bridge
Creating a Bridge in GMax
This tutorial will show you the steps needed to create a model in GMax 1.2 and then the creation of the config file and the directory structure required for the use of the bridge in TRS 2012. We will build a basic concrete single track bridge. A bridge in Trainz consists of three sections "initiator", mesh-table default section and the "terminator". Normally the initiator and terminator are the same as far as the creation in GMax is concerned. The mesh-table default section is the section in Trainz that expands as you lengthen your bridge in Trainz.
Open the Gmax application using the Train Content Creation Studio icon. There are a few things that need to be considered. The most important is track gauge as this obviously effects the width of the bridge deck. In this case I will be designing a narrow gauge bridge so the overall width will be 3660 mm and each girder will be 15000 mm long and 915 mm high.
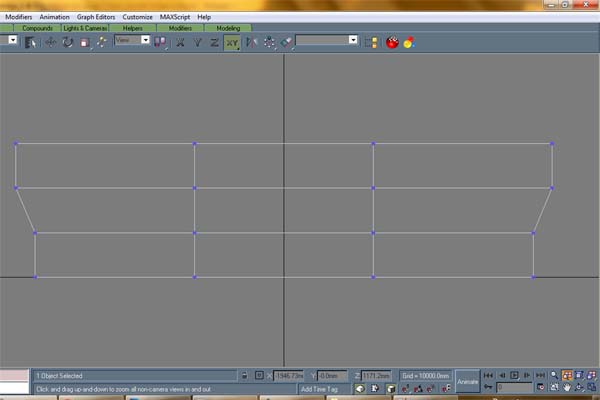
I will assume that you have some experience in using the GMax environment. Create a box that is the dimensions shown above and make it 3 segments high and 3 segments wide. Convert it to an editable mesh. Open up the front view to full screen. Open the "Modify" tab and then open the editable mesh tree so you can modify the vertices individually. Select the bottom two vertices on the left hand side. The "X" value should show -1830 , you need to over type this with -1700. This will move the two vertices towards the middle of the bridge. Do the same with the right hand side bottom two vertices. Change the value from 1830 to 1700. now you should have ended up with the image below

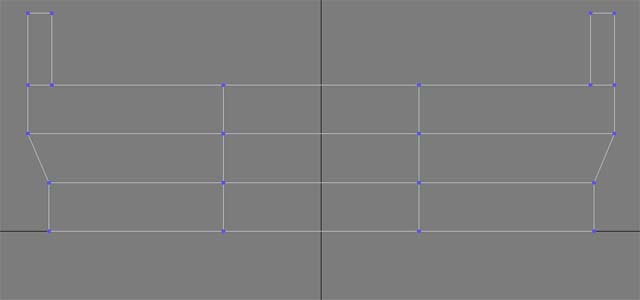
Now Save your file. I named mine Main_Section. Now we need to add a couple of more sections to our basic box to make it look more like a rail bridge. First create another box that will form the side retaining wall that is at the edge of the top deck of the bridge. Create a box 15000 mm long 415 mm high and 150 mm wide. No move the new box so the location is X = -1755 and Z is 915. Create a third box and locate it at X = 1755 and Z = 915. The next thing to do is to combine the three boxes into a single object. See image below for combined boxes.
 Each bridge has an escape platform in case you are caught on the bridge when a train comes along so we will add a platform on each side of the bridge.... To Be Continued
Notes
For bridges in TRS 2010 and 2012 need to have "mesh-table" in the config file so as the middle (repeating section) of the bridge actually shows within the simulator. This will need to be added using Content Creator Plus to the config file. In the mesh-table you need to create a "default" value. This default value will the the main (repeating section) of the bridge. Also add an "auto-create" so as it is created automatically in the surveyor.