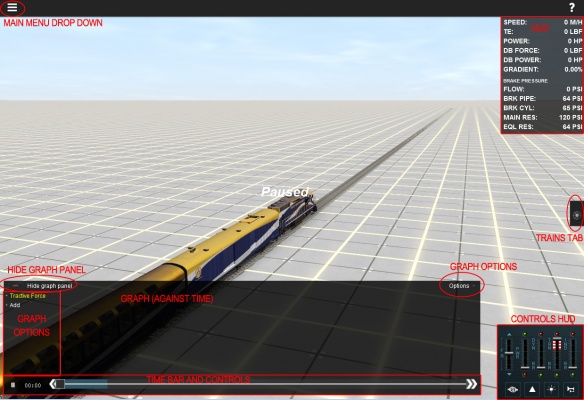
Test Track:Main Menu
Contents |
Test Track Main Menu
Clicking Main Menu on the top menu bar provides access to creating, editing and saving test routes, and editing the engine specification files.Create New Test
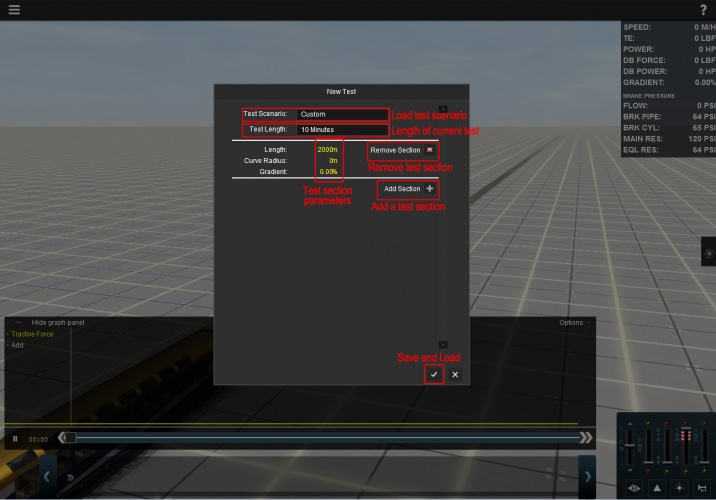
Test Track uses a basic set of track laying options to set up the required track sections for your testing. Track is laid in discreet sections:
- Length - set each section to a specific length in meters
- Curvature - set in meters radius. Entering 1000 will create a gentle curve to the right based upon the circumference of a circle with a 1000m radius. Use -1000 to curve to the left.
- Incline (gradient) - set in %. Entering 1% means that the track will rise 1m every 100m. Entering -0.1% means the track will fall by 1m every 1,000m.
Once you have set your parameters for the first track section, click Add Section to add your next track section.
A trackmark is placed at the end of each new section, so you may want to add several shorter sections to provide additional marker points along your route.
Any time you want to check your track or begin your Test, click the Save tick and your track is loaded along with the previously used train.
Use the Free Roaming camera to navigate along the track or begin your Test.
Load Existing Test
Under New Test, click on the Custom Test Scenario to bring up a drop down list of previously saved Tests. Select the test to load the section data and then makes any edits or Save and Load immediately.
Edit Test
To make further changes to your currently loaded Test route, choose the Edit Test option.
Save Test
Use Save Test to save your currently loaded test for use again later. Save will create a new asset (asset type = ??) which you can locate and edit in Content Manager or share with your friends.
Tip: Use notepad to copy/paste or find/replace to edit larger test tracks then commit the new asset in Content Manager.
Edit Engine Specifications
In order to make changes to the performance of your locos and rolling stock, you need to make changes to the underlying parameters that "drive" the physics simulation. Each traincar requires an asset called an "enginespec" which includes a long list of values that are utilized by the physics code to determine the behaviour of the train car. By tweaking the values, running tests and analysing the graph and report results, extremely accurate results can be obtained.
This guide will not attempt to teach you how to tune these parameters, but will focus instead on the actual functional aspects of the tools.
Currently Selected Traincar
All the specification data relates to the currently selected traincar. So be careful if you have changed your car selection in the 3D world that you are editing the correct vehicle.
Editing Traincar Characteristics
The editable parameters are grouped by function. Full explanations of each of the parameters will be added to the wiki at a later date.
To alter any data point, select the yellow numerical text and type in the new value.
Editing the Throttle and Dynamic Brake values can be accessed by clicking on the Edit Values link on the graph. This opens a new set of editable parameters.
Configuration Parameter
The following links provide information on which items are editable and how they are used.
Basic vs Advanced Editing
In Advanced mode, users can edit each value directly.
The Basic mode (when implemented) will allow users to enter known data from real-world sources and TANE will create a "best estimate" set of values.
Saving Changes
There are three options provided for saving. To begin with you will want to save changes in memory for testing, but once you are happy with the results, you can choose to overwrite the current asset or create a clone asset. Users will also be able to choose and apply a new engine spec via the Properties tool in Surveyor (and Driver if the Session Creator allows access).
When saving into memory, the current test is automatically restarted and the simulation operates with the new data.
Using Your Updated Engine
Of course, without the ability to use your newly tuned engine in-game, there would be little point in making the changes. To use any engine file, simply place your loco in Surveyor, then use the Properties tool ("?") and click on the loco. Choose the appropriate engine from the list, then save your session and go for a drive...

