The information in this Wiki Page applies to both TANE and TRS19.
Message Popup Icons are small graphic icons that can be placed in browser message windows in Driver mode. The browser windows are created by the Message Popup Rule.
 |
The icons used in Custom Message Popups belong to the class of Textures - Not Environmental |
|
 |
Information on creating and using Message Popups can be found on the Trainz Wiki pages at:-
|
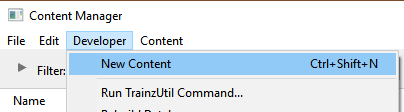
How to Create a New Non-Environmental Texture Asset
|
 |
Step 2: Find the New Asset
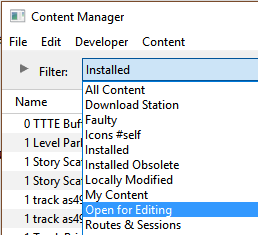 |
- Set the CM Search Filter to Open for Editing
This will display only those assets that have been opened for editing (hopefully only your new and as yet unnamed asset will be shown)
|
|
|
|
Step 3: Open the Asset in Windows Explorer
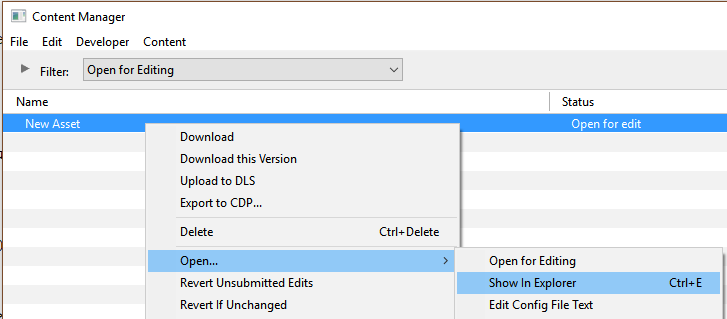 |
- Right mouse click on the entry New Asset
- Select Open
- Select Show in Explorer
|
|
|
|
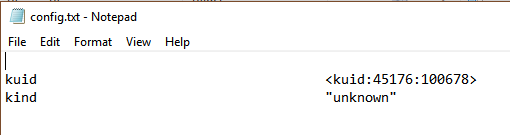
Step 4: Open File in Notepad
 |
There will only be a single item in the asset, its config.txt file
- Double click on the file to open it in Notepad
|
|
|
|
Step 5: Edit the File
 |
You will need to edit the contents of this file.
- The next section,
 The Config.txt File, identifies the changes you will need to make. The Config.txt File, identifies the changes you will need to make.
- The new name you give to the asset will not take effect until after it has been committed.
- After editing, save the changes and exit Notepad.
|
| Warning: |
 |
Unless you know exactly what you are doing, DO NOT ALTER THE KUID NUMBER that has been added to the file |
|
|
|
Step 6: Add Any "Extras"
You will need to add three additional files (possibly more depending on how the icon is created) to the asset folder:-
These file do not have to be added immediately but must be present before the new asset can be used. You can reopen the asset for editing later to add the files before it is committed. |
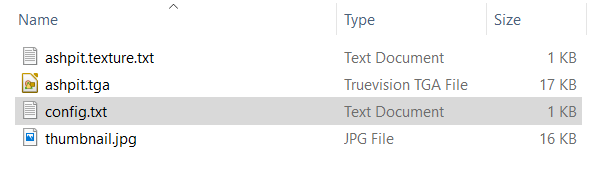 |
THIS IS AN EXAMPLE ONLY
This is the minimum number of files needed in a Texture asset |
|
|
Step 7: Finish Up
|
The Config.txt File
This file should follow the same (or a similar) format as the example below. Entries in blue will be different for each asset. The order of the "tags" is not important:-
kuid                                    <kuid:this is an auto-generated number>
kind                                    "texture"
texture                                 "asset_name.texture"
username                                "place your selected asset name here"
category-class                          "JI"
trainz-build                            4.3

thumbnails
{
  0
  {
    width                               240
    height                              180
    image                               "name_of_thumbnail.jpg"
  }
  1
  {
    width                               64
    height                              64
    image                               "asset_name.texture"
  }
}
description                             "Place your description of what the icon represents here"
The Icon Image
|
You will need image editing software to create the icon image or to change an existing image to the required dimensions and format. |
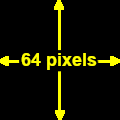
(not to scale) |
|
 |
Settings:
The image must meet the following specifications:-
- 64 pixels wide and 64 pixels tall
- bit depth should be 24 (no alpha channel or transparency) or 32 (if an alpha channel is used)
- image file format can be any of:-
- bmp
- jpg (jpg does not support transparency)
- png
- tga (tga compression should not be used)
|
|
|
 |
If your image will have a transparency, such as a transparent background, it is usually a lot easier to save the image in a format that supports an alpha channel (bmp, png or tga) and either
- convert the background to a transparency or
- remove the background and add a transparent layer to the image as its background
than it is to use a format that does not support an alpha channel and have to create a second image for the alpha channel. See The Texture File below. |
The Texture File
|
The .texture.txt file controls how an image icon is displayed, particularly its Alpha Channel (or transparency) data. The file must be present even if no transparency is used in the icon. |
|
|
Settings:
- the Texture File is a standard text file
- the filename is composed of:-
- a user selected asset_name followed by a period (.)
- the word texture followed by a period (.)
- the letters txt
|
|
A sample Texture File, "ashpit.texture.txt", is shown below:-
primary=ashpit.jpg
alpha=ashpit.bmp
tile=st
|
|
|
Settings:
- primary - this is the name of the icon image file that contains the RGB colour image. Any alpha channel in this file will be ignored
- alpha - this is the name of the icon image file that contains the Alpha Channel (transparency) image (see Notes: below)
- tile=st - instructs TANE/TRS19 to tile the image both horizontally and vertically. This has no effect on the icon in a message popup window but must be included for validation purposes
No "white spaces" between the text characters is allowed. |
|
|
 |
Notes:
There are 3 general "scenarios" for the structure of the Texture File in a Texture Non Environmental asset.
 |
If the icon has a transparency (an alpha channel) and is saved in a format that supports the alpha channel |
Then:-
primary=ashpit.tga
alpha=ashpit.tga
tile=st
|
- the primary and alpha images are the same file, as in the example shown left
- the image must contain both the RGB colour data and the Alpha Channel (transparency) data (it must have a depth of 32 bits)
|
 |
If the icon needs to have transparency (an alpha channel) but an alpha channel is not available (e.g. it is saved in the jpg file format) or is not suitable |
Then:-
primary=ashpit.jpg
alpha=ashpit_alpha.jpg
tile=st
|
- two different files (different file names or different image file formats) must be used as in the example shown left
- both images must be the same size (64 pixels x 64 pixels)
- both images must have a depth of 24 bits - so no alpha channel must be present in either image
- the alpha image file should be a greyscale image or even just black and white
|
 |
If the icon image does not have a transparency and no alpha channel is needed |
Then:-
primary=ashpit.tga
tile=st
|
- the alpha= line in the .texture.txt file is not needed, as in the example shown left
- the primary file contains the RGB colour data and can be in any supported image format. If it also has alpha channel data then that data it will be ignored so the icon will be shown without any transparency
|
Image file formats supported by TANE/TRS19 that have an alpha channel are:-
Image file formats supported by TANE/TRS19 that DO NOT have an alpha channel are:-
|
|
A detailed description of the .texture file format can be found on the Trainz Wiki Page at:-
|
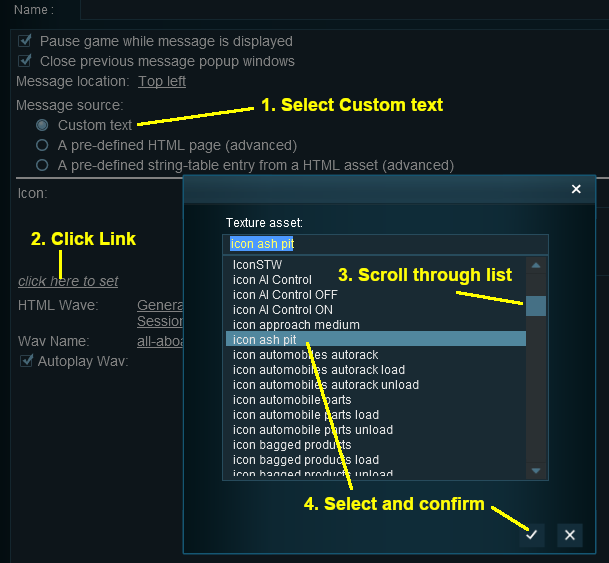
Using the Asset
Once the new asset has been committed it will be available for use in a Message Popup Rule. It will appear as a Texture Asset in the rule icon list.
Trainz Wiki
 |
More Tutorials and Guides to Using Trainz
|