How to Use Layers
 |
Contents |
The Layers Tool
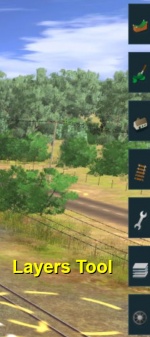 |

| Click the Layers Tool to open up its properties.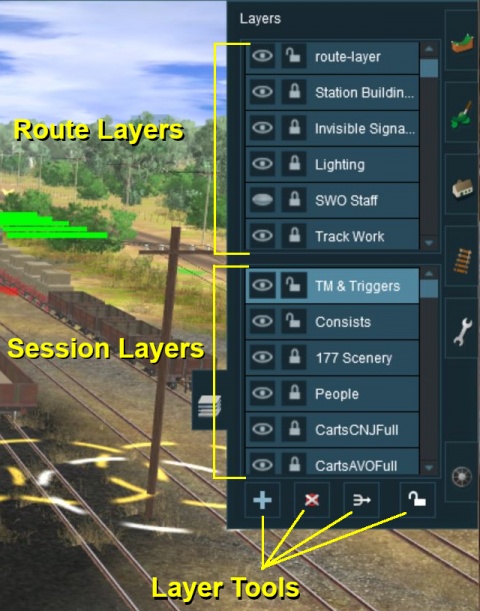 |
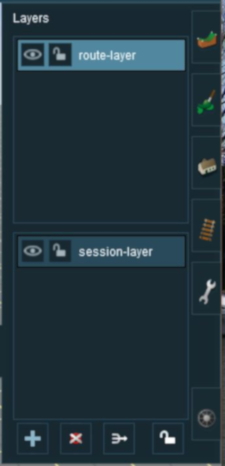
The layers are organised into two groups:-
- Route Layers in the top group, and
- Session Layers in the lower group.
With the Layer Tools (Add, Delete, Merge and Lock) below them.
Each group contains multiple layers - the scroll bars next to the layer names indicate that there are more layers in each group.
Loading a Route and Loading a Session
The layers you will see will depend on whether you have loaded into Surveyor a Route by itself (with no "child" Session) or a Session and its "parent" Route.
| An important lesson here is:- |
||
|
If you load a ROUTE without a SESSION then only edit the Route Layers |
||
| If you load a SESSION then you can edit the Route Layers AND the Session Layers | ||
Creating a New Route
When a brand new route is created it will come with two layers, a single "route-layer" and a single "session-layer".
 |
|
Adding a New Layer
| Click the Add Button |
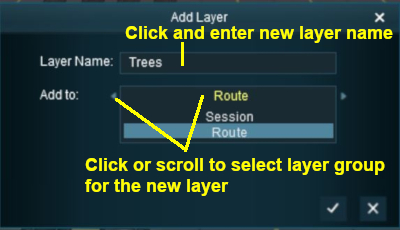
A New Layer dialogue window will appear.
 |
|
Click the Tick button to accept the changes.
Deleting a Layer
| Select the layer to be deleted and click the Delete Button |
| Deleting a layer will delete ALL the objects placed in that layer except objects that are "Bound" to that layer. |
If the layer being deleted is empty, then the following dialogue window will appear:-
 |
- Click Yes to delete the layer
- Click No' to cancel the delete operation
If the layer being deleted is NOT empty, then the following dialogue window will appear:-
 |
- Click Merge to merge this layer and its contents into another layer. See Merging Layers below for information on merging layers
- Click Delete to delete the layer and its contents. This cannot be undone
- Click Cancel to cancel the delete operation
Merging Layers
| Select the layer to be merged into another layer and click the Merge Button |
| Merging a layer into a second layer will move ALL the objects from the first layer into the second layer. The first layer, which is now empty, will then be deleted. |
Locking Layers
| It is good practice to LOCK ALL LAYERS that you are not working with. This will avoid the all too common problem of accidentally adding objects to the wrong layer. |
Locking Individual Layers
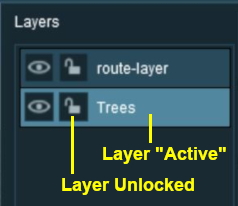
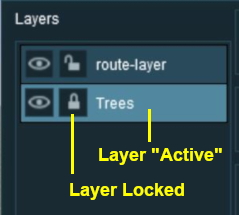
To LOCK an individual layer, click on the Open Padlock icon next to its name. The objects in a LOCKED layer cannot be moved or deleted.
 |
 |
|
If you attempt to add a scenery object to a locked layer you will receive the following message:-
 Clicking the Tick button will UNLOCK the layer |
Locking ALL Route Layers
| Click the Lock Button |
This will LOCK ALL the layers in the Route Layers Group. The Session Layers Group will not be affected.
The Route Layers Group can be UNLOCKED by clicking the Lock Button again.
Moving a Layer
Hiding Layers
Route Layers vs Session Layers
This topic has filled endless threads in the Trainz Forums with arguments raging on both sides.
There are no "cast iron" rules that dictate what should be placed in the Route Layers Group and what should be placed in the Session Layers Group. Each Route and Session will be different and different creators have different ways of working. The main question to be asked is how many different Sessions will be created using a particular Route?
- For a Route with only a single Session - everything can safely go into the Route Layers Group
- Many creators only ever build a single Session for each of their Routes so they do not use Session Layers at all.
- For a Route with multiple (2 or more) Sessions - certain things will need to go into the Session Layers Group for each Session.
- Many creators build multiple Sessions for each Route and rely on the Session Layers to provide the differences between their Sessions.
The Route Layer Group
| The Route Layer Group should be used for everything that you want to be seen in every single Session (if you have multiple sessions). |
There is nothing stopping you from placing everything in the "route-layer" and never have to worry about managing layers ever again. However, layers do provide you with a way of organising your Route scenery objects to make them more manageable. Some examples:-
- A Special Objects layer or layers that can be used to hold a certain type or types of scenery objects. For example all the trees. This can be very useful when you need to hide those objects to locate or place other objects. Trackside cameras in particular can be very difficult to find when placed in a forest.
- A Platform Objects layer can be used to hold all platform items such as seats, luggage, luggage trolleys, people, lamp posts, etc. Because these items are placed on top of a platform object they can be very difficult to move or delete without first moving the platform. The layer containing the platform can be locked allowing these objects to be easily moved or deleted.
- Hiding and Showing Objects in Driver Mode. There is a Session Rule that can hide and show layers during the running of a Session. For example: a rail worker can be shown standing next to a track lever while shunting operations are underway but can be hidden ("gone off to morning tea") by hiding that layer when shunting has been completed.
- Test Layer. Not sure if a particular object is right for your layout? Place it in a temporary layer which you can hide and show to see the difference it makes. This is particularly useful if you are deciding between different types of grasses.
The "route-layer"
While all layers are equal, the "route-layer" is special.
I would recommend that all the following objects should be placed in the "route-layer":-
- Track and interactive industries with track
- Track infrastructure (turntables, bridges, tunnels)
- Signals
- Junctions and switches
- Track signs (speed limits, warnings, etc)
..and that the "route-layer" be placed at the top of the Route Layers Group.
The Session Layer Group
| The Session Layer Group should be used for everything that you only want to be seen in the currently loaded Session. |
