How to Use S20 Tools
(→The Free Move Tool) |
(→The Free Move Tool) |
||
| Line 1,010: | Line 1,010: | ||
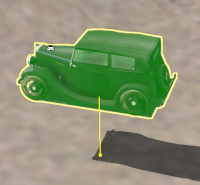
The '''Free Move Tool''' is used to move objects around the route in the '''XY''' (horizontal) directions only.<br> | The '''Free Move Tool''' is used to move objects around the route in the '''XY''' (horizontal) directions only.<br> | ||
| − | This tool | + | This tool uses the '''Tool Options Palette''' and the '''Info Palette''' (to display data only). None of the controls in the '''Tool Options Palette''' are active. If these palettes are not visible on the screen then refer to [[image:PageLink.PNG|link=]] '''[[#Notes_Palettes|Notes: Palettes]]''' at the top of this document.<br> |
<span style="font-weight: 700; font-size: 17px; color: white; background-color: black;"> For Scenery Objects </span><br> | <span style="font-weight: 700; font-size: 17px; color: white; background-color: black;"> For Scenery Objects </span><br> | ||
| Line 1,039: | Line 1,039: | ||
<tr valign="top"> | <tr valign="top"> | ||
<td>[[image:NotePad.PNG|link=]]</td> | <td>[[image:NotePad.PNG|link=]]</td> | ||
| − | <td> | + | <td>When moving a scenery asset, its height will be '''fixed''' to the terrain height.</td> |
</tr> | </tr> | ||
</table> | </table> | ||
| Line 1,048: | Line 1,048: | ||
</tr> | </tr> | ||
</table> | </table> | ||
| + | |||
| + | <span style="font-weight: 700; font-size: 15px; color: white; background-color: blue;"> Set the Height for a Scenery Asset </span><br> | ||
| + | |||
| + | When placed in a route by the '''Placement Tool''' a scenery asset will take the height of the terrain as its set height. It will be '''fixed''' to the terrain so when you move it around it will always be at the same height as the terrain it is over.<br> | ||
| + | |||
| + | This can be changed to '''fix''' the object to a set height above or below the terrain.<br> | ||
| + | |||
| + | <table> | ||
| + | <tr valign="top"> | ||
| + | <td>[[image:FreeMoveMeshObjectSetAboveGround_S20.png|link=]]</td> | ||
| + | <td> | ||
| + | <table> | ||
| + | <tr valign="top"> | ||
| + | <td>[[image:DotPoint1.JPG|link=]]</td> | ||
| + | <td>With the object selected, enter a height value into the '''Tool Options''' <span style="font-weight: 700; font-size: 15px; color: white; background-color: black;"> Height </span> text box</td> | ||
| + | </tr> | ||
| + | <tr valign="top"> | ||
| + | <td>[[image:DotPoint2.JPG|link=]]</td> | ||
| + | <td>Hit the <span style="font-weight: 700; font-size: 15px; color: white; background-color: black;"> Enter </span> key</td> | ||
| + | </tr> | ||
| + | <tr valign="top"> | ||
| + | <td colspan=2>The scenery asset will now be '''fixed''' at the entered height above (or below) the terrain as it is moved around</td> | ||
| + | </tr> | ||
| + | </table> | ||
| + | </td> | ||
| + | </tr> | ||
| + | </table> | ||
| + | |||
| + | <span style="font-weight: 700; font-size: 15px; color: white; background-color: blue;"> Asset Context Menu </span><br> | ||
| + | |||
| + | A selected scenery asset will have a '''Context Icon''' with a '''Context Menu'''. The icon design will vary between asset types.<br> | ||
| + | <br> | ||
| + | To open an assets '''Context menu''' either:- | ||
| + | * '''Left''' click the '''Context Icon''', or | ||
| + | * Press the <span style="color: white; background-color: black; font-weight: 700; font-size: 15px;"> T </span> key | ||
| + | |||
| + | <table width=900> | ||
| + | <tr valign="top"> | ||
| + | <td width=220>[[image:ContextMenuMeshObject_S20.png|link=]]</td> | ||
| + | <td width=680> | ||
| + | <table width=680 bgcolor=#000000> | ||
| + | <tr valign="top"> | ||
| + | <td> | ||
| + | <table width=676 bgcolor=#ffffff> | ||
| + | <tr valign="top"> | ||
| + | <td><span style="font-weight: 700; color: white; background-color: black;"> Cut </span></td> | ||
| + | <td> </td> | ||
| + | </tr> | ||
| + | <tr valign="top"> | ||
| + | <td><span style="font-weight: 700; color: white; background-color: black;"> Copy </span></td> | ||
| + | <td> </td> | ||
| + | </tr> | ||
| + | <tr valign="top"> | ||
| + | <td><span style="font-weight: 700; color: white; background-color: black;"> Paste </span></td> | ||
| + | <td> </td> | ||
| + | </tr> | ||
| + | <tr valign="top"> | ||
| + | <td><span style="font-weight: 700; color: white; background-color: black;"> Delete </span></td> | ||
| + | <td> </td> | ||
| + | </tr> | ||
| + | <tr valign="top"> | ||
| + | <td><span style="font-weight: 700; color: white; background-color: black;"> Smooth Ground Under Selected </span></td> | ||
| + | <td> </td> | ||
| + | </tr> | ||
| + | <tr valign="top"> | ||
| + | <td><span style="font-weight: 700; color: white; background-color: black;"> Settle on Ground </span></td> | ||
| + | <td> </td> | ||
| + | </tr> | ||
| + | <tr valign="top"> | ||
| + | <td><span style="font-weight: 700; color: white; background-color: black;"> Apply Height </span></td> | ||
| + | <td> </td> | ||
| + | </tr> | ||
| + | <tr valign="top"> | ||
| + | <td><span style="font-weight: 700; color: white; background-color: black;"> Reset Object Rotation </span></td> | ||
| + | <td> </td> | ||
| + | </tr> | ||
| + | <tr valign="top"> | ||
| + | <td><span style="font-weight: 700; color: white; background-color: black;"> Randomise Object Rotation </span></td> | ||
| + | <td> </td> | ||
| + | </tr> | ||
| + | <tr valign="top"> | ||
| + | <td><span style="font-weight: 700; color: white; background-color: black;"> Select in Assets Palette </span></td> | ||
| + | <td> </td> | ||
| + | </tr> | ||
| + | <tr valign="top"> | ||
| + | <td><span style="font-weight: 700; color: white; background-color: black;"> Edit Properties </span></td> | ||
| + | <td> </td> | ||
| + | </tr> | ||
| + | </table> | ||
| + | </td> | ||
| + | </tr> | ||
| + | </table> | ||
| + | </td> | ||
| + | </tr> | ||
| + | </table> | ||
| + | |||
| + | |||
<span style="font-weight: 700; font-size: 17px; color: white; background-color: black;"> For Spline Objects </span><br> | <span style="font-weight: 700; font-size: 17px; color: white; background-color: black;"> For Spline Objects </span><br> | ||
Revision as of 20:32, 9 January 2023
The information in this Wiki Page applies to Surveyor 2.0 (S20) as found in Trainz Plus.
This document is under development
|
|
|||||||||
The Tools Palette
 |
|
|||||||||||||||||
The Brush Tool
The Brush Tool is used for painting the route. It can:-
When selected, the Brush Tool will show two drop down menu lists. |
 |
| The first drop down menu will set the Brush Target, the type of brush. The Targets are:- |
|||||
|
 |
|
|||
Ground Height
This brush tool uses the Tool Options Palette. If this palette is not visible on the screen then refer to Notes: Palettes at the top of this document.
| When the Ground Height Target is selected, the second drop down box will give a choice of several Ground Height tools. The choices are:- |
|
|
 |
| The available brush tool options are shown in the Tool Options Palette with a Gold coloured icon next to their names. Those options that have their icon greyed out will be ignored, but they can still be edited. | ||||||||||||||||||||||||||||||||||||
Height Up/Height Down  |
Set Height  |
Grade  |
|
|||||||||||||||||||||||||||||||||
|
Ground Texture
This brush tool uses the Tool Options Palette. If this palette is not visible on the screen then refer to Notes: Palettes at the top of this document.
When the Ground Texture Target is selected, the second drop down box will be disabled - there are no brush texture tool choices.
The available brush tool options are shown in the Tool Options Palette with a Gold coloured icon next to their names. Those options that have their icon greyed out will be ignored, but they can still be edited.
 |
|
||||||||||||||||||||||||||||
|
Scrapbook Data
This brush tool uses both the Tool Options Palette and the Scrapbook Palette. If these palettes are not visible on the screen then refer to Notes: Palettes at the top of this document.
| The Scrapbook Brush When the Scrapbook Data Target is selected, the second drop down box will give a choice of two Scrapbook Data tools. |
|
|
|
|
| The available brush tool options are shown in the Tool Options Palette with a Gold coloured icon next to their names. Those options that have their icon greyed out will be ignored, but they can still be edited. | |||||||||||||||||||||||||||||||
Scrapbook Brush  |
Scrapbook Clone  |
|
|||||||||||||||||||||||||||||
|
The Scrapbook Palette  |
|
|||||||||||||||||||||||||||||||||||||||||||
Edit Effect Layers...
When this Target is selected, the Edit Effect Layers options will appear. This is the same as selecting Edit Effect Layers ... from the Trainz Edit Menu.
 |
 |
 |
 |
More information on creating and editing Effect Layers can be found on the Trainz Wiki at:- |
The Placement Tool
The Placement Tool is used to add assets to the route. This tool uses the Assets Palette. If this palette is not visible on the screen then refer to The first step is to identify and select the particular asset that you want to add to the route.
The Eyedropper Tool
|
||||||||||||||||||||||||||||||||||||||||||||||||||||||||||||||||||||||||||||||||||||||||||||||||||||||||||||||||||||||||||||||||||||||||||||||||||||||||||||||||||||||||||||||


