How to Merge Routes
m (→Before You Start Merging) |
(→Selecting and Loading the Routes to Merge) |
||
| Line 84: | Line 84: | ||
='''Selecting and Loading the Routes to Merge'''= | ='''Selecting and Loading the Routes to Merge'''= | ||
| − | + | [[file:DotPoint1.JPG|link=]] '''Load the ''Base Route'' into Surveyor''' | |
<table cellpadding="4" bgcolor=#bbffff> | <table cellpadding="4" bgcolor=#bbffff> | ||
<tr valign="top"> | <tr valign="top"> | ||
| Line 97: | Line 97: | ||
</tr> | </tr> | ||
</table> | </table> | ||
| − | + | [[file:DotPoint2.JPG|link=]] Start the '''Merge Route Tool''' and select and load the Route ''to-be-merged'' with the '''Base Route'''.<br> | |
| − | <table | + | <table> |
<tr valign="top"> | <tr valign="top"> | ||
<td width="190">[[file:MergeMainMenu.JPG|link=]]</td> | <td width="190">[[file:MergeMainMenu.JPG|link=]]</td> | ||
| + | <td valign="top"> | ||
| + | <table> | ||
| + | <tr valign="top"> | ||
| + | <td> [[file:MergeToolStartTRS19SP1.png|link=]]</td> | ||
<td> | <td> | ||
<table cellpadding="4" bgcolor=#ffffff> | <table cellpadding="4" bgcolor=#ffffff> | ||
| Line 111: | Line 115: | ||
<td>[[file:Steps.PNG|link=]]</td> | <td>[[file:Steps.PNG|link=]]</td> | ||
<td><span style="font-size: 17px;">'''Steps:'''</span><br> | <td><span style="font-size: 17px;">'''Steps:'''</span><br> | ||
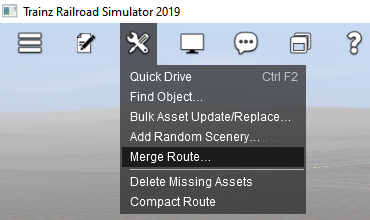
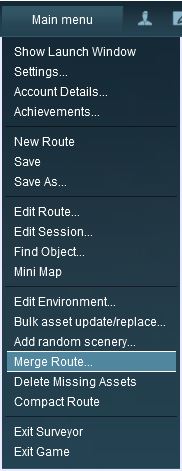
| − | *'''Select the ''Merge Route'' option in the ''Surveyor Main Menu''''' | + | *'''Select the ''Merge Route'' option in the ''Surveyor Main Menu'' (TANE/TRS19 - shown far left) or the ''Surveyor Tools Menu'' (TRS19 SP1 - shown left)''' |
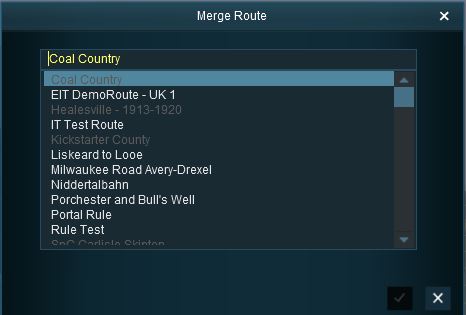
| − | ::This will open a '''Route Selection''' window. | + | ::This will open a '''Route Selection''' window (shown below). |
*'''Select the route ''to-be-merged'''''</td> | *'''Select the route ''to-be-merged'''''</td> | ||
</tr> | </tr> | ||
| Line 120: | Line 124: | ||
</tr> | </tr> | ||
</table> | </table> | ||
| + | <br> | ||
[[file:MergeSelectRoute.JPG|link=]]<br> | [[file:MergeSelectRoute.JPG|link=]]<br> | ||
::This will be the '''to-be-merged route''' and only its Route data will be loaded | ::This will be the '''to-be-merged route''' and only its Route data will be loaded | ||
</td> | </td> | ||
</tr> | </tr> | ||
| − | </table> | + | </table></td> |
| + | </tr> | ||
| + | </table><br> | ||
<table cellpadding="4" bgcolor=#c1e7e7> | <table cellpadding="4" bgcolor=#c1e7e7> | ||
<tr valign="top"> | <tr valign="top"> | ||
Revision as of 08:25, 31 October 2019
Merging Routes
The information in this Wiki Page applies to both TANE and TRS19.
Contents |
The Surveyor Merge Routes command allows two different routes to be joined together edge-to-edge or end-to-end.
Before You Start Merging
| Make sure that you have backup copies of all the routes that you are going to merge. |
Before you start merging there are some important points you will need to consider and there may be some preparation work that will have to be performed.
Identify...
|
Common Problems (and Their Solutions)
| Most route mergers will have problems but most of these problems can be easily fixed. |
Some problems will require you to do a bit (or a lot) of extra work before you can merge two routes into one. But for some problems, the best solution may be to select other routes to merge.
|
|
| The most common problem in the "impossible to fix" category is when both routes have different orientations (N-S and E-W) and you were hoping to join them end-to-end in the same direction to make an even longer route. Once a route has been created its orientation cannot be changed. |
A handy tip for merging two routes with different heights is to create a new route that only contains the extra "in-between" baseboards - no scenery, textures or track are needed. The baseboards on one end will have heights that match those of the base route and the baseboards on the other end will have heights that match those of the to-be-merged route. The merge is performed in two stages:-
|
Selecting and Loading the Routes to Merge
Load the Base Route into Surveyor
 |
Should you load the Route or the Session?
|
Start the Merge Route Tool and select and load the Route to-be-merged with the Base Route.
 |
|
||||||||
| DLC routes cannot be selected for merging |
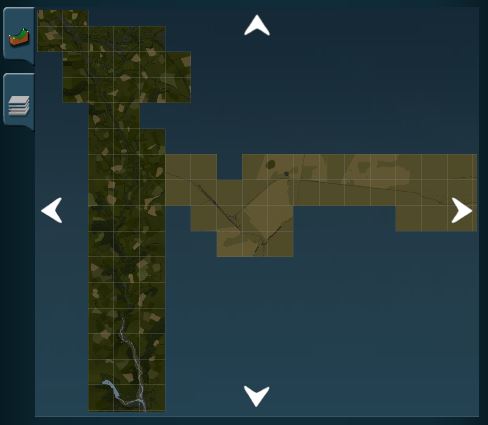
This will display a "minimap" of the proposed merger (nothing will be merged until after the final step) with some control options.
The Merge Map
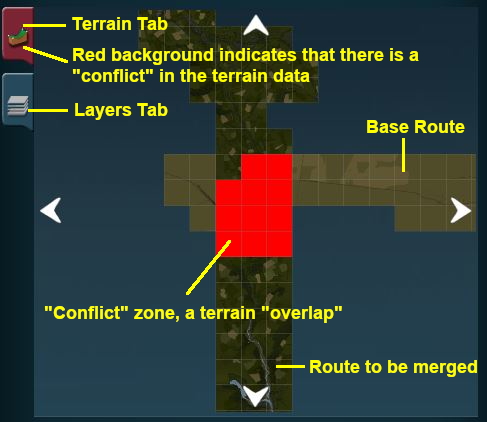 |
The two tabs shown on the left are the:-
|
Move the To-Be-Merged Route into its New Position
 |
|
||||||
The Layers Map
Click the Layers Tab to show the layers loaded from the two routes.
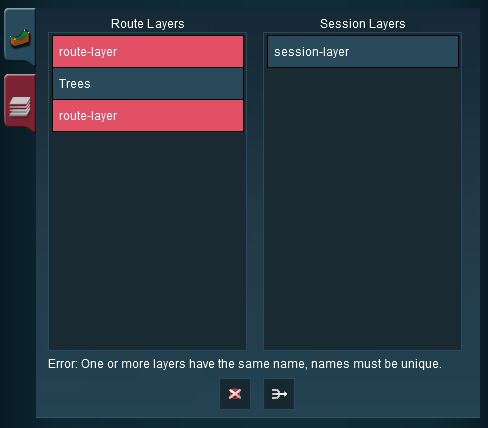
| A route merge will not proceed until ALL the terrain and layer conflicts have been eliminated. |
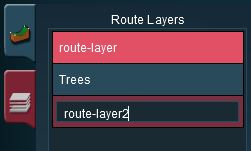
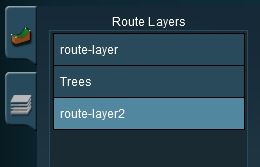
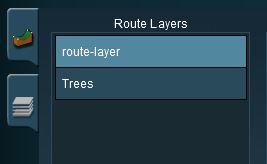
In the example shown below two of the layers, one from each route, are using the same name "route-layer". This causes a conflict that must be resolved before the merge can be completed.
There are three simple options for solving this problem:-
| Rename one of the conflicting layers. Double click on the layer name to enter a new name. |
 |
|
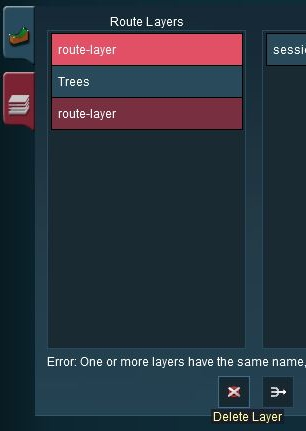
| Delete one of the conflicting layers. Select the layer and click on the Delete icon. |
 |
|
| Merge one of the conflicting layers. |
|
|
|
 |
Steps:
|
|
|
|
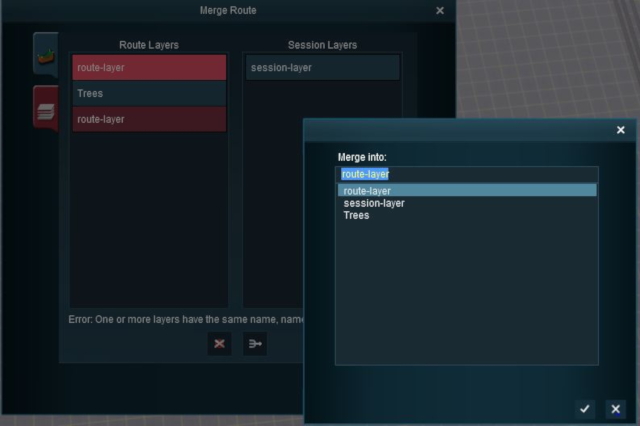 |
... the conflict has now been resolved. |
|||||||||
Accept or Reject
Once all the conflicts have been resolved, the final step in the merging process can take place.
| ACCEPT: Click the Tick button to accept the merge. This icon will not be usable unless ALL conflicts have been resolved. | |
| REJECT: Click the Cross button to reject the merge. The merging will be cancelled, no routes will be lost or altered. |
Trainz Wiki
 |
More Tutorials and Guides to Using Trainz |
