How to Use Driver Setup Rule
(→Driver Setup Rule) |
(→Driver Command Rule) |
||
| Line 212: | Line 212: | ||
Open the '''Surveyor Session Editor''' by selecting '''Edit Session''' from the Surveyor main menu. | Open the '''Surveyor Session Editor''' by selecting '''Edit Session''' from the Surveyor main menu. | ||
| − | |||
| − | |||
<table> | <table> | ||
<tr valign="top"> | <tr valign="top"> | ||
| − | <td>[[file: | + | <td>[[file:EditSessionWindow.JPG|480px]]</td> |
<td> | <td> | ||
| − | *Scroll | + | *Select the '''Driver Command Rule''' shown left (it is usually the rule near the top of the list). |
| − | *Click the '''Tick''' | + | *Click the '''Edit''' button at the bottom of the Session Editor window. |
| − | + | <br> | |
| − | This will add the rule to the Session Editor.</td> | + | <table border="2" bordercolour="black" cellpadding="4" bgcolor=#fcbcbc> |
| + | <tr> | ||
| + | <td>If the '''Driver Command Rule''' is not shown in the list then... | ||
| + | *Click the '''Add''' button at the bottom of the Session Editor window | ||
| + | *Scroll through the list of rules to locate and select the '''Driver Command Rule''' | ||
| + | *Click the '''Tick''' button on the rule list window | ||
| + | This will add the rule to the Session Editor. | ||
| + | </td> | ||
| + | </tr> | ||
| + | </table> | ||
| + | </td> | ||
</tr> | </tr> | ||
</table> | </table> | ||
Revision as of 21:13, 27 June 2018
Contents |
Driver Setup Rule
The Driver Setup Rule is automatically added to the Session Editor of every route and Session.
Open the Surveyor Session Editor by selecting Edit Session from the Surveyor main menu.
Adding New Drivers
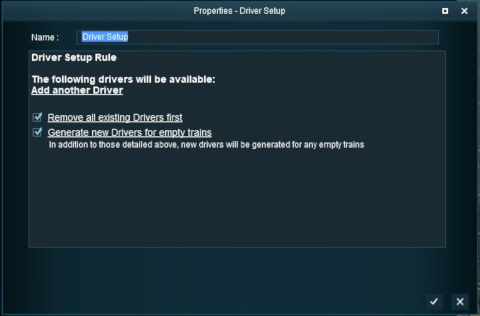
After selecting the Driver Setup Rule and clicking the Edit button, the Driver Setup Properties Window will be shown. The image below shows the properties window if it is opened with no locomotives placed in the layout.
 |
|
Editing the Driver List
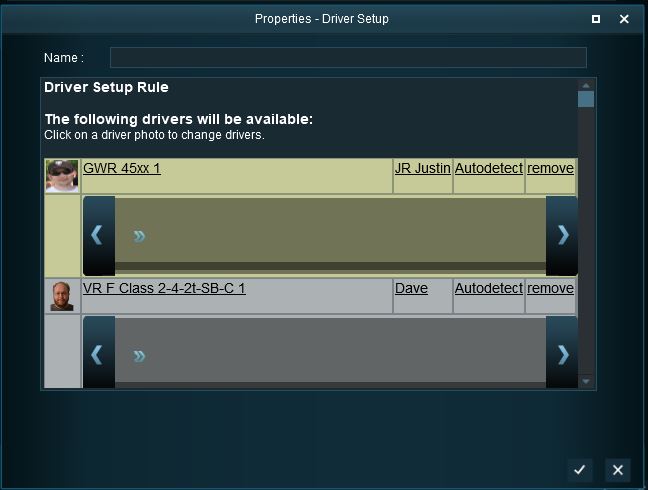
When drivers and trains have been added to the rule, it will appear as shown below.
 |
|
Adding Driver Commands
The grey area below the driver details (name, loco, owner) is the Driver Command Bar. This is where the driving instructions (the "train orders") used by the Trainz AI system are given to the driver.
 Shown below is a Command Bar after two Driver Commands have been added. Each command has its own icon. Move the mouse pointer onto a command icon to reveal a tooltip showing the contents of the command, as shown in the image. |
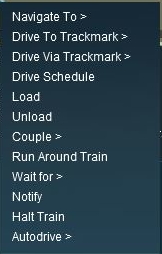
Click the small "double chevron" icon shown in the image on the left. This will open a Command List menu which will show the driver commands that can be added to this drivers Command Bar.
|
When a driver command has been executed in Drive Mode by the Trainz AI system, it will be deleted from the Command Bar and the next command in the sequence will then be executed. This will continue until the last command has been executed and deleted. Then the AI control of the train will terminate.
Deleting Driver Commands
To remove a command from the Command Bar...
 |
|
The "Repeat" Command
| The "Repeat" command is a special built in command that allows all the driver commands to be repeated endlessly. |
To add a repeat command, click the Add Command button on the Command Bar.
 |
|
As each command is executed by the Trainz AI system, it will be deleted from the front of the command list and added to the end of the list. |
 |
|
Known Issue
If a Repeat command is present in the Command Bar and all the other commands are then deleted, the Repeat command will remain in the Command Bar and cannot be removed. Because there are no other commands to be repeated this will not cause a problem. However when later adding new commands the presence of the Repeat command can be easily overlooked.
Workaround:
Add a command (any command) to the Command Bar and then the Don't Repeat option will be available and the Repeat command can be removed.
Driver Command Rule
The Driver Command Rule controls which Driver Commands will be available in a Session. This applied to both:-
|
|
| Removing commands such as Navigate To will force players to manually drive trains when in Drive Mode instead of allowing them to use the Trainz AI system to do all the work. |
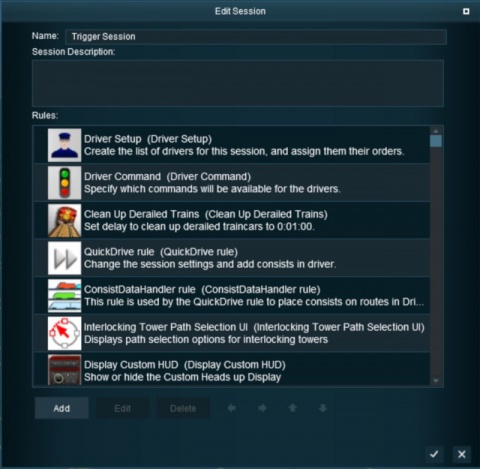
Open the Surveyor Session Editor by selecting Edit Session from the Surveyor main menu.
 |
|
Once the rule has been added to the Session Editor, select the Driver Command Rule and click the Edit button at the bottom of the Editor window.
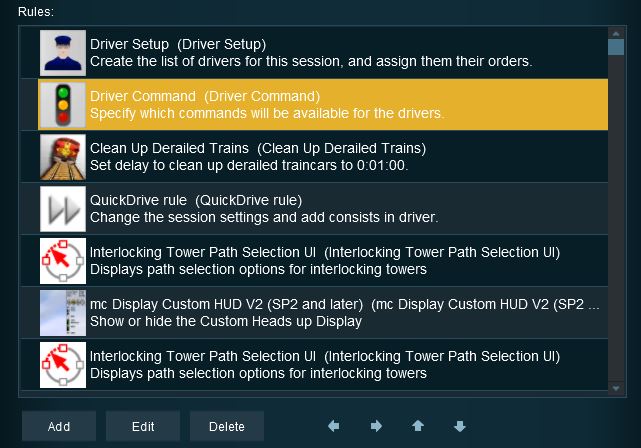 |
The Rule properties window will open to show all the Driver Commands that have been installed in TANE on your system. This list includes the commands that are built into TANE and those that have been downloaded from the DLS.
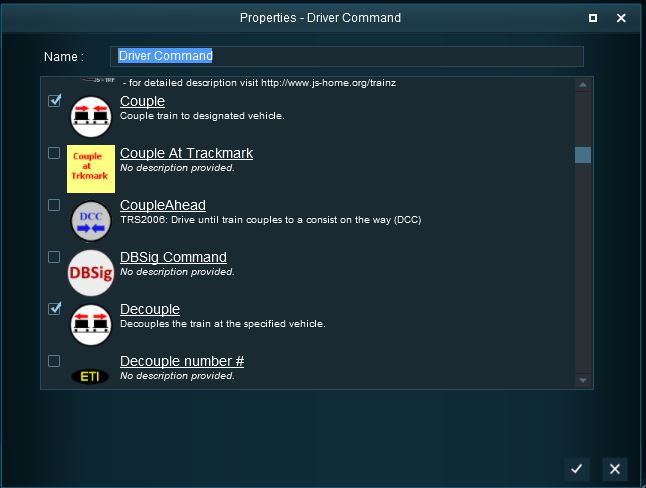 |
|
Trainz Wiki
- How to Guides
- Session Rules List (Alphabetical) with Parameters
- Session Rules List (Categories) With Parameters
Route Creation Tutorials:
Session Creation Tutorials:
- How to Create a HTML Asset (Session Introduction Page and In Game Messages)
- How to Control Junctions in Sessions
- How to Control Signals in Sessions
- How to Use Message Popup Rule
- How to Use Message Popup Rule (Applications)
- How to Use Navigation Point Rules
- How to Use Navigation Point Rules (Applications)
- How to Use Parent and Child Rules
- How to Use Track Triggers
- How to Use Variables in Sessions (Examples)
- List of Parent Rules

