TurfFX Effect Layer
m |
|||
| Line 180: | Line 180: | ||
[[file:turftbunching.jpg]] | [[file:turftbunching.jpg]] | ||
| + | |||
| + | |||
| + | ==== Expansion-constant ==== | ||
| + | |||
| + | TBD | ||
| + | |||
| + | |||
| + | ==== Expansion-multiplier ==== | ||
| + | |||
| + | TBD | ||
| + | |||
| + | |||
| + | ==== Number-of-seeds-multiplier ==== | ||
| + | |||
| + | TBD | ||
| + | |||
Revision as of 10:26, 12 June 2018
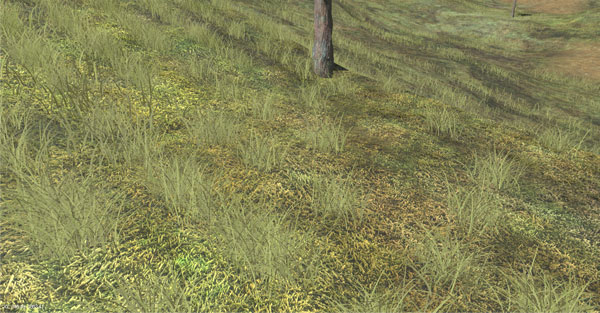
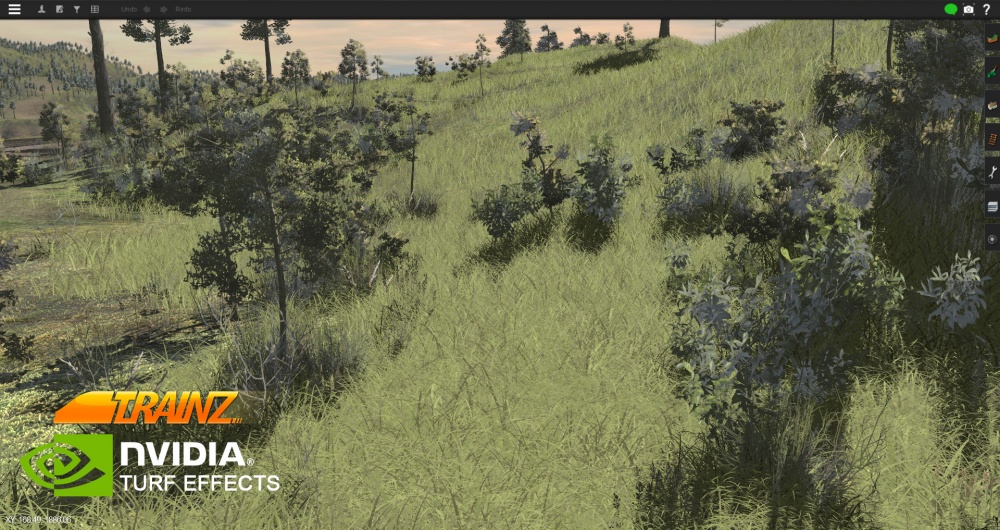
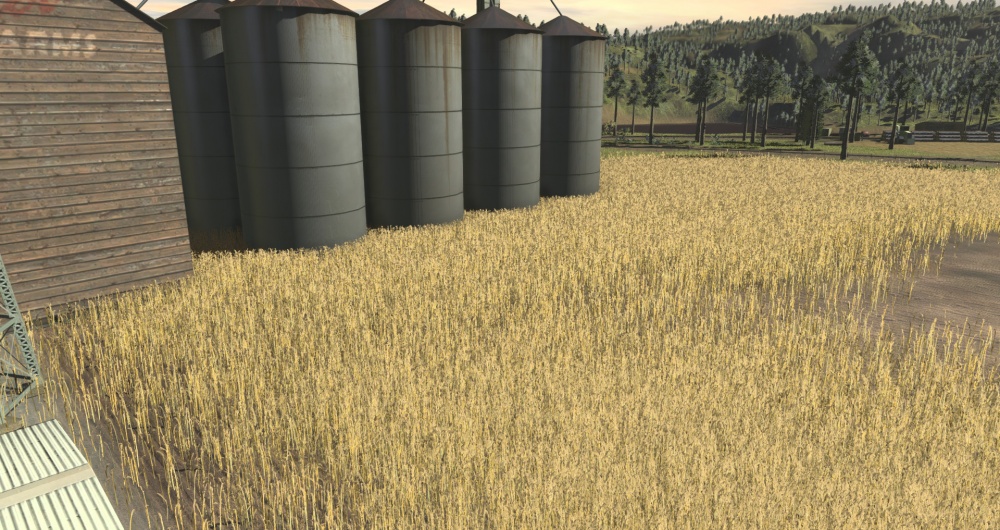
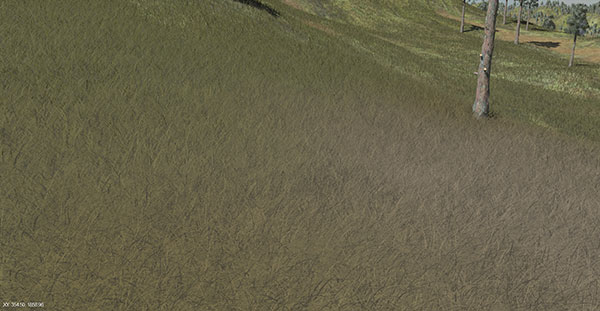
The TurfFX Effect Layer is an Effect Layer type which is used to render grass (and similar foliage). As with all effect layers, turf is painted onto the terrain and automatically generates appropriate geometry for the area surrounding the camera. As compared to the Clutter Effect Layer, TurfFX offers less flexibility but substantial improvements to performance which in turn allows for greater density at greater draw distances and effective wind-synchronised animation.
Configuration
TurfFx is made up of individual polygon blades with many options to configure each blade in your Turf Effect Layer and within the asset itself (the individual asset is explained in TurfFX Effect Layer below).
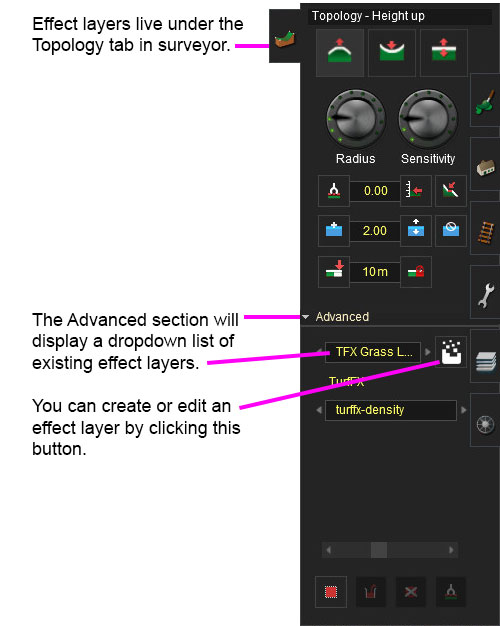
Creating and Editing Turffx Layers
NOTE: To return to ground editing mode you select "Ground" option in the dropdown list in the above image
Effect Layer Window
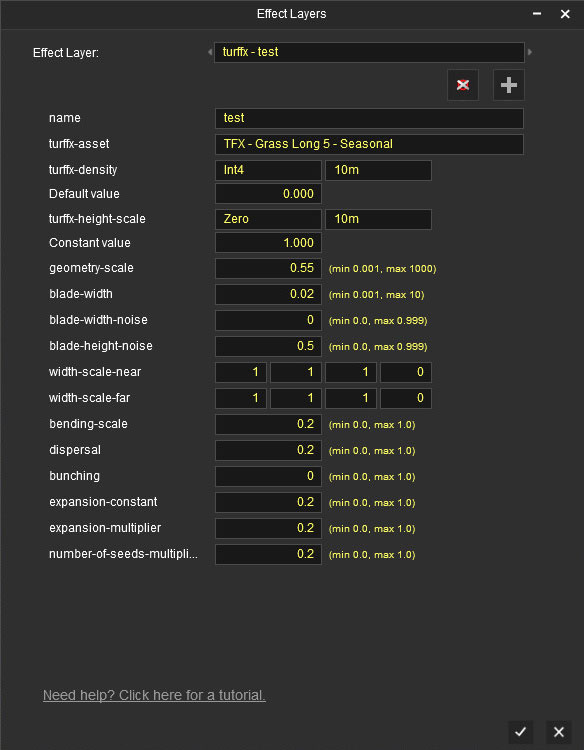
The Effect Layers window allows you to edit your effect properties. The UI in this window will change based on what effect you choose (clutter, turf, something else).
Select
This allows you to select any existing effect layers to view and edit their parameters.
Delete
This button will delete the currently selected effect layer.
Add
This button will allow you to create a new effect layer.
Name
Enter a name for your effect layer.
Turffx-Asset
This is where you select a turf asset to be generated for your entire turffx layer. Select an asset you want used in your turffx layer from the dropdown list.
Turffx-Density Data Binding
The "turffx-density" options and associated "constant" value control the Effect Layer Data Binding (read this link for details) which controls the density of this turffx layer across the route. Density ranges from 0.0 (no turf present) to 1.0 (maximum density).
NOTE: The turffx-density parameter (int1, int2, int4 ...etc) determines how accurate your density will be when painting with the height up/down and sensitivity radius in the topology tab. For example, int1 will give you 1 click while painting to get 100% density (off or on). Int4 will give you 1 click for 1/3rd density, 2 clicks for 2/3rds density, 3 clicks for 3/3rds density. Obviously the more accuracy you need the more data will need to be stored so use the appropriate data binding for the effect you require.
Turffx-Height-Scale Data Binding
The "turffx-height-scale" options and associated "constant" value control the Effect Layer Data Binding (read this link for details) which controls the height of this turffx layer across the route. Height ranges from 0.0 (no turf present) to 1.0 (maximum height).
Geometry-Scale
This changes the height of your blade geometry in meters.
Blade-Width
This changes the width of your blade geometry in meters.
Blade-Width-Noise
This adds random variation to the width of your blade geometry.
Blade-Height-Noise
This adds random variation to the height of your blade geometry.
Width-Scale-Near
This defines the shape of your blade geometry up close to the camera.
Width-Scale-Far
This defines the shape of your blade geometry in the distance.
Bending-Scale
Defines how much your blade geometry will bend in the wind. (bending strength for wind animation)
Dispersal
Dispersal controls the radius around a seed point to place individual grass blades.
Bunching
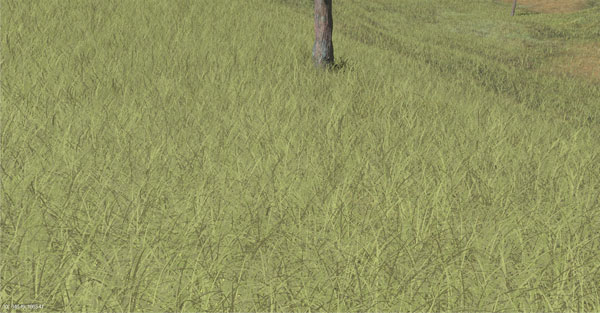
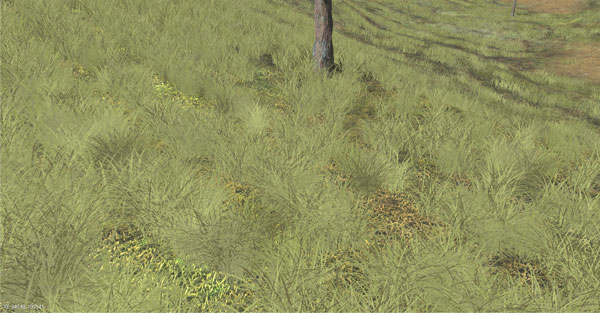
Bunching controls radial alignment of individual grass blades around the seed point. Bunching equal to one (1) produces maximally aligned distribution of grass blades, while zero (0) would result in completely random distribution.
Expansion-constant
TBD
Expansion-multiplier
TBD
Number-of-seeds-multiplier
TBD
Painting Turffx
Using Height Up and Down Tool
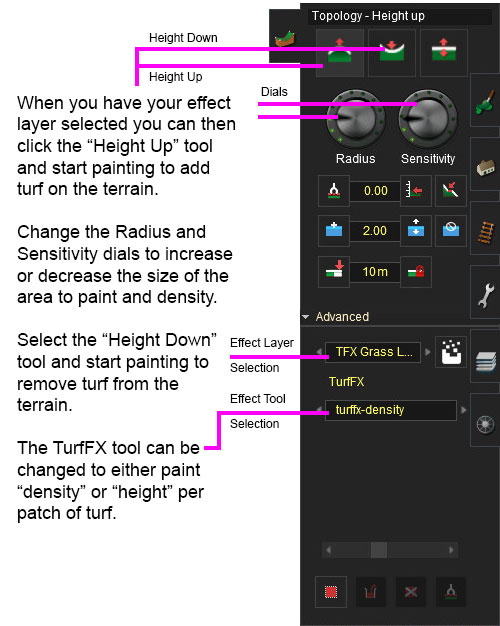
Effect Layers are selected in the Advanced Topology Tab. When you change from Ground to any of the Effect Layers you have created, the Height Up, Height Down and Radius tools are used muc like the tools in the Paint Tab.
Using Area Fill Tool
You can also select an area and fill the area with your selected Effect Layer Binding. Set the Effect Fill Density slider when using the Fill tool to adjust the density of your effect layer.
Painting Tips
- Effect Layers are data intensive, and so the user has to work out where they require precision (e.g. in highly visible areas) and where they can use much less precision (e.g. away from the track areas)
- Using 2.5m precision everywhere will consume your scene budget very quickly
- Using the turffx-height-scale tool will raise or lower existing effect layers only. (i.e. you need to paint some denisty prior to adjusting the height)
- Experiment with different values such as using 0.001 for dispersal to get that "clumpy" look (then try 0.05, 0.5 etc for different looks)
Example Usage
Surveyor Bulk Editing Tools
TBD
Asset Creation
Asset Files
This section provides help with setup of your individual turf asset (config.txt and textures).
Asset Textures
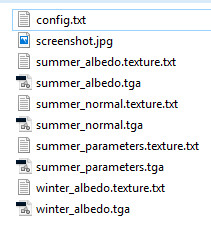
Turf requires an albedo, normal and parameters set of texture files.
Albedo Texture
RGB: The albedo map defines the base color of each texel. The sRGB color space is used.
A: The alpha channel provides a "black and white" masked alpha channel. Black indicates full transparency, meaning that the fragment is discarded. White indicates full opacity. Transparency will always cost more performance than a full opaque blade of turf so where possible try and reduce the amount of transparency in your texture.
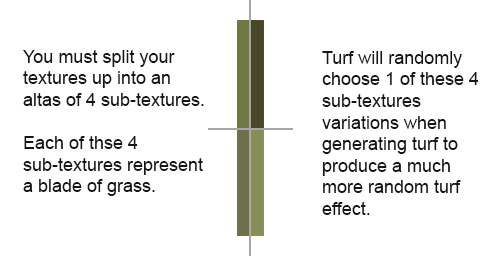
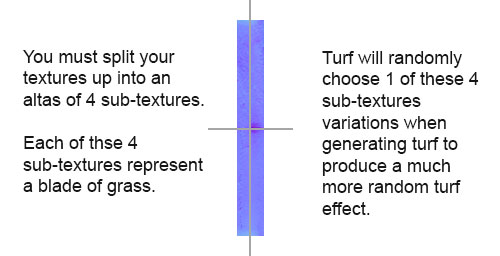
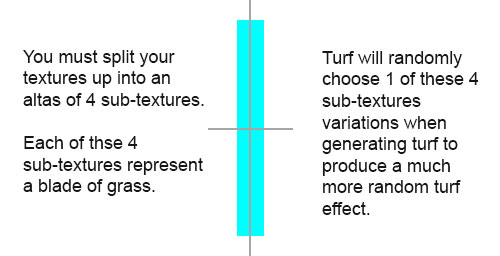
NOTE: the texture will be divided into 4 even sized sub-textures within the texture atlas. For example, if you have a 512x512 texture then the turf system will use 4 x 256x256 textures. If the texture atlas is 256x32 then the 4 sub-textures will be 128x16.
Normal Texture
RGB: Surface normal map. This defines which way the surface is facing, relative to the interpolated vertex normals. Since this is an XYZ format rather than color data, it should never be modified in Photoshop. Using Photoshop to add a fourth channel or copy/paste smaller textures into a texture atlas is acceptable. Per-pixel manipulation or use of filters on the "RGB" channels is not acceptable.
A: Average Ground Color Tinting. 0.0 avoids any color tinting from the minimap, while 1.0 tints each blade of grass with whatever ground texture minimap color it is positioned on top of.
NOTE: the texture will be divided into 4 even sized sub-textures within the texture atlas. For example, if you have a 512x512 texture then the turf system will use 4 x 256x256 textures. If the texture atlas is 256x32 then the 4 sub-textures will be 128x16.
Parameters Texture
This texture is the same as any other parameters texture in the new PBR materials format. See m.clutter or m.pbrmetal for an example of a parameters texture.
NOTE: the texture will be divided into 4 even sized sub-textures within the texture atlas. For example, if you have a 512x512 texture then the turf system will use 4 x 256x256 textures. If the texture atlas is 256x32 then the 4 sub-textures will be 128x16.
Asset Config.txt
 kuid                                    <KUID>
 kind                                    "turffx"
 username                                "NAME"
 trainz-build                            4.6
 category-class                          "FF"

 season-turffx
 {
   0
   {
     albedo-texture                      "summer_albedo.texture"
     normal-texture                      "summer_normal.texture"
     parameters-texture                  "summer_parameters.texture"
     num-control-points-per-blade        3
     expansion-constant                  0.5
     expansion-multiplier                0.1
     number-of-seeds-multiplier          0.15
     density-clamp-far                   500
     density-clamp-near                  0
     density-compensation-max            2
     density-falloff-power               6
     edge-offset-far                     0,0,0,0
     edge-offset-minimum                 0.004
     edge-offset-near                    0,0,0,0
     smoothness-clamp-far                20
     smoothness-clamp-near               0
     smoothness-falloff-power            2
     tessellation-level-far              1
     tessellation-level-near             16

     clutter-asset                       <KUID>
     clutter-draw-distance               100
     clutter-spacing                     1.4

     blade-control-points
     {
       0                                 0.02,0.7,0.1
       1                                 0.63,1.25,0.6
       2                                 1.1,1.15,0.95
     }
   }

   1
   {
     albedo-texture                      "winter_albedo.texture"
     normal-texture                      "summer_normal.texture"
     parameters-texture                  "summer_parameters.texture"
     num-control-points-per-blade        3
     expansion-constant                  0.5
     expansion-multiplier                0.1
     number-of-seeds-multiplier          0.15
     density-clamp-far                   500
     density-clamp-near                  0
     density-compensation-max            2
     density-falloff-power               6
     edge-offset-far                     0,0,0,0
     edge-offset-minimum                 0.004
     edge-offset-near                    0,0,0,0
     smoothness-clamp-far                20
     smoothness-clamp-near               0
     smoothness-falloff-power            2
     tessellation-level-far              1
     tessellation-level-near             16

     clutter-asset                       <KUID>
     clutter-draw-distance               100
     clutter-spacing                     1.4

     blade-control-points
     {
       0                                 0.02,0.7,0.1
       1                                 0.63,1.25,0.6
       2                                 1.1,1.15,0.95
     }
   }

   2
   {
     albedo-texture                      "winter_albedo.texture"
     normal-texture                      "summer_normal.texture"
     parameters-texture                  "summer_parameters.texture"
     num-control-points-per-blade        3
     expansion-constant                  0.5
     expansion-multiplier                0.1
     number-of-seeds-multiplier          0.15
     density-clamp-far                   500
     density-clamp-near                  0
     density-compensation-max            2
     density-falloff-power               6
     edge-offset-far                     0,0,0,0
     edge-offset-minimum                 0.004
     edge-offset-near                    0,0,0,0
     smoothness-clamp-far                20
     smoothness-clamp-near               0
     smoothness-falloff-power            2
     tessellation-level-far              1
     tessellation-level-near             16

     clutter-asset                       <KUID>
     clutter-draw-distance               100
     clutter-spacing                     1.4

     blade-control-points
     {
       0                                 0.02,0.7,0.1
       1                                 0.63,1.25,0.6
       2                                 1.1,1.15,0.95
     }
   }
 }

 season-selector
 {
   above-snow-line                       1

   branch-true
   {
     output-season                       2
   }

   branch-false
   {
     season-range                        0.25,0.75

     branch-true
     {
       output-season                     1
     }

     branch-false
     {
       output-season                     0
     }
   }
 }

 thumbnails
 {
   0
   {
     image                               "screenshot.jpg"
     width                               240
     height                              180
   }
 }

 kuid-table
 {
   0                                     <KUID>
 }
Asset Config.txt Breakdown
Let's break it all up and step through it line by line:
First declare the normal config.txt tags. You must use a "turffx" kind and the trainz-build number must be 4.6 or above.
 kuid                                    <KUID>
 kind                                    "turffx"
 username                                "NAME"
 trainz-build                            4.6
 category-class                          "FF"
Next you will want to start the main season-turffx container. This container provides a lot of configuration for your turf asset.
 season-turffx
 {
Container "0" is for the season summer in this example. (see the "season-selector" below for clarification on this). We will also use container "1" for winter and "2" for above the snowline.
   0
   {
We declare our summer textures here.
     albedo-texture                      "summer_albedo.texture"
     normal-texture                      "summer_normal.texture"
     parameters-texture                  "summer_parameters.texture"
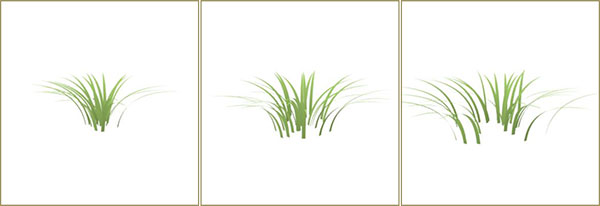
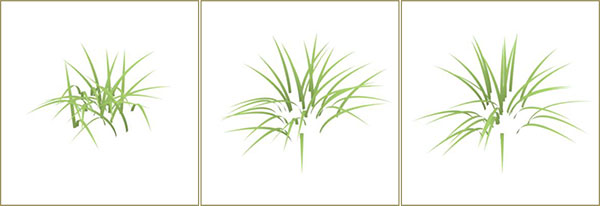
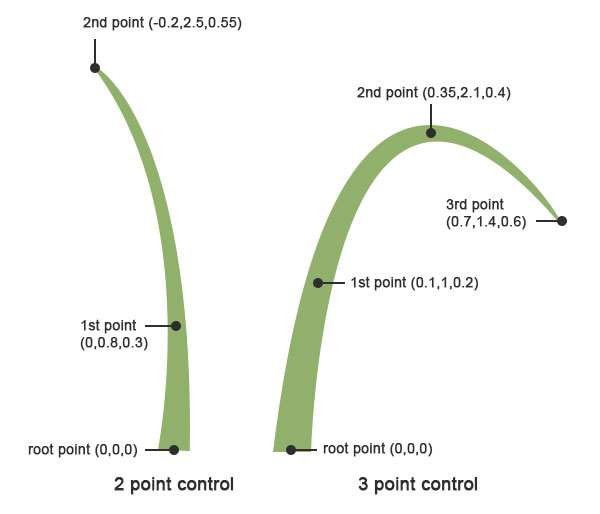
You now need to determine if you will be using 2 or 3 control points to generate your turf blades. We will define a set of control point values to generate blades from in the "blade-control-points" container below. For further explanation of 2 vs 3 control points scroll down to "blade-control-points" to see an image that explains this further.
num-control-points-per-blade 3
Expansion constant is used to determine the max density of the overall turf effect layer.
CPU Procedural.
Range -10.0 .. 10.0
Expansion = "expansion-constant" + "expansion-multiplier" * "value0"
expansion-constant 0.5
Expansion multiplier is used to determine the max density of the overall turf effect layer.
CPU Procedural.
Range -10.0 .. 10.0
Expansion = "expansion-constant" + "expansion-multiplier" * "value0"
expansion-multiplier 0.1
Number of seeds is used to determine the max density of the overall turf effect layer.
CPU Procedural.
Range 0.01 .. 1.0
Number of Seeds = "number-of-seeds-multiplier" * "value0"
number-of-seeds-multiplier 0.15
Edge profile offset relative to strand shape (m).
Defines edge offset along the normal in meters relative to the center of the grass blade.
So basically, you can add a crease in the center of each blade. You can control root, mid low, mid high, tip.
4-component vector.
Per grass zone.
edge-offset-near 0,0,0,0
Edge profile offset relative to strand shape (m).
4-component vector.
Per grass zone.
edge-offset-far 0,0,0,0
If edge profile is lower than this, it would be zero.
If an absolute interpolated edge offset value is less than a minimal threshold, edge offset would be zero. Offset threshold should be used to simplify the blade at a distance where edge offset doesn't affect visuals.
In other words, use this to turn off crease rendering in the distance to save polygons.
Per grass zone.
edge-offset-minimum 0.004
Smoothness = pow(max(1.0 - clampedDistance / smoothnessClampFar, 0), smoothnessFalloffPower)
Smoothness falloff is used for a linear interpolation between near and far per-blade parameters. Near value would be chosen for smoothness = 1, far for smoothness = 0.
Per grass zone.
smoothness-clamp-near 0
Per grass zone.
smoothness-clamp-far 20
Per grass zone.
smoothness-falloff-power 2
"Number of subdivisions along the strand"
Tessellation controls subdivision along the blade. Valid values should lie in the interval [1, 64].
Per grass zone.
tessellation-level-near 16
Per grass zone.
tessellation-level-far 1
Clutter-assets are used as a fallback when TurfFX is disabled or not available. You can configure this manually in the game settings for testing.
The intention here is that you should provide a clutter effect which looks reminiscent of the TurfFX asset in question. You should not attempt to exactly duplicate it, and you should especially not attempt to achieve TurfFX levels of polygon density, animation, etc. It is a safe assumption that any computer which is using this fallback is below our recommended spec, and the user will value performance over full graphical detail. However, you should avoid the effect looking completely terrible- if performance is that important, the user can switch the grass effect off entirely.
A single asset to use as a clutter mesh.
clutter-asset <KUID>
The spacing (in meters) for the clutter asset.
clutter-draw-distance 100
The draw distance (in meters) for the clutter asset.
clutter-spacing 1.4
This is an array of (2x or 3x (3-component-vector)) depending on what you defined in your "num-control-points-per-blade" tag.
Control points define the global shape variation for a particular grass type. Currently there are only two options: grass blades with 2 and 3 user-defined control points. For example with 2 user- defined points there is a root point and 2 extra points (with coordinates relative to root) which form each blade. An asset stores an array of those 3d control points where each pair corresponds to a separate grass blade(they are assigned in round- robin manner) . Also there is no need to vary the rotations as those are automatically added by the library. You can start with a single blade and later add as many as needed to create a variety of shapes."
Per grass zone.
     blade-control-points
     {
       0                                 0.02,0.7,0.1
       1                                 0.63,1.25,0.6
       2                                 1.1,1.15,0.95
     }
   }
 }
Container "1" and "2" are seasonal containers.
1 = winter
2 = above snowline
in this example asset. You can use the same tag values that are declared in container "0" or you can create new values for the other seasonal containers. You'll most likely want to change the textures (at least the Albedo) if anything like we have done in this example.
   1
   {
     enable-high-lod                     0
     albedo-texture                      "winter_albedo.texture"
     normal-texture                      "summer_normal.texture"
     parameters-texture                  "summer_parameters.texture"
     num-control-points-per-blade        3
     expansion-constant                  0.5
     expansion-multiplier                0.1
     number-of-seeds-multiplier          0.15
     density-clamp-far                   500
     density-clamp-near                  0
     density-compensation-max            2
     density-falloff-power               6
     edge-offset-far                     0,0,0,0
     edge-offset-minimum                 0.004
     edge-offset-near                    0,0,0,0
     smoothness-clamp-far                20
     smoothness-clamp-near               0
     smoothness-falloff-power            2
     tessellation-level-far              1
     tessellation-level-near             16

     clutter-asset                       <KUID>
     clutter-draw-distance               100
     clutter-spacing                     1.4

     blade-control-points
     {
       0                                 0.02,0.7,0.1
       1                                 0.63,1.25,0.6
       2                                 1.1,1.15,0.95
     }
   }

   2
   {
     enable-high-lod                     0
     albedo-texture                      "winter_albedo.texture"
     normal-texture                      "summer_normal.texture"
     parameters-texture                  "summer_parameters.texture"
     num-control-points-per-blade        3
     expansion-constant                  0.5
     expansion-multiplier                0.1
     number-of-seeds-multiplier          0.15
     density-clamp-far                   500
     density-clamp-near                  0
     density-compensation-max            2
     density-falloff-power               6
     edge-offset-far                     0,0,0,0
     edge-offset-minimum                 0.004
     edge-offset-near                    0,0,0,0
     smoothness-clamp-far                20
     smoothness-clamp-near               0
     smoothness-falloff-power            2
     tessellation-level-far              1
     tessellation-level-near             16

     clutter-asset                       <KUID>
     clutter-draw-distance               100
     clutter-spacing                     1.4

     blade-control-points
     {
       0                                 0.02,0.7,0.1
       1                                 0.63,1.25,0.6
       2                                 1.1,1.15,0.95
     }
   }
We then add a "Season-selector" container so we can declare what contain 0, 1 and 2 represent.
 season-selector
 {
   above-snow-line                       1

   branch-true
   {
     output-season                       2
   }

   branch-false
   {
     season-range                        0.25,0.75

     branch-true
     {
       output-season                     1
     }

     branch-false
     {
       output-season                     0
     }
   }
 }
We need a thumbnail for this asset so we add that.
 thumbnails
 {
   0
   {
     image                               "screenshot.jpg"
     width                               240
     height                              180
   }
 }
Finally, we add the kuid-table and the clutter-asset kuid(s).
 kuid-table
 {
   0                                     <KUID>
 }
Example Assets
Short Straight Blades: Download Asset
Long Curved Blades: Download Asset
Hardware Limitations
As an NVIDIA-provided visual effect, there are some hardware requirements and limitations which apply to TurfFX.
1. TurfFX is currently supported only for Windows.
2. TurfFX requires a GPU with substantial amounts of VRAM. Whereas Trainz will typically run (albeit slowly, or at reduced settings) on below-spec computers, TurfFX may need to be disabled entirely if the GPU is insufficient.
With TurfFX disabled, the Effect Layers are ignored entirely, with no performance penalty for those objects you cannot see.
See Also
Back to Effect_Layer
