|
|
| Line 107: |
Line 107: |
| | | | |
| | <table> | | <table> |
| − | <tr> | + | <tr valign="top"> |
| | <td>[[file:LayersAddLayer.JPG]]</td> | | <td>[[file:LayersAddLayer.JPG]]</td> |
| | <td> | | <td> |
Revision as of 14:45, 3 June 2018
 |
Layers are a Surveyor tool that allows you to better manage the objects that are placed in your Trainz World. |
|
 |
Layers are a Driver tool that allows you to change what the players see as they drive around your Trainz World. |
|
The Layers Tool
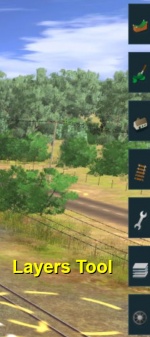 |

| Click the Layers Tool to open up its properties.
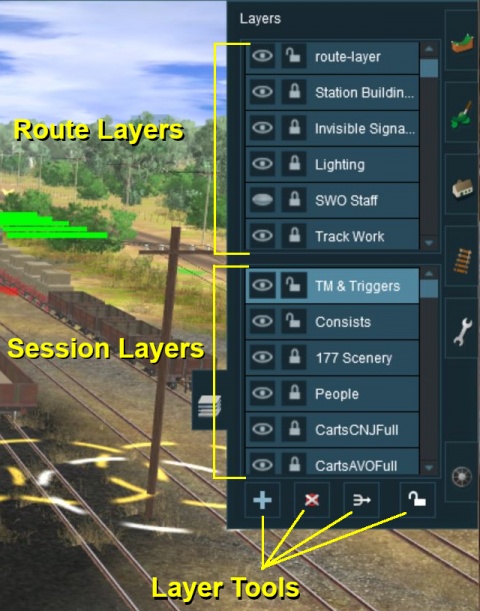 |
The layers are organised into two groups:-
- Route Layers in the top group, and
- Session Layers in the lower group.
With the Layer Tools (Add, Delete, Merge and Lock) below them.
Each group contains multiple layers - the scroll bars next to the layer names indicate that there are more layers in each group.
Loading a Route and Loading a Session
The layers you will see will depend on whether you have loaded into Surveyor a Route by itself (with no "child" Session) or a Session and its "parent" Route.
 |
 |
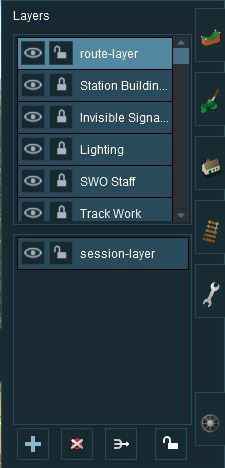
- The image on the left shows the layers that will appear if the route only is loaded into Surveyor. These are the layers that are saved with the Route. Note that a default "session-layer" is present. An empty default "session-layer" is always added when only the Route is loaded into Surveyor.
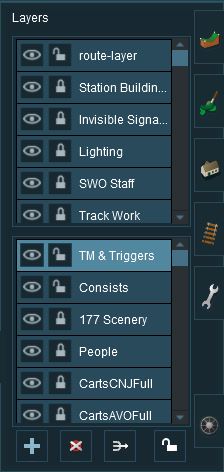
- The image on the right shows the layers that will appear if a Session based on that Route is loaded into Surveyor. It shows Route Layers and Session Layers.
In both cases, the Route Layers are identical because the same Route has been loaded. A Session contains its own layers, the Session Layers, that are saved with the Session but are not saved with the Route.
 |
Route Layers are saved with the Route. Session Layers are saved with the Session. |
|
 |
If you load a Route without a Session and edit the "session-layer" then those edits will be gone the next time you load the Route without a Session because a new empty "session-layer" will be created each time a Route is loaded without a Session. |
|
 |
An important lesson here is:-
|
If you load a ROUTE without a SESSION then only edit the Route Layers
|
| If you load a SESSION then you can edit BOTH the Route Layers and the Session Layers |
|
|
Creating a New Route
When a brand new route is created it will come with two layers, a single "route-layer" and a single "session-layer".
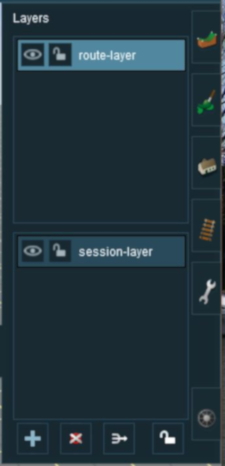 |
- Both layers will be empty (the baseboard with its grid is saved with the route but is not in any layer).
- A layer can be renamed at anytime by double clicking on its name with the left mouse button and typing a new name.
|
Adding a New Layer
 |
Click the Add Button |
A New Layer dialogue window will appear.
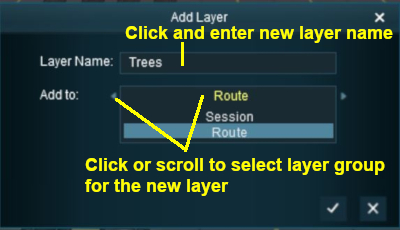 |
- Enter a name for the new layer and select the layer group, Route or Session, where it will be placed. You can change the layer group later if you change your mind.
|
Click the Tick button to accept the changes.
Deleting a Layer
 |
Select the layer to be deleted and click the Delete Button |
 |
Deleting a layer will delete ALL the objects placed in that layer except objects that are "Bound" to that layer. |
Merging Layers
 |
Select the layer to be merged into another layer and click the Merge Button |
 |
Merging a layer into a second layer will move ALL the objects in the first layer into the second layer. The first layer, which is now empty, will then be deleted. |
Locking Layers
Locking ALL Route Layers
 |
Click the Lock Button |
Locking Individual Layers
Moving a Layer
Hiding Layers
Adding Objects To Layers
The "route-layer"
Layer Hierarchy
Moving Objects To Other Layers
The Bound Layer
Layers in Driver Mode


