How to Create a Picklist
From TrainzOnline
(Difference between revisions)
m |
m (→Using Surveyor 2.0) |
||
| Line 425: | Line 425: | ||
<tr valign="top"> | <tr valign="top"> | ||
<td>[[image:DotPoint.JPG|10px|link=]]</td> | <td>[[image:DotPoint.JPG|10px|link=]]</td> | ||
| − | <td>'''Saved Filters''' - these are the '''Search Filters''' that are | + | <td>'''Saved Filters''' - these are the '''Search Filters''' that are used with '''Content Manager'''. They consist of:- |
<table> | <table> | ||
<tr valign="top"> | <tr valign="top"> | ||
| Line 519: | Line 519: | ||
<tr valign="top"> | <tr valign="top"> | ||
<td width=25>[[image:Ablue.png|link=]]</td> | <td width=25>[[image:Ablue.png|link=]]</td> | ||
| − | <td><span style="font-weight: 700; font-size: 15px;">Steps: Using the Asset List in the | + | <td><span style="font-weight: 700; font-size: 15px;">Steps: Using the Asset List in the Assets Palette</span></td> |
</tr> | </tr> | ||
<tr valign="top"> | <tr valign="top"> | ||
| Line 550: | Line 550: | ||
<tr valign="top"> | <tr valign="top"> | ||
<td>[[image:DotPoint3.JPG|link=]]</td> | <td>[[image:DotPoint3.JPG|link=]]</td> | ||
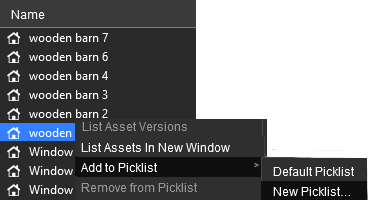
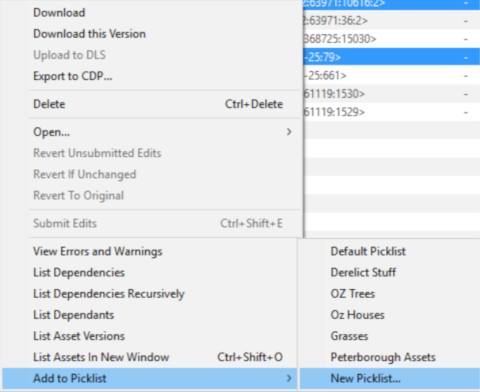
| − | <td>select the option <span style="font-weight: 700; font-size: 15px; color: white; background-color: black;"> Add to Picklist </span></td> | + | <td>select the option <span style="font-weight: 700; font-size: 15px; color: white; background-color: black;"> Add to Picklist </span> from the popout menu</td> |
</tr> | </tr> | ||
</table> | </table> | ||
| Line 604: | Line 604: | ||
<tr valign="top"> | <tr valign="top"> | ||
<td>[[image:DotPoint3.JPG|link=]]</td> | <td>[[image:DotPoint3.JPG|link=]]</td> | ||
| − | <td>select the option <span style="font-weight: 700; font-size: 15px; color: white; background-color: black;"> Add to Picklist </span></td> | + | <td>select the option <span style="font-weight: 700; font-size: 15px; color: white; background-color: black;"> Add to Picklist </span> from the popout menu</td> |
</tr> | </tr> | ||
</table> | </table> | ||
| Line 664: | Line 664: | ||
<tr valign="top"> | <tr valign="top"> | ||
<td width=629><span id="stepUsingCM"></span> | <td width=629><span id="stepUsingCM"></span> | ||
| + | |||
='''Using Content Manager (CM)'''= | ='''Using Content Manager (CM)'''= | ||
</td> | </td> | ||
Revision as of 22:31, 7 October 2023
The information in this Wiki Page applies to TANE, TRS19, Trainz Plus and TRS22.
|
|
 |
|
|
||||||||
Using Surveyor Classic |
| Steps: | |||||
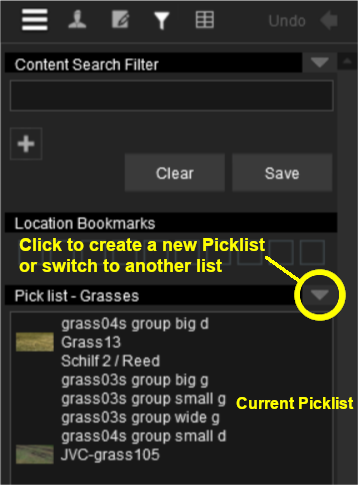
Open the Picklist Window:
|
|||||
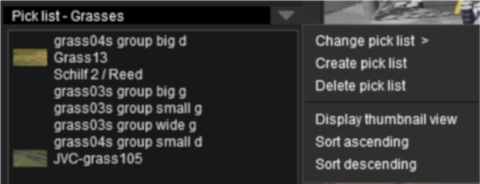
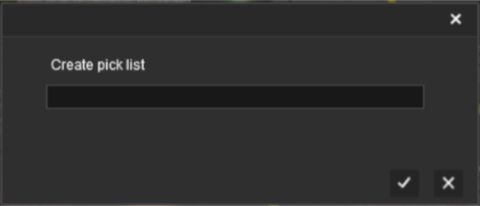
Select a Picklist or Create a New Picklist:
|
|||||||||||||
| Add Assets to the Picklist: Options: Choose one of two methods:- |
|||||||||||||||||||||||||||||||||||||||||
|
|||||||||||||||||||||||||||||||||||||||||
|
Using Surveyor 2.0 |
|
Locating the Picklists
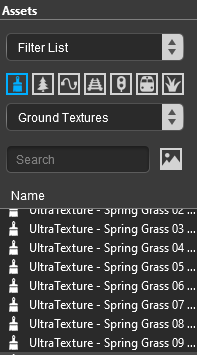
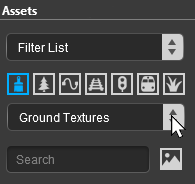
| Picklists are created, managed and deleted using the Assets Palette in Surveyor 2.0 |
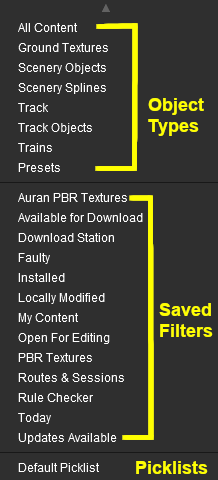
The Assets Palette gives you access to all the installed Assets, the Search Filters created in Content Manager and the Picklists.
 The Assets Palette |
|
|||||||||||||||||||||
 |
|
|||||||||||||||||||||||||||||
Creating a New Picklist |
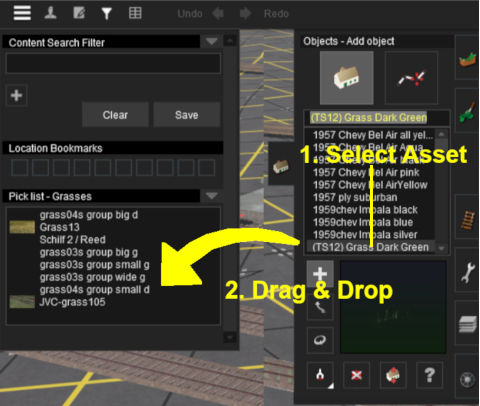
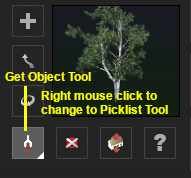
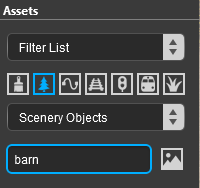
| New Picklists are created by selecting an asset in the Assets Palette or by selecting an existing object in the route |
| A new Picklist is created by first identifying an asset or object that will be added to the new (yet to be created) Picklist. You cannot create an empty Picklist. | |||||||||||||||||||||||||||||||||||
| Options: Choose one of two methods:- | |||||||||||||||||||||||||||||||||||
|
|
||||||||||||||||||||||||||||||||||
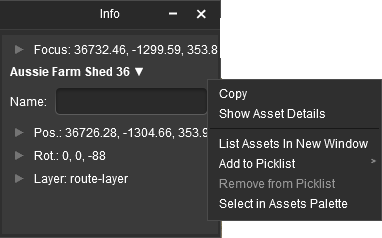
| In both Options |
||||
 |
|
|||
|
Using Content Manager (CM) |
| Steps: | ||||||||||||
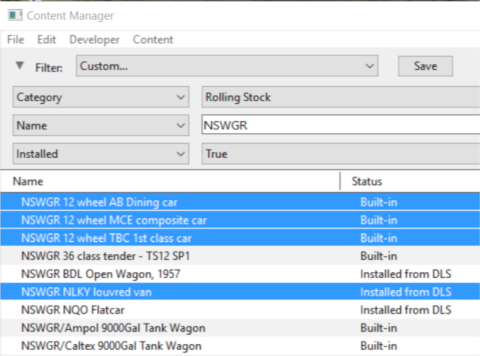
Select the Assets:
|
||||||||||||
Add the Assets to the Picklist:
|
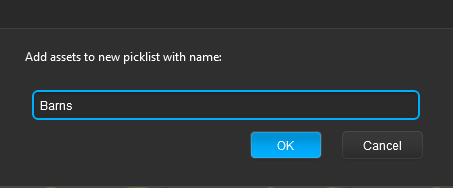
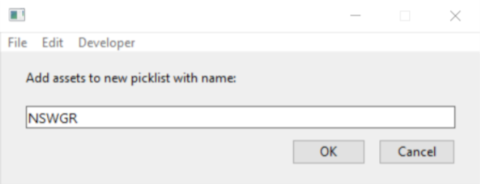
Enter Picklist Name (for New Picklist Option Only):
|
Trainz Wiki
 |
More Tutorials and Guides to Using Trainz |
This page was created by Trainz user pware in January 2019 and was last updated as shown below.