How to Create a Message Popup Icon
m (→Message Popup Icons) |
m (→The Texture File) |
||
| Line 335: | Line 335: | ||
<td>[[file:Gears.PNG]]</td> | <td>[[file:Gears.PNG]]</td> | ||
<td><font size="3">'''Settings:'''</font><br> | <td><font size="3">'''Settings:'''</font><br> | ||
| − | *'''primary''' - this is the name of the icon image file that contains the '''RGB''' image | + | *'''primary''' - this is the name of the icon image file that contains the '''RGB''' colour image |
| − | *'''secondary''' - this is the name of the icon image file that contains the '''Alpha Channel | + | *'''secondary''' - this is the name of the icon image file that contains the '''Alpha Channel''' (transparency) image |
*'''tile=st''' - instructs TANE to tile the image both horizontally and vertically. This has no effect on the icon in a message popup window but must be included for validation purposes | *'''tile=st''' - instructs TANE to tile the image both horizontally and vertically. This has no effect on the icon in a message popup window but must be included for validation purposes | ||
</td> | </td> | ||
Revision as of 21:56, 4 August 2018
Contents |
Message Popup Icons
| The icons used in Custom Message Popups belong to the class of Textures - Not Environmental |
Information on Message Popups can be found at the Trainz Wiki pages:-
Using the Message Popup Rule
Using the Message Popup Rule (Applications)
How to Create a HTML Asset
Message Popup Rule (description)
How to Create a New Non-Environmental Texture Asset
|
|
|||
 |
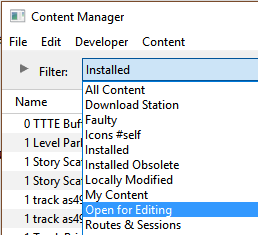
Step 2: Display the New Asset
|
||
|
|
|||
 |
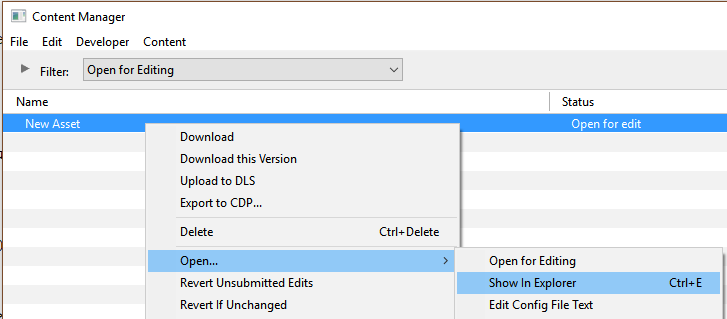
Step 3: Open the Asset in Windows Explorer
|
||
|
|
|||
 |
Step 4: Open File in Notepad
|
||
|
|
|||
 |
Step 5: Edit the File
|
||
|
|
|
 |
Step 6: Add Any "Extras" You will need to add three additional files (possibly more depending on how the icon is created) to the asset folder:-
|
 |
THIS IS AN EXAMPLE ONLY This is the minimum number of files needed in a Texture asset |
|
|
||||||||
 |
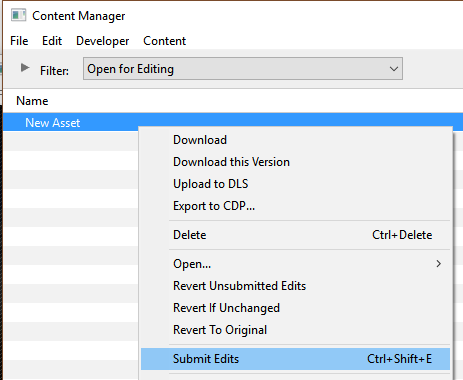
Step 7: Finish Up
|
|||||||
The Config.txt File
This file should follow the same (or a similar) format as the example below. Entries in blue will be different for each asset. The order of the "tags" is not important:-
kuid                                    <kuid:this is an auto-generated number>
kind                                    "texture"
texture                                 "asset_name.texture"
username                                "place your selected asset name here"
category-class                          "JI"
trainz-build                            4.3

thumbnails
{
  0
  {
    width                               240
    height                              180
    image                               "name_of_thumbnail.jpg"
  }

  {
    width                               64
    height                              64
    image                               "asset_name.texture"
  }
}
description                             "Place your description of the icon here"
|
|
|
| Settings: For the above example:
|
|
|
|
|
The Icon Image
| You will need image editing software to create the icon image or to change an existing image to the required dimensions and format. |
(not to scale) |
|
||||||
The Texture File
| The .texture.txt file mainly contains the transparency (or Alpha Channel) data. |
|
|
|
Settings:
|
|
|
|
|
A sample .texture.txt file is shown below:-
primary=ashpit.tga secondary=ashpit.tga tile=st |
|
||||||
| Notes: In the example shown above, both the primary and secondary images are the same. In this case the image must contain both the RGB colour data and the Alpha Channel data. |
This is a work in progress. More to come.


