How to Manage Backups
m (→Backup Plan Basics) |
m (→Creating Manual Backups) |
||
| (4 intermediate revisions by one user not shown) | |||
| Line 246: | Line 246: | ||
<br> | <br> | ||
| − | <table bgcolor=# | + | <table width=1000 bgcolor=#ff0000 cellpadding=2> |
<tr valign="top"> | <tr valign="top"> | ||
<td> | <td> | ||
| − | <table bgcolor=# | + | <table width=996 bgcolor=#fcbcbc cellpadding=2> |
<tr valign="top"> | <tr valign="top"> | ||
| − | <td | + | <td>[[image:Stop.PNG|link=]]</td> |
| − | <td><span style="font-size: | + | <td><span style="font-size: 15px; font-weight: 700;">WARNING:</span><br> |
| − | + | ||
The "usual" method of dragging and dropping the backup folder into '''Content Manager''' to restore it no longer works. Instead the following method is recommended. | The "usual" method of dragging and dropping the backup folder into '''Content Manager''' to restore it no longer works. Instead the following method is recommended. | ||
</td> | </td> | ||
| Line 327: | Line 326: | ||
#open '''Content Manager''' | #open '''Content Manager''' | ||
#run a database repair | #run a database repair | ||
| + | #'''IF''' Content Manager shows your restored asset as '''Open for Edit''' then submit it | ||
</td> | </td> | ||
</tr> | </tr> | ||
| Line 335: | Line 335: | ||
</table> | </table> | ||
<br> | <br> | ||
| − | More details, including tips on troubleshooting, can be found in the Trainz Knowledge Base at [[image:WikiLink.PNG|link=]] '''<span class=" | + | More details, including tips on troubleshooting, can be found in the Trainz Knowledge Base at [[image:WikiLink.PNG|link=]] '''<span class="plain;s">[https://support.trainzportal.com/index.php?/Knowledgebase/Article/View/97/0/reinstalling-or-restoring-a-backup-version-of-your-content Restoring Backups]</span>''' |
<br> | <br> | ||
<table> <!-- BEGIN Nav Buttons Table --> | <table> <!-- BEGIN Nav Buttons Table --> | ||
| Line 347: | Line 347: | ||
</table> <!-- END Nav Buttons Table --> | </table> <!-- END Nav Buttons Table --> | ||
<br> | <br> | ||
| − | + | ='''Creating Manual Backups'''= | |
| − | + | ||
| − | + | ||
| − | + | ||
| − | + | ||
| − | + | ||
| − | + | ||
| − | + | ||
| − | + | ||
| − | + | ||
| − | + | ||
| − | + | ||
| − | + | ||
| − | + | ||
| − | + | ||
| − | + | ||
| − | + | ||
| − | + | ||
| − | + | ||
| − | + | ||
| − | + | ||
<table cellpadding=2 bgcolor=#c1e7e7> | <table cellpadding=2 bgcolor=#c1e7e7> | ||
| Line 398: | Line 378: | ||
</td> | </td> | ||
</tr> | </tr> | ||
| − | <tr valign=" | + | <tr valign="top"> |
<td width=10>[[image:DotPoint.JPG|10px|link=]]</td> | <td width=10>[[image:DotPoint.JPG|10px|link=]]</td> | ||
<td>[[image:FilterToday.png|link=|alt=Today Filter]]</td> | <td>[[image:FilterToday.png|link=|alt=Today Filter]]</td> | ||
<td>to show all assets that have been altered today</td> | <td>to show all assets that have been altered today</td> | ||
</tr> | </tr> | ||
| − | <tr valign=" | + | <tr valign="top"> |
<td>[[image:DotPoint.JPG|10px|link=]]</td> | <td>[[image:DotPoint.JPG|10px|link=]]</td> | ||
<td>[[image:FilterRouteSelfInstalled.png|link=|alt=Launcher Settings Tabs]]</td> | <td>[[image:FilterRouteSelfInstalled.png|link=|alt=Launcher Settings Tabs]]</td> | ||
| Line 475: | Line 455: | ||
</table> | </table> | ||
<br> | <br> | ||
| − | |||
=='''Backup Plan Basics'''== | =='''Backup Plan Basics'''== | ||
| Line 595: | Line 574: | ||
</table> <!-- END Nav Buttons Table --> | </table> <!-- END Nav Buttons Table --> | ||
<br> | <br> | ||
| − | |||
='''Backing Up and Restoring Picklists'''= | ='''Backing Up and Restoring Picklists'''= | ||
<table cellpadding=2 bgcolor=#c1e7e7> | <table cellpadding=2 bgcolor=#c1e7e7> | ||
| Line 709: | Line 687: | ||
</table> <!-- END Nav Buttons Table --> | </table> <!-- END Nav Buttons Table --> | ||
='''Trainz Wiki'''= | ='''Trainz Wiki'''= | ||
| − | <table | + | <table width=1000> |
<tr valign="top"> | <tr valign="top"> | ||
| − | <td>[[image:TrainzWiki.png|link=]]</td> | + | <td> |
| + | <table width=600 cellpadding=2 bgcolor=#ffffff> | ||
| + | <tr valign="top"> | ||
| + | <td width=80>[[image:TrainzWiki.png|link=]]</td> | ||
<td> | <td> | ||
<span style="font-size: 17px;">'''More Tutorials and Guides to Using Trainz'''</span><br> | <span style="font-size: 17px;">'''More Tutorials and Guides to Using Trainz'''</span><br> | ||
| − | *'''<span class=" | + | *'''<span class="plain;s">[http://online.ts2009.com/mediaWiki/index.php/HowTo How to Guides]</span>''' |
*'''[[Driver Commands List]]''' | *'''[[Driver Commands List]]''' | ||
*'''[[Session Rule List with Parameters|Session Rules List (Alphabetical) with Parameters]]''' | *'''[[Session Rule List with Parameters|Session Rules List (Alphabetical) with Parameters]]''' | ||
*'''[[Session Rules By Categories With Properties|Session Rules List (Categories) With Parameters]]''' | *'''[[Session Rules By Categories With Properties|Session Rules List (Categories) With Parameters]]''' | ||
| + | </td> | ||
| + | </tr> | ||
| + | </table> | ||
| + | </td> | ||
| + | <td> | ||
| + | <table width=400 cellpadding=4 bgcolor="aquamarine"> | ||
| + | <tr valign="top"> | ||
| + | <td width=50>[[image:LinkWiki.PNG|link=]]</td> | ||
| + | <td> | ||
| + | <span style="font-size: 17px;">'''Related Links'''</span><br> | ||
| + | *'''[[How to Perform Database Repairs|How to Perform Database Repairs]]''' | ||
| + | *'''[[How to Restore Deleted Assets|How to Restore Deleted Assets]]''' | ||
| + | *'''[[Understand_Content_Manager_Status_Labels|Understanding Content Manager Status Labels]]''' | ||
| + | *'''[[Using Content Manager to Update Assets|Using Content Manager to Update Assets]]''' | ||
| + | </td> | ||
| + | </tr> | ||
| + | </table> | ||
</td> | </td> | ||
</tr> | </tr> | ||
</table> | </table> | ||
---- | ---- | ||
| − | This page was created by Trainz user '''<span class=" | + | This page was created by Trainz user '''<span class="plain;s">[http://online.ts2009.com/mediaWiki/index.php/User:Pware pware]</span>''' in January 2020 and was last updated as shown below. |
---- | ---- | ||
[[Category:How-to guides]] | [[Category:How-to guides]] | ||
Latest revision as of 08:21, 30 April 2025
The information in this Wiki Page applies to TANE, TRS19, Trainz Plus and TRS22. This guide will explain automatic and manual backups in Trainz.
| Main Points: | |
| Trainz will automatically backup your current route and session in Surveyor while you work. You can set the number of backups created each day | |
| You can use Content Manager to manually create backups of routes, sessions and assets as often as you need | |
| Both the manual and automatic backups can be restored to Trainz by Content Manager | |
| You can backup all your user data (built-in assets, DLS downloads, DLC purchases, your own creations) | |
Contents |
[edit] Automatic Backups vs Manual Backups
|
[edit] Automatic Backups
[edit] Creating Automatic Backups
| In Summary: | |
| Only a set number of backups are created each day | |
| Only 7 days of backups are kept | |
This is a Set and Forget operation. You simply tell Trainz how many backups you want created each day and the program takes care of the rest.
|
|
||||||||||||||
 |
Steps:
|
|||||||||||||
|
|
||||||||||||||
|
Only the last 7 days of backups are kept and this number cannot be changed.
[edit] Restoring Automatic Backups
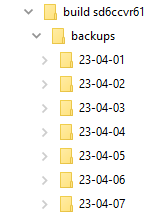
The automatic backups are stored in a backup folder in your Trainz local data folder. The location of this folder is held in your Launcher - Trainz Settings - Install tab.
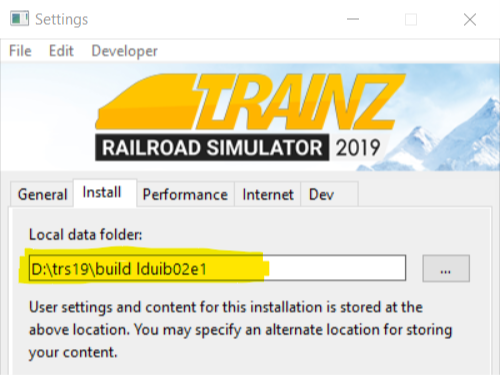 |
|
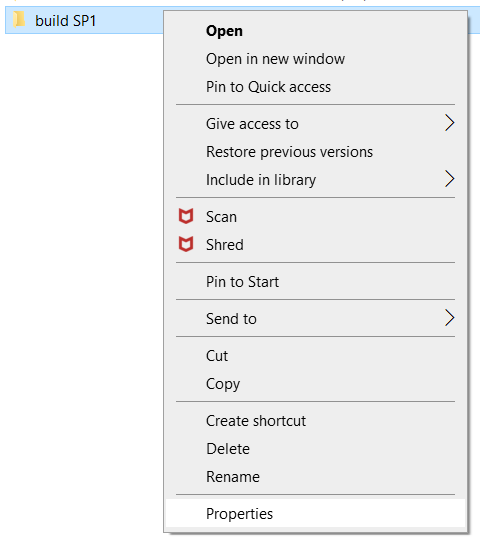
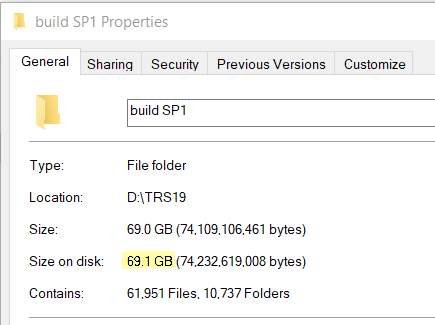
This folder can also found using Windows Explorer by following a similar folder path as shown below.
![]()
Where idname is the first 5 characters of your Windows logon name and random will be a random sequence of letters and numbers identifying the Trainz Build Number.
|
|||||||||||
|
 |
Steps: |
||||||||
|
|||||||||
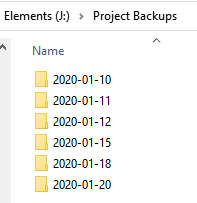
| Open the backup folder for the date that you want. A list of backup files and folders created that day will be shown.
 |
|||||||||
|
|||||||||
|
|||||||||
|
|
|||||||||
More details, including tips on troubleshooting, can be found in the Trainz Knowledge Base at Restoring Backups
[edit] Creating Manual Backups
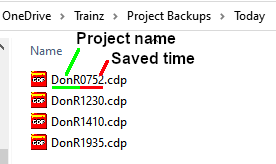
| Manual backups are stored as .CDP files | |
| Many assets can be stored in a single .CDP file |
|
|
||||||||||||||||||
 |
Steps:
|
|||||||||||||||||
[edit] Restoring Manual Backups
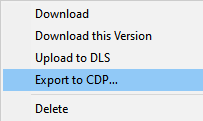
| Simply drag and drop the backup CDP file or files into Content Manager |
|
|
|||||||||||
 |
Steps:
|
||||||||||
[edit] Backup Plan Basics
| If you are using a manual backup method then devise a simple backup plan and stick to it |
The most important parts of any backup plan are:-
| make regular backups - how often will depend on the complexity of the project | |||||||||||||||||||||||||||||
| keep duplicate sets of backups including on offline storage | |||||||||||||||||||||||||||||
| keep previous backup sets, not just the latest ones - how many past sets you will want to keep will depend on factors such as available storage | |||||||||||||||||||||||||||||
| have a simple but consistent file naming system to be able to quickly identify the backup you need to restore lost work
|
|||||||||||||||||||||||||||||
[edit] Backing Up and Restoring Picklists
| Picklists have to be exported and imported as text files |
Picklists cannot be backed up manually using .CDP files. They must be exported as text files.
 |
Detailed instructions on backing up and restoring Picklists as text files can be found on the Trainz Wiki Page at:- |
[edit] Backing Up All Your User Content
| You can backup ALL your installed content including built-ins and DLC |
| You can make a backup copy of all your installed content (buildings, tracks, rolling stock, trees, routes, sessions, etc, etc). Everything you have downloaded and installed from the DLS and other web sites, all the built-in content and all your DLC packages. Also included will be all the screenshots you have captured and your automatic backups. In short, everything but the program "executables" and utilities that form the Trainz program itself.
All of this data is stored in your Local Data Folder. |
| Warning: | |
| Be aware that this could be a very large quantity of data that could take a lot of time and space to backup | |
|
|
||||
 |
Steps:
|
|||
|
||||
|
||||
|
|
||||
[edit] Trainz Wiki
|
|
This page was created by Trainz user pware in January 2020 and was last updated as shown below.

