M.pbrmetal
m |
m (→Blender Material Configuration (2.8+)) |
||
| (27 intermediate revisions by 8 users not shown) | |||
| Line 9: | Line 9: | ||
==Albedo== | ==Albedo== | ||
| − | RGB: The albedo defines the base color of each texel. The sRGB color space is used. | + | RGB: The [[albedo map]] defines the base color of each texel. The sRGB color space is used. |
Please note that there is no alpha channel support. For the most robust result, the alpha channel should be omitted or set to 1.0 (white). Note that unlike legacy Trainz materials, PBR materials do not autodetect opacity mode based on the texture in use. The content creator must select the appropriate material for their desired outcome. Runtime texture replacement should not expect to replace an opaque texture with a blended or masked texture and have the material update automatically. | Please note that there is no alpha channel support. For the most robust result, the alpha channel should be omitted or set to 1.0 (white). Note that unlike legacy Trainz materials, PBR materials do not autodetect opacity mode based on the texture in use. The content creator must select the appropriate material for their desired outcome. Runtime texture replacement should not expect to replace an opaque texture with a blended or masked texture and have the material update automatically. | ||
| Line 18: | Line 18: | ||
==Normal== | ==Normal== | ||
| − | RGB: Surface normal. This defines which way the surface is facing, relative to the interpolated vertex normals. Since this is an XYZ format rather than color data, it should never be modified in Photoshop. Using Photoshop to add a fourth channel or copy/paste smaller textures into a [[texture atlas]] is acceptable. Per-pixel manipulation or use of filters on the "RGB" channels is not acceptable. | + | RGB: Surface [[normal map]]. This defines which way the surface is facing, relative to the interpolated vertex normals. Since this is an XYZ format rather than color data, it should never be modified in Photoshop. Using Photoshop to add a fourth channel or copy/paste smaller textures into a [[texture atlas]] is acceptable. Per-pixel manipulation or use of filters on the "RGB" channels is not acceptable. |
A: [[Parallax Occlusion Map|Displacement height]]. 0.0 represents the deepest possible value, while 1.0 represents the shallowest possible value. While it is possible to paint this data in Photoshop, a linear color space must be used, and far superior results will be available through other data sources. The parallax height and the surface normal must be kept in sync, which means that a third-party tool must be used to generate the surface normal from the parallax height if you are painting this map manually. | A: [[Parallax Occlusion Map|Displacement height]]. 0.0 represents the deepest possible value, while 1.0 represents the shallowest possible value. While it is possible to paint this data in Photoshop, a linear color space must be used, and far superior results will be available through other data sources. The parallax height and the surface normal must be kept in sync, which means that a third-party tool must be used to generate the surface normal from the parallax height if you are painting this map manually. | ||
| Line 37: | Line 37: | ||
| − | + | *'''Parameters (Emissive - Red Channel) Texture Example''' | |
| + | :[[File:pbrparametersemissivemap1.jpg|border|middle|x200px]] | ||
| − | + | :R: Emissive. This causes the texture to have an internal glow, even when no external light is present. Used for phosphors, permanently-lit markings, etc. The glow color is based on the albedo. Note that this glow does not cast light upon surrounding surfaces except via the Bloom post-processing effect. You might want to consider making this a gray / dark gray color on some assets that you want more of the albedo color to show through indirect (ambient) lit surfaces. | |
| − | |||
| − | + | *'''Parameters (Roughness - Green Channel) Texture Example''' | |
| + | :[[File:pbrparametersroughnessmap1.jpg|border|middle|x200px]] | ||
| − | + | :G: Roughness. Defines whether the surface reflections are shiny (0.0) or matte (1.0). See the [[Physically Based Rendering|PBR metal workflow]] for details. | |
| − | |||
| − | + | *'''Parameters (Ambient Occlusion - Blue Channel) Texture Example''' | |
| + | :[[File:pbrparametersambientocclusionmap1.jpg|border|middle|x200px]] | ||
| − | + | :B: Ambient Occlusion. Defines whether the surface is exposed to ambient lighting conditions (1.0) or affected only by direct lighting (0.0). | |
| − | |||
| − | + | *'''Parameters (Metallic - Alpha Channel) Texture Example''' | |
| + | :[[File:pbrparametersmetallicmap1.jpg|border|middle|x200px]] | ||
| − | + | :A: Metallicity. Defines whether the surface is metallic (1.0) with the albedo used to colorize reflected light, or dielectric (0.0) with the albedo used to colorize the surface. While intermediate values are not physically accurate, they may be used to emulate subsurfaces which are partially metallic. See the [[Physically Based Rendering|PBR metal workflow]] for details. | |
| − | + | ||
| − | [[ | + | |
=Examples= | =Examples= | ||
| Line 70: | Line 69: | ||
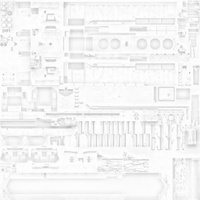
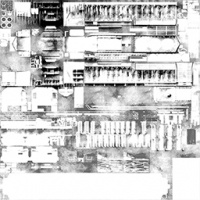
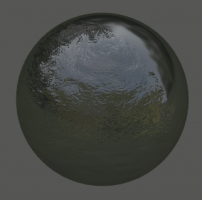
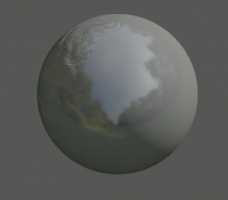
[[File:m.pbrmetal-0.png|border|middle|x200px]] [[File:m.pbrmetal-1.png|border|middle|x200px]] [[File:m.pbrmetal-2.png|border|middle|x200px]] [[File:m.pbrmetal-3.png|border|middle|x200px]] | [[File:m.pbrmetal-0.png|border|middle|x200px]] [[File:m.pbrmetal-1.png|border|middle|x200px]] [[File:m.pbrmetal-2.png|border|middle|x200px]] [[File:m.pbrmetal-3.png|border|middle|x200px]] | ||
| + | |||
| + | |||
| + | [[File:trainz_material_cast_iron.jpg|border|middle|x512px]] | ||
| + | |||
| + | Example asset download: | ||
| + | |||
| + | [http://download.trainzportal.com/tutorials/Trainz_Material_-_pbrmetal_(cast_iron).cdp Trainz Material - pbrmetal (cast iron)] | ||
| + | |||
| + | |||
| + | |||
| + | [[File:trainz_material_gloss_paint.jpg|border|middle|x512px]] | ||
| + | |||
| + | Example asset download: | ||
| + | |||
| + | [http://download.trainzportal.com/tutorials/Trainz_Material_-_pbrmetal_(gloss_paint).cdp Trainz Material - pbrmetal (gloss paint)] | ||
| + | |||
| + | |||
| + | |||
| + | [[File:trainz_material_painted_metal.jpg|border|middle|x512px]] | ||
| + | |||
| + | Example asset download: | ||
| + | |||
| + | [http://download.trainzportal.com/tutorials/Trainz_Material_-_pbrmetal_(painted_metal).cdp Trainz Material - pbrmetal (painted metal)] | ||
| + | |||
| + | |||
| + | |||
| + | [[File:trainz_material_rubber.jpg|border|middle|x512px]] | ||
| + | |||
| + | Example asset download: | ||
| + | |||
| + | [http://download.trainzportal.com/tutorials/Trainz_Material_-_pbrmetal_(rubber).cdp Trainz Material - pbrmetal (rubber)] | ||
| + | |||
| + | |||
| + | |||
| + | [[File:trainz_material_stainless_steel.jpg|border|middle|x512px]] | ||
| + | |||
| + | Example asset download: | ||
| + | |||
| + | [http://download.trainzportal.com/tutorials/Trainz_Material_-_pbrmetal_(stainless_steel).cdp Trainz Material - pbrmetal (stainless steel)] | ||
| + | |||
| + | |||
| + | |||
| + | [[File:chart_roughness_metallic.jpg|border|middle|x512px]] | ||
| + | |||
| + | Example asset (route + objects) download: | ||
| + | |||
| + | [http://download.trainzportal.com/tutorials/pbr_roughness_metallic_chart_180831a.cdp PBR Roughness / Metallic Chart] | ||
=3ds Max Material Configuration= | =3ds Max Material Configuration= | ||
| Line 77: | Line 123: | ||
[[File:pbrmetal3dsmaxtextureassignment.jpg]] | [[File:pbrmetal3dsmaxtextureassignment.jpg]] | ||
| − | =Blender Material Configuration= | + | =Blender Material Configuration V2.79b= |
| − | + | ||
| + | You must use the Blender Render option in Blender as the Cycles Render in V2.79b doesn't export the texture names associated with the material. | ||
| + | |||
| + | The albedo and normal textures have no special requirements but the parameters texture must use the Influence->Specular->Hardness tag (checkbox). The value of the hardness is not exported by the Blender FBX exporter. Sample settings are shown below. Note that the normal texture does not use an alpha channel in this example. | ||
| + | |||
| + | |||
| + | [[File:Blender_PBRMetal_albedo_setting.jpg|border|middle|x700px]] [[File:Blender_PBRMetal_normal_setting.jpg|border|middle|x700px]] [[File:Blender_PBRMetal_parameters_setting.jpg|border|middle|x700px]] | ||
| + | |||
| + | =Blender Material Configuration (2.8+)= | ||
| + | |||
| + | The shader node is a Principled BSDF shader and the FBX exporter supports the export of some texture names but not all. The following connections should be made: | ||
| + | |||
| + | Albedo texture to the Base Color input. | ||
| + | |||
| + | Parameter texture to the Roughness input. | ||
| + | |||
| + | The normal texture, via a normal converter set to Tangent, to the Normal input. | ||
| + | |||
| + | The 3D view of the mesh does not show a true PBR render. | ||
| + | |||
| + | You will need to update the texture.txt files created by the Trainz FBX importer. | ||
| + | |||
| + | |||
| + | [[File:MpbrmetalExportBlender2.8beyond.png|border|middle|x700px]] | ||
| + | |||
| + | =Maya LT Material Configuration= | ||
| + | |||
| + | Maya LT uses a Phong shader and the parameters texture should be linked to the shader Cosine Power input via a Set Range node. Note that the input and output of this node both use Value X. The Normal Map must be passed through a Bump converter and then connected to the shader Normal input. The Bump converter "Use as" value within the attributes editor must use the "Tangent Space Normals" option. See the images below. | ||
| + | |||
| + | ''Note. The material name shown in these images has "FBXASC046" where the full stops (periods) appear in the name box.m.pbrmetal. Maya LT does not permit full stops (periods) in name and substitutes an underscore which doesn't work for Trainz. FBXASC046 gets replaced with a full stop on export. N3V are looking at this issue.'' | ||
| + | |||
| + | |||
| + | [[File:Sample_pbrmetal_material.jpg|border|middle]] | ||
| + | [[File:Sample_pbrmetal_material_properties.jpg|border|middle]] [[File:Bump_normal_converter_properties.jpg|border|middle]] | ||
| + | |||
| + | =Substance Painter Export Preset= | ||
| + | |||
| + | Export preset for Substance Painter. This preset puts every map you need into Albedo, Normal and Parameter texture channels. As result you will get 3 textures, ready for importing into game. | ||
| + | |||
| + | The link below is a preset that has height maps enabled by default. | ||
| + | |||
| + | [https://www.dropbox.com/s/ukp3p8uw53332ay/Trainz2019_WithHeight.spexp?dl=0 Trainz 2019 Exporter with Height Maps Enabled] | ||
| + | |||
| + | The link below contains a preset that does not have height maps enabled, which may be more useful to some on rollingstock. | ||
| + | |||
| + | [https://www.dropbox.com/s/4gzmuzdy8g7nwzc/Trainz2019.spexp?dl=0 Trainz 2019 Exporter with Height Maps Disabled] | ||
| + | |||
| + | ==Installing the Preset== | ||
| + | |||
| + | First download either or both presets to your computer from the links above. Open Substance Painter and navigate to File -> Import Resources. | ||
| + | |||
| + | [[File:Step2.png]] | ||
| + | |||
| + | At the top of the new window, click on "Add resources." Then locate your preset you'd like to import. | ||
| + | |||
| + | [[File:Step3.png]] | ||
| + | |||
| + | After selecting the preset Substance Painter should already recognize that it is an export preset. | ||
| + | |||
| + | [[File:Step4.png]] | ||
| + | |||
| + | In the dropdown window at the bottom right corner of the active window, you can select where you want to save it. You can either save this into your project file you are currently working on, or add it to your shelf. If you save it to your shelf you won't have to import it for every project, so this is the best method! After you are done, click Import. | ||
| + | |||
| + | [[File:Step5N.png]] | ||
| + | |||
| + | ==Exporting Textures== | ||
| + | |||
| + | When you are ready to export your textures from your project, navigate at the top left to File -> Export Textures. | ||
| + | |||
| + | [[File:Step6.png]] | ||
| + | |||
| + | In this new window, select the dropdown window near "Config" and select your Trainz 2019 preset from the dropdown window. After you select which texture size you want to export or which materials to export, hit export and your textures will export! At the top of the window will be the directory where your textures will export to. In my case, it is exporting to K:\Class 47\Textures\game\lit up. You can change the directory by simply clicking on it. | ||
| + | [[File:Step7.png]] | ||
| + | That's all you have to do! These presets will support all PBR materials including pbrmetalmasked, and glass. However to use alphas you will need to enable opacity in the Texture Set Settings. | ||
[[Category:Material types| ]] | [[Category:Material types| ]] | ||
| + | [[Category:Modeling]] | ||
| + | [[Category:Content creation]] | ||
Latest revision as of 10:37, 16 February 2023
m.pbrmetal is the most basic PBR-based material type used in Trainz, and should be the default material type of choice for any mesh unless some specific feature of some other material type is required. All PBR materials are defined using a multitude of texture channels (not just a simple RGB image) which define various aspects of the material on a per-texel basis. One major advantage of this approach is that a single in-game material can be used to display various different real-world materials, rather than requiring multiple separate in-game materials with different parameters. Trainz uses a Metallic/Roughness style PBR workflow.
It should be noted that the "metal" in the name of this material refers to the physical property used in the lighting equations; it does not mean that the material is only appropriate for metallic surfaces.
This page describes content format v4.6 and assumes that the FBX file format is used as a data source for any meshes.
Contents |
[edit] Texture Slots
The following texture slots are used for this material. All textures should typically have the same dimensions unless they represent a uniform color, however this is not strictly enforced.
[edit] Albedo
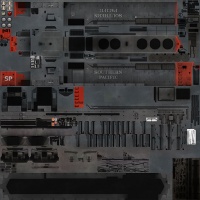
RGB: The albedo map defines the base color of each texel. The sRGB color space is used.
Please note that there is no alpha channel support. For the most robust result, the alpha channel should be omitted or set to 1.0 (white). Note that unlike legacy Trainz materials, PBR materials do not autodetect opacity mode based on the texture in use. The content creator must select the appropriate material for their desired outcome. Runtime texture replacement should not expect to replace an opaque texture with a blended or masked texture and have the material update automatically.
Albedo Texture Example
[edit] Normal
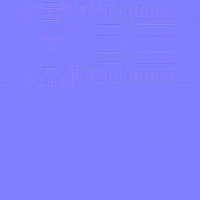
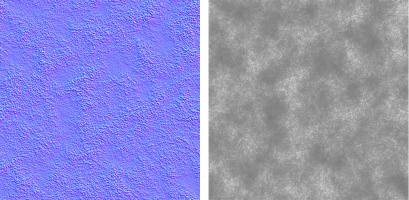
RGB: Surface normal map. This defines which way the surface is facing, relative to the interpolated vertex normals. Since this is an XYZ format rather than color data, it should never be modified in Photoshop. Using Photoshop to add a fourth channel or copy/paste smaller textures into a texture atlas is acceptable. Per-pixel manipulation or use of filters on the "RGB" channels is not acceptable.
A: Displacement height. 0.0 represents the deepest possible value, while 1.0 represents the shallowest possible value. While it is possible to paint this data in Photoshop, a linear color space must be used, and far superior results will be available through other data sources. The parallax height and the surface normal must be kept in sync, which means that a third-party tool must be used to generate the surface normal from the parallax height if you are painting this map manually.
Normal Texture Example with no Alpha Channel (Parallax)
Normal Texture Example with Alpha Channel (Parallax)
[edit] Parameter
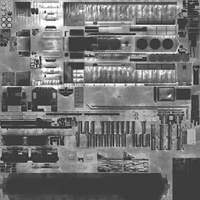
This texture is comprised of four separate channels which each form a separate data element. Linear color space (not sRGB) is used for these channels.
- Parameters (Emissive - Red Channel) Texture Example
- R: Emissive. This causes the texture to have an internal glow, even when no external light is present. Used for phosphors, permanently-lit markings, etc. The glow color is based on the albedo. Note that this glow does not cast light upon surrounding surfaces except via the Bloom post-processing effect. You might want to consider making this a gray / dark gray color on some assets that you want more of the albedo color to show through indirect (ambient) lit surfaces.
- Parameters (Roughness - Green Channel) Texture Example
- G: Roughness. Defines whether the surface reflections are shiny (0.0) or matte (1.0). See the PBR metal workflow for details.
- Parameters (Ambient Occlusion - Blue Channel) Texture Example
- B: Ambient Occlusion. Defines whether the surface is exposed to ambient lighting conditions (1.0) or affected only by direct lighting (0.0).
- Parameters (Metallic - Alpha Channel) Texture Example
- A: Metallicity. Defines whether the surface is metallic (1.0) with the albedo used to colorize reflected light, or dielectric (0.0) with the albedo used to colorize the surface. While intermediate values are not physically accurate, they may be used to emulate subsurfaces which are partially metallic. See the PBR metal workflow for details.
[edit] Examples
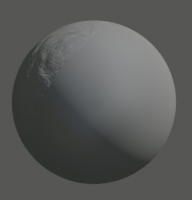
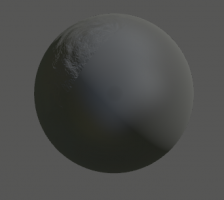
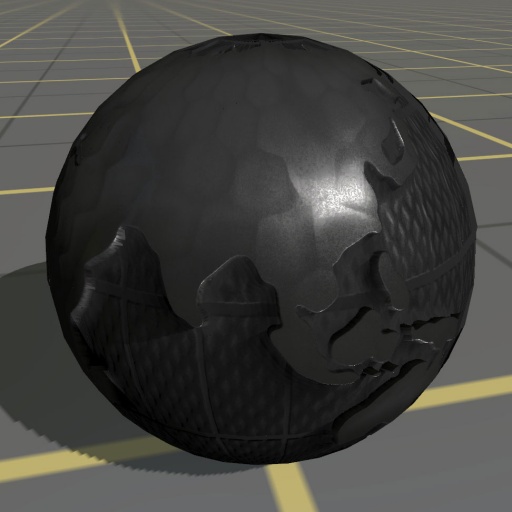
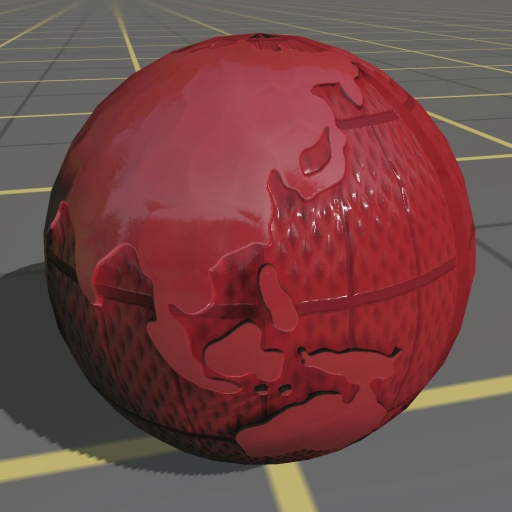
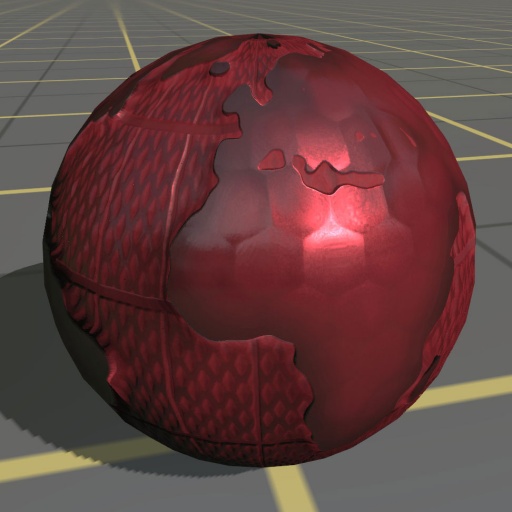
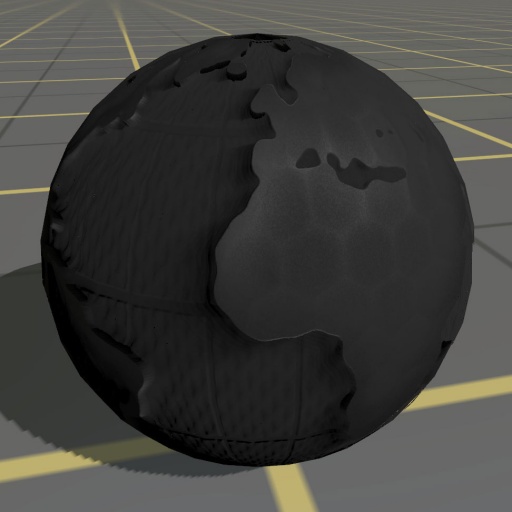
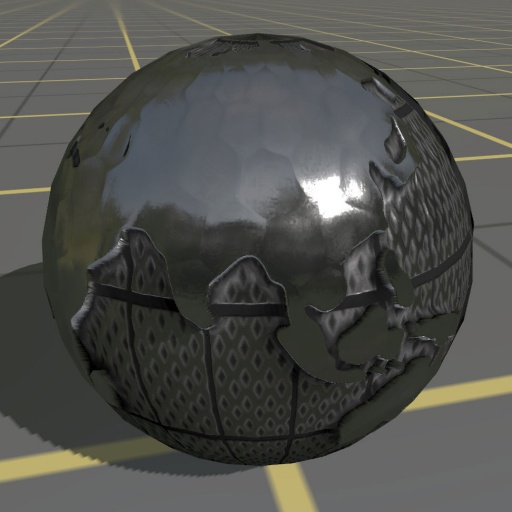
The following images show this material type with a few basic configurations of roughness and metallicity, under identical environmental conditions.
Example asset download:
Trainz Material - pbrmetal (cast iron)
Example asset download:
Trainz Material - pbrmetal (gloss paint)
Example asset download:
Trainz Material - pbrmetal (painted metal)
Example asset download:
Trainz Material - pbrmetal (rubber)
Example asset download:
Trainz Material - pbrmetal (stainless steel)
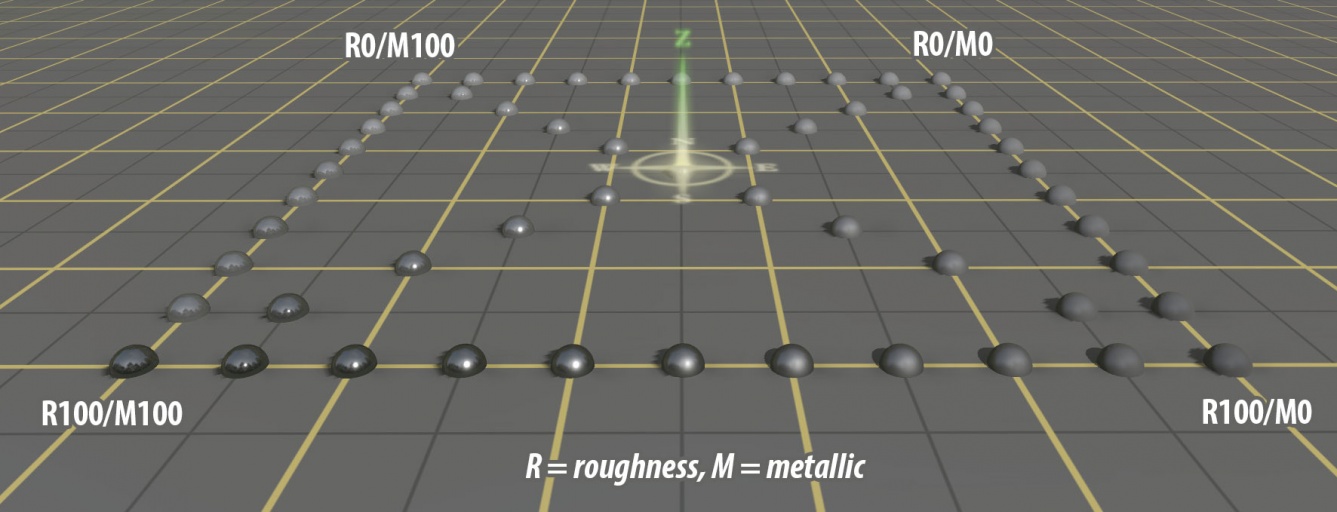
Example asset (route + objects) download:
PBR Roughness / Metallic Chart
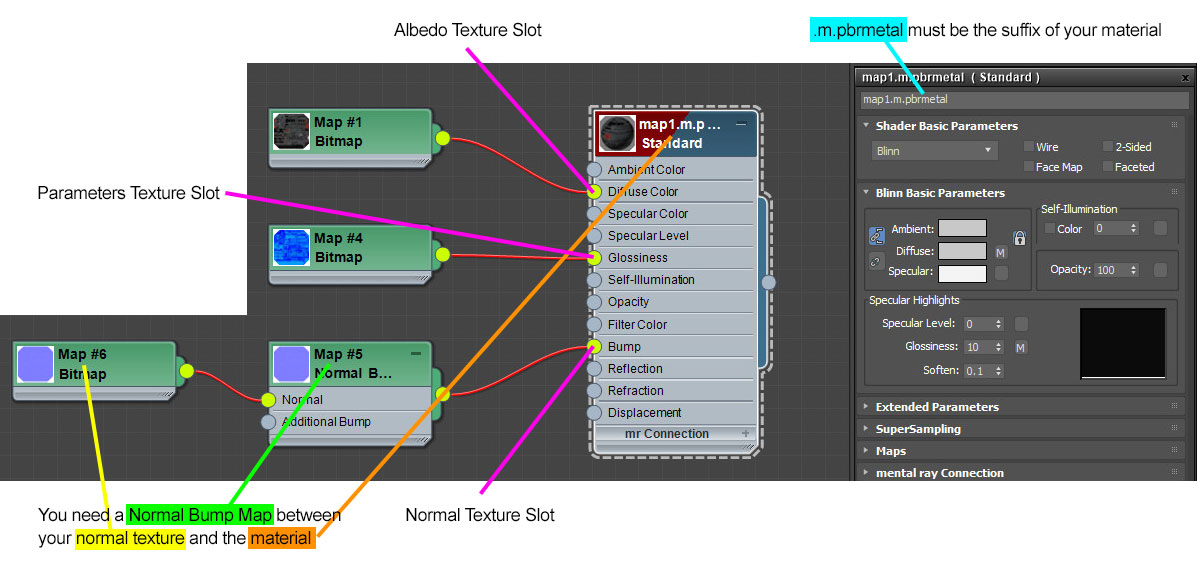
[edit] 3ds Max Material Configuration
Texture Assignment
[edit] Blender Material Configuration V2.79b
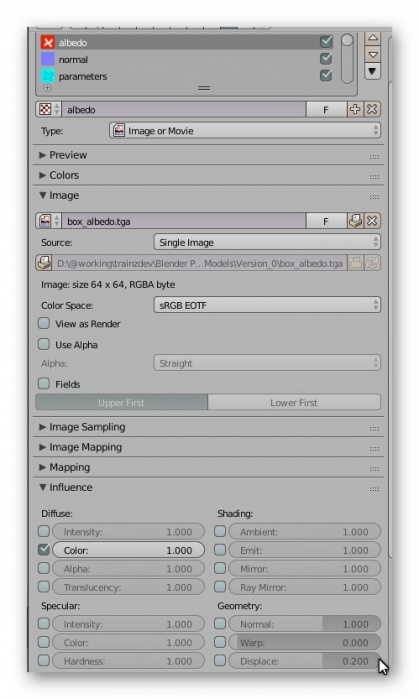
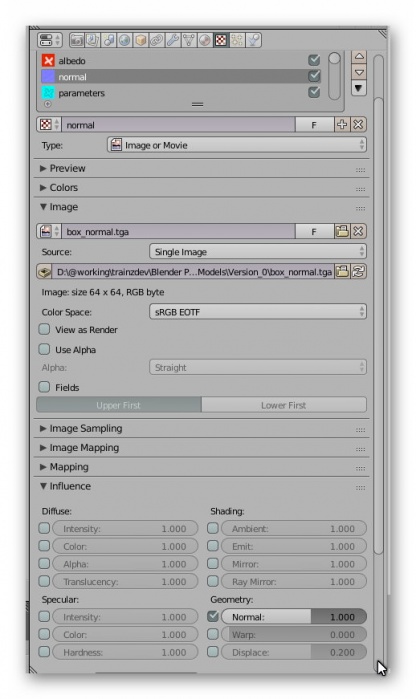
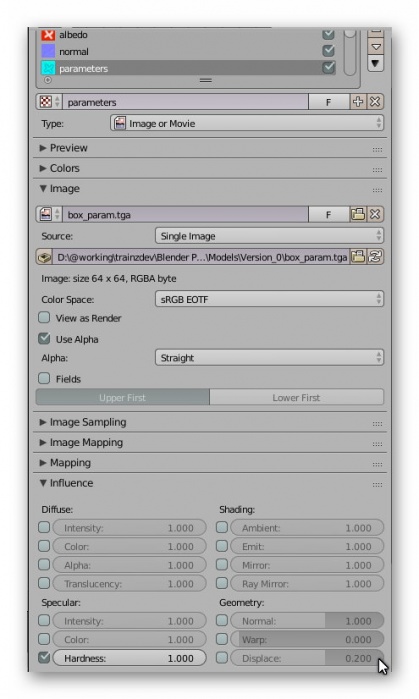
You must use the Blender Render option in Blender as the Cycles Render in V2.79b doesn't export the texture names associated with the material.
The albedo and normal textures have no special requirements but the parameters texture must use the Influence->Specular->Hardness tag (checkbox). The value of the hardness is not exported by the Blender FBX exporter. Sample settings are shown below. Note that the normal texture does not use an alpha channel in this example.
[edit] Blender Material Configuration (2.8+)
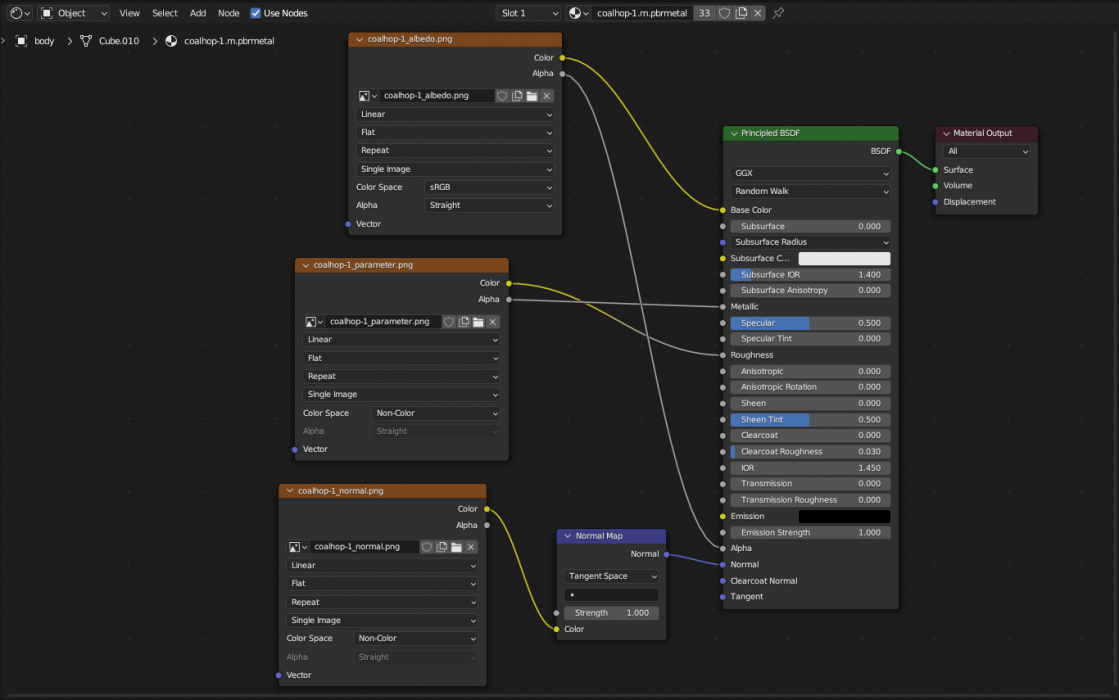
The shader node is a Principled BSDF shader and the FBX exporter supports the export of some texture names but not all. The following connections should be made:
Albedo texture to the Base Color input.
Parameter texture to the Roughness input.
The normal texture, via a normal converter set to Tangent, to the Normal input.
The 3D view of the mesh does not show a true PBR render.
You will need to update the texture.txt files created by the Trainz FBX importer.
[edit] Maya LT Material Configuration
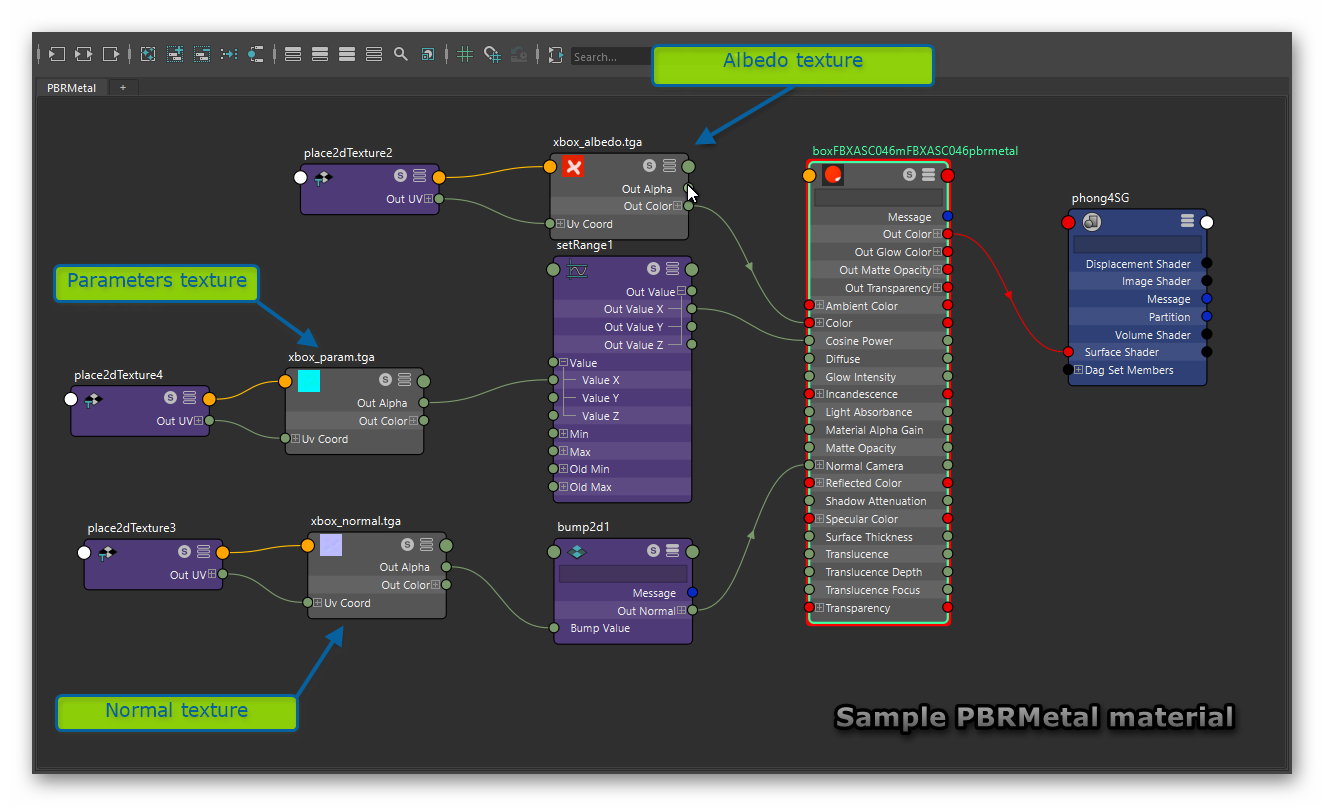
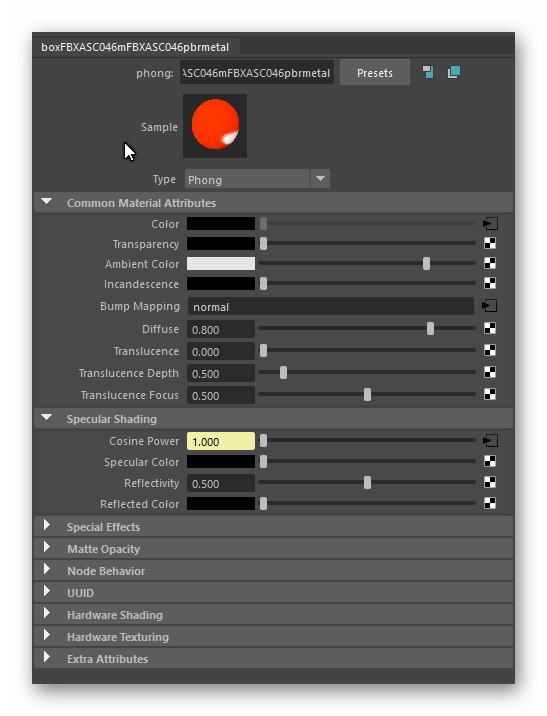
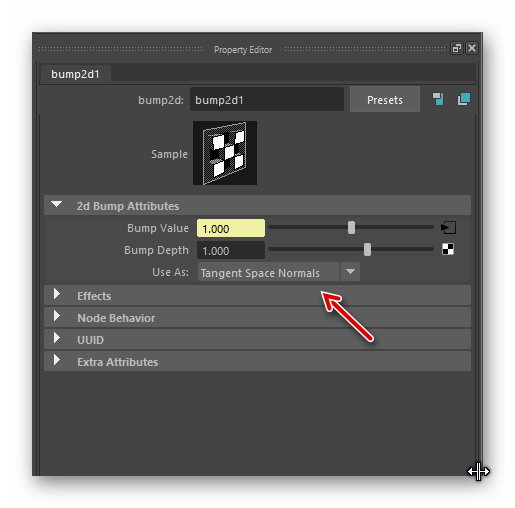
Maya LT uses a Phong shader and the parameters texture should be linked to the shader Cosine Power input via a Set Range node. Note that the input and output of this node both use Value X. The Normal Map must be passed through a Bump converter and then connected to the shader Normal input. The Bump converter "Use as" value within the attributes editor must use the "Tangent Space Normals" option. See the images below.
Note. The material name shown in these images has "FBXASC046" where the full stops (periods) appear in the name box.m.pbrmetal. Maya LT does not permit full stops (periods) in name and substitutes an underscore which doesn't work for Trainz. FBXASC046 gets replaced with a full stop on export. N3V are looking at this issue.
[edit] Substance Painter Export Preset
Export preset for Substance Painter. This preset puts every map you need into Albedo, Normal and Parameter texture channels. As result you will get 3 textures, ready for importing into game.
The link below is a preset that has height maps enabled by default.
Trainz 2019 Exporter with Height Maps Enabled
The link below contains a preset that does not have height maps enabled, which may be more useful to some on rollingstock.
Trainz 2019 Exporter with Height Maps Disabled
[edit] Installing the Preset
First download either or both presets to your computer from the links above. Open Substance Painter and navigate to File -> Import Resources.
At the top of the new window, click on "Add resources." Then locate your preset you'd like to import.
After selecting the preset Substance Painter should already recognize that it is an export preset.
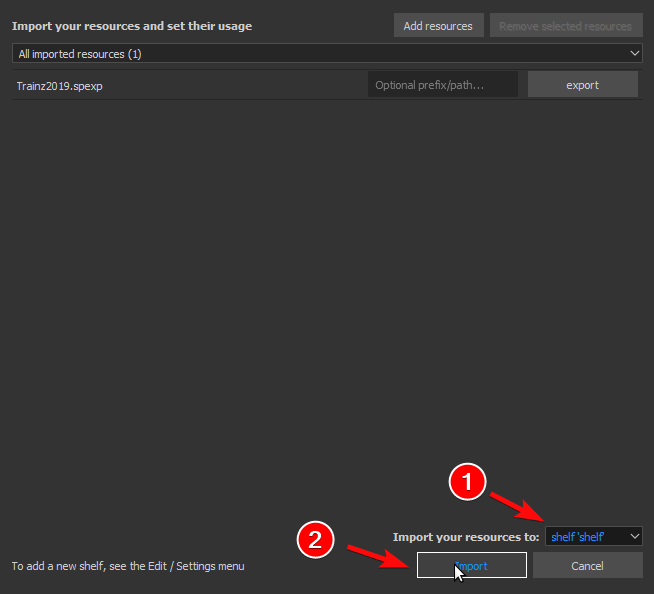
In the dropdown window at the bottom right corner of the active window, you can select where you want to save it. You can either save this into your project file you are currently working on, or add it to your shelf. If you save it to your shelf you won't have to import it for every project, so this is the best method! After you are done, click Import.
[edit] Exporting Textures
When you are ready to export your textures from your project, navigate at the top left to File -> Export Textures.
In this new window, select the dropdown window near "Config" and select your Trainz 2019 preset from the dropdown window. After you select which texture size you want to export or which materials to export, hit export and your textures will export! At the top of the window will be the directory where your textures will export to. In my case, it is exporting to K:\Class 47\Textures\game\lit up. You can change the directory by simply clicking on it.
That's all you have to do! These presets will support all PBR materials including pbrmetalmasked, and glass. However to use alphas you will need to enable opacity in the Texture Set Settings.
