CCG/Using Content Creator Plus
(Created page.) |
m |
||
| Line 5: | Line 5: | ||
===Creating a new Asset=== | ===Creating a new Asset=== | ||
| − | In the | + | In the [[Content Manager]] Program, clicking on the New button will open [[Content Creator Plus]] and display the “New Asset” window, from which you can select a base Kind to use as a template. |
[[Image:CCGFigure3-6.png|CCP new asset window]] | [[Image:CCGFigure3-6.png|CCP new asset window]] | ||
| Line 15: | Line 15: | ||
===The Working Directory=== | ===The Working Directory=== | ||
| − | When you are creating or editing an asset with Content Creator Plus, all of your content exists in a temporary “working directory” which is located in your “.\editing” folder within your Trainz install. Assets in this folder are considered “open for editing”. | + | When you are creating or editing an asset with [[Content Creator Plus]], all of your content exists in a temporary “working directory” which is located in your “.\editing” folder within your Trainz install. Assets in this folder are considered “open for editing”. |
All files required by your new model MUST be placed in your temporary working directory. | All files required by your new model MUST be placed in your temporary working directory. | ||
Latest revision as of 19:18, 25 March 2010
Contents |
[edit] CHAPTER 3: Understanding and using Content Creator Plus
Using Content Creator Plus
[edit] Creating a new Asset
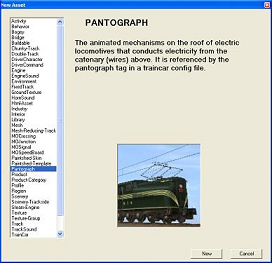
In the Content Manager Program, clicking on the New button will open Content Creator Plus and display the “New Asset” window, from which you can select a base Kind to use as a template.
The displayed list shows all the asset Kinds supported by Trainz. Click on the name of the Kind that you want to create and the program will generate the basic config.txt structure for that kind, using the mandatory tags. You may also add additional optional tags and containers to your config.txt file for a more complex asset.
Refer also to the notes for containers and tags that are required for the model to function correctly.
[edit] The Working Directory
When you are creating or editing an asset with Content Creator Plus, all of your content exists in a temporary “working directory” which is located in your “.\editing” folder within your Trainz install. Assets in this folder are considered “open for editing”.
All files required by your new model MUST be placed in your temporary working directory.
You can open this folder by selecting “Edit|Edit in Explorer” from the main menu bar. Note that the name of the folder may be of the form “edit nfd0hk9y6”. After you have given the asset a username, saved the config.txt file, and committed the asset, the directory name will change to the selected username when you next reopen it in Explorer.
[edit] Formats for entering Tag Data
Tags require different forms of entry depending on the type of data required. Some tags require a simple text string, while others will require more complex data like a Vector, a float list or a Boolean value.
[edit] String, floating point numbers or integers
These three data types are simple text or numeric values.
A string is a basic text field, a Floating point number (or float) is a number that includes a decimal point, while and integer is a numeric value with no decimal point (whole number). The value placed in the text box will be directly associated with the tag.
[edit] Vector
A vector is a series of values. A vector may have any number of values depending on the type of data it stores, for example a vector3 will display three separate text boxes, one for each value.
[edit] Float list entry
A float list for a tag will take a series of floating point number values.
The list above includes a series of four floats, each of which can be removed if required. Additional values may be added to the list by clicking on the add button.
[edit] KUIDs
The KUID entry is made up of three different parts: The user ID, the content ID and the version ID.
KUIDs are handled internally, and are unable to be edited directly.
[edit] Boolean Entry
A Boolean entry is a simple true or false value. It is represented by a tick box.
Clicking with the Left Mouse button in the box will toggle the tick mark on or off. A tick represents “True” or “1”.
[edit] Data choices
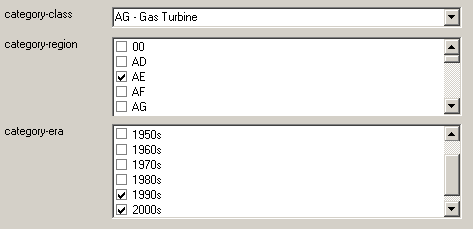
Where a large list of choices is offered, it is convenient for CCP to display the available selections in a combo box.
Open the box and select a value by clicking on that value with the Left mouse button. A tick-mark is shown in the box. You may select multiple choices by ticking additional boxes in the list. The category-region or category-era are examples of multiple selection options, while the category-class is a single selection from a drop down box.
[edit] File Browser
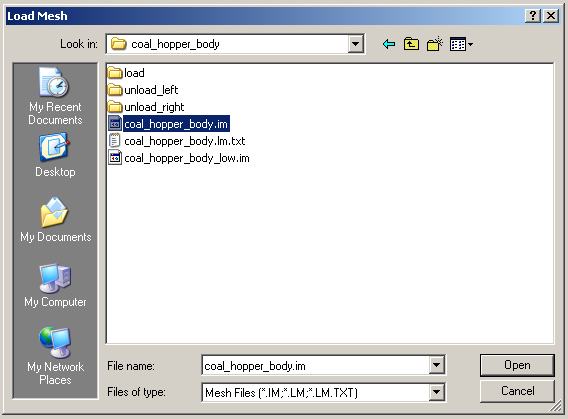
Clicking on the “...” button adjacent to an appropriate tag with the Left mouse button will open the file browser. The file browser is used to locate the files you wish to use in your asset.
Once the file is located, click on the “Open” button and the field will be filled with the path for the file you have selected.
Remember that your files must be placed in the working directory.
The file type selections in the browser will reflect the types that are required to fill the dialog box. For example, a mesh dialog box offers a choice between “ *.im, *.lm, and *.lm.txt” types, whereas a script will allow files with “*.gs or *.gse” extensions to be selected.
[edit] New Assets
Some tags (typically images, scripts or HTML assets) will have an adjacent “New” button when the entry box is empty.
Clicking on the “New” button will allow you to create a new asset of the appropriate kind, and will automatically create the necessary files and load them into your editor of choice (specified in your windows settings, for example Photoshop may be your default image editor).
If these tags are populated, the “New” button is replaced with an “Edit” button, which will open the asset in your default editor.
[edit] Asset Browser
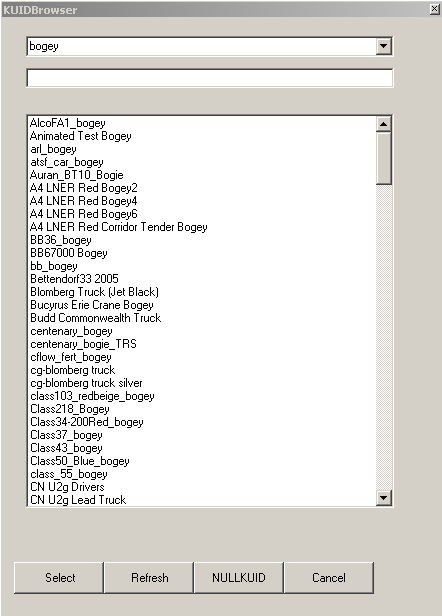
Some fields require a link to other assets. For simplicity, a list of relevant assets is presented from which the user can select their desired asset, in the Asset Browser.
For convenience, the top drop down selection box filters assets by type, to simplify searching and selection.
Browse through the list of installed assets, or type in a partial name in the search box (second top box) to locate the asset required. Once you have found the asset you wish to use, Left click on the “Select” button. This will internally store the asset KUID. A null KUID may alternatively be selected where required. Note that the kuid for an asset is not displayed, usernames are used for simplification. Care should be used in selecting assets where the same username has been used for different assets - it may be convenient to locate the required asset in CMP to verify selections.
[edit] String Asset Browser
The string asset (KUID) browser works similarly to the KUID browser, with the additional ability to change the actual name of the tag.
Refer to the Getting Started section for additional information on saving files and error checking, and to Chapter 4 for detailed information on creating a new asset.


