How to Create a Picklist
From TrainzOnline
(Difference between revisions)
m (→Using CM) |
m (→Using CM) |
||
| Line 26: | Line 26: | ||
<tr valign="top"> | <tr valign="top"> | ||
<td>[[file:Steps.PNG]]</td> | <td>[[file:Steps.PNG]]</td> | ||
| − | <td><font size="3">'''Step 2: | + | <td><font size="3">'''Step 2: Add the assets to the Picklist'''</font><br> |
<table> | <table> | ||
<tr valign="top"> | <tr valign="top"> | ||
Revision as of 12:14, 5 January 2019
This guide will show you how to create a Picklist in TRS19 or TANE (both methods are identical).
Both programs provide you with two different methods of creating Picklists, using either Content Manager (or Manage Content from the TANE/TRS19 Launcher) of in Surveyor.
Using CM
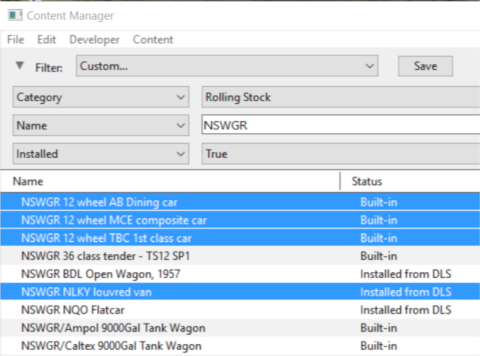
From the TRS19 or TANE Launcher, select Manage Content
 |
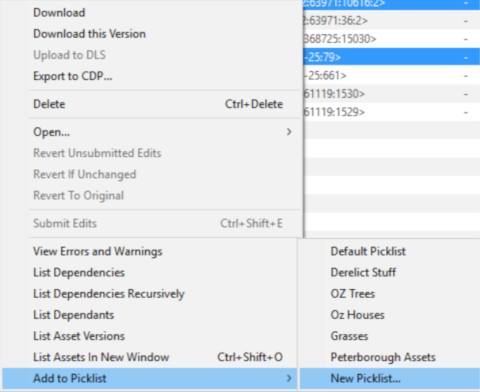
Step 2: Add the assets to the Picklist
|
 |
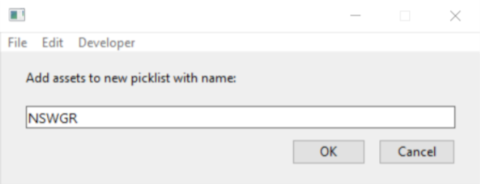
Step 3: Enter Picklist Name (for New Picklist option only)
|


